Pages

Apr 30, 2023

Darkroom Door Domes, Gathered Flowers & Moroccan Tile


Hello everyone!  I'm back with part three of my samples from the spring Darkroom Door stamp release.  If you missed them, check out post one HERE and post two HERE.  My first card features the adorable Small Glass Dome Eclectic Stamp.  I shared a card with the larger Glass Dome stamp HERE, but the smaller size is just so cute and works great with standard sized cards.

I was delighted to fill the dome with stems from the new Gathered Flowers stamp set.  First, I stamped the Small Glass Dome and dipped it in watery Antique Linen Distress Ink and colored the base with Gathered Twigs.  Then I stamped the flowers with Antique Mahogany and Peeled Paint, spritzing the stamps for a watercolor effect.  For the background, I dipped the panel in watery Aged Mahogany and stamped the bottom half with the new Moroccan Tile Background Stamp.  I layered with a folded doily and seam binding dyed to match and finished with a sentiment strip stamped with the Enjoy Today Small Stamp.


My next card is a simple one.  I dipped my background panel in a Antique Linen and then stamped Enjoy Today at the center.  Then I stamped the stems from the Gathered Flowers repeatedly around the edges of the card using Distress Inks in Evergreen Bough, Peacock Feathers and Peeled Paint.  


For my final card I embossed the Moroccan Tiles in white and added some watery Distress Oxides in Shaded Lilac, Tumbled Glass and Worn Lipstick.  I dipped a panel for the sentiment from Enjoy Today in the same inks.  


I die cut an oval for contrast and added the Cupcake Eclectic Stamp over a seam binding bow.  I used Antique Linen for the cake portion.  I love just how versatile this background stamp is!  I really hope these cards have inspired you today.  xx, Autumn


Apr 28, 2023

Studio Light Floral Seashell Card & Jellyfish Tag


Hi again sweet friends!  I'm back with round two of my cards from the latest Studio Light Essential stamp release.  Today I'm focusing on the seashells from this release.  My first card was really a lot of fun to make.  This card features the Flower Stories stamp (SL-ES-STAMP426).  


To create this fun beachy background, I dipped the top portion of my card in watery Distress Ink in Tumbled Glass and the bottom portion in watery Vintage Photo.  I dried between each layer, splashing the same inks over and over to get the look of waves crashing on the shore.  Finally I splashed with watery gesso.  Along the top, I stamped the gorgeous scripture from the Bible Journaling stamp by JMA (JMA-IP-STAMP278).  I fussy cut the watercolored floral shell.  I used Victorian Velvet for the flowers.  


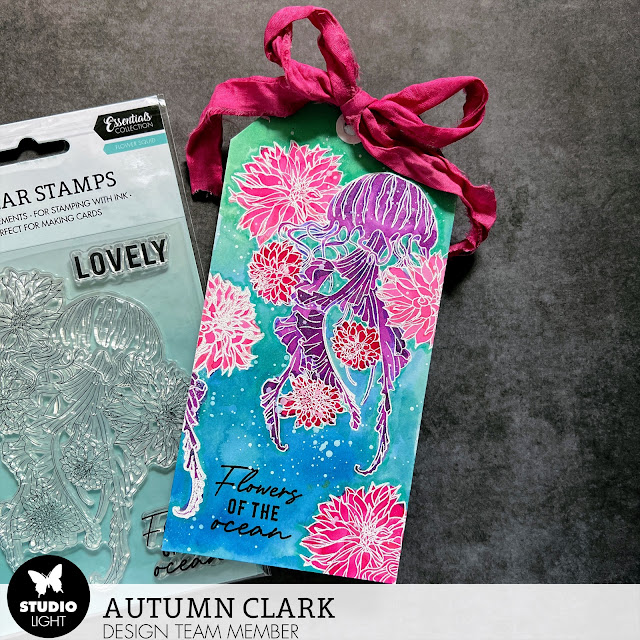
For my next project, I decided to play with my Lindy's Magicals (powdered pigments).  I cut a tag from Bristol and embossed the jellyfish stamp, Flower Squid (SL-ES-STAMP429) in white.  I used the a tiny amount of the pigment and lots of water to color the image.  


I love the pearlescent look of the Magicals!  I gave the panel a splash of gesso and stamped the focal sentiment in Versafine black.  I finished with a sari ribbon bow and mounted the tag onto chipboard for stability.  


For those of you that love the beach, this Essential stamp collection is for you!  ;0  I hope these projects have inspired you today.  Make sure to check out my first post HERE for more inspiration.  xx, Autumn


Studio Light Essentials: 


Apr 26, 2023

Studio Light Lemons and Bees Watercolored Cards


Hi friends!  Today I have a couple of bright and cheery cards to share with you featuring the latest Essential stamp release by Studio Light.  I just sat down to play with no idea in mind and am so happy with how this first card turned out.  I started by dipping my Bristol panel into watery Distress Inks in Squeezed Lemon and Mustard Seed.  Once I had a grungy background, I sponged Mustard Seed through part one of the new Leaf Pattern Mask (SL-ES-MASK178) then followed with Vintage Photo in part two.  I used the incredible Studio Light Ink Blending Brushes, which come in different sizes for getting just the right amount of ink where needed.  


Next I had a lovely time watercoloring the new Lemon Squeezy stamp (SL-ES-STAMP427).  What a great image!  I used Twisted Citron and Peeled Paint Distress Ink for the leaves and Antique Linen for the flowers.  


I finished by stamping the Easy Peasy sentiment - fun!  


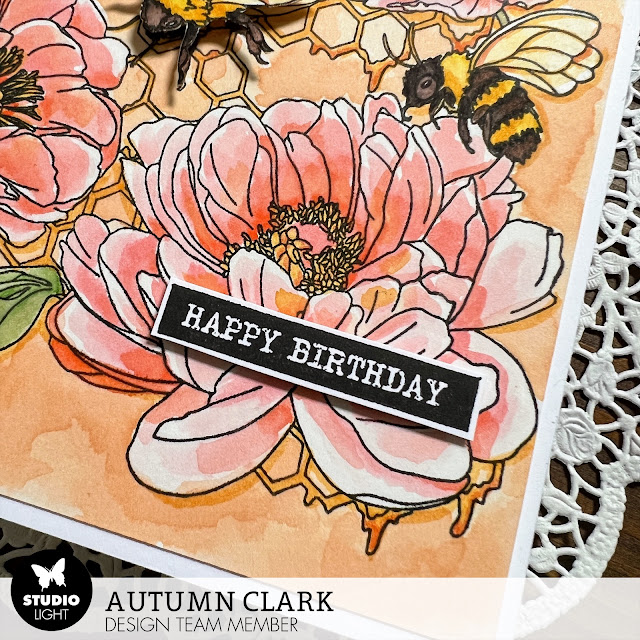
I really got in the watercolor mood and stamped the new Honey Bees stamp (SL-ES-STAMP425) onto another Bristol panel and then colored away!  I used Distress Inks in Saltwater Taffy, Dried Marigold, Mustard Seed, and Bundled Sage.  I used Distress Markers in Black Soot and Walnut Stain to color the bee's body.  I went back over the honey comb in the background with a Wild Honey Marker.  


I finished by mounting one of the bees, which I fussy cut very carefully!  He looks so good with the dimension, as if he's flying.  The sentiment is from JMA Sentiments & Wishes (JMA-ES-STAMP340).  This stamp is so much fun to work with!  I can't wait to make a square card next time!  


Studio Light Essentials:


Apr 25, 2023

Studio Light Simple Paper Fold Mini Album Tutorial


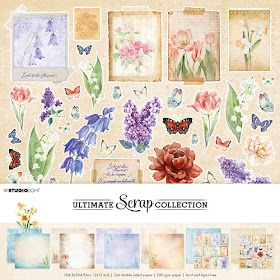
Hi everyone!  I've been spending lots of time in my studio as you may have noticed!  I've been playing with the beautiful Spring Grunge Ultimate Scrap Collection (SL-USC-PS24) by Studio Light.  This paper is sooooo pretty and has 2x2 sheets of fussy cut elements with lots of floral and butterfly images.  I loved both sides of the paper and decided to create a simple folded mini album to showcase both sides.

Here's the simple construction:  First, I chose one of the blue shades of paper and cut it 5.5” high x 11 11/16".  Next, I scored at 3 7/8, 4, 7 3/4 and 8".  


To create the closure, I stitched some yellow sari ribbon in place with zig zag stitching to add to the collage feel of the album.  


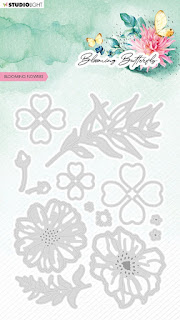
I used the journaling cards to create little pull outs.  Here I tore two pieces of the USC paper one going one way and the other going the other way to create two little pockets.  I used Blooming Flowers Cutting Dies (SL-BB-CD485), which I tinted with watercolor.  I stamped the butterfly postage from the Spring Crafts Grunge stamp set (SL-GR-STAMP398) in a Uncharted Mariner Distress Ink at the top. 


I was excited to incorporate the Blooming Butterfly Vellum Sheets (SL-BB-VES03) into this project, though they were designed to coordinate with the BB USC.  I picked the thin white stripes vellum and used it to create even more pockets, adding some fussy cut elements into the collage.  


Here I added the vellum over a torn music sheet and layered with torn crocheted lace and a sentiment from the Celebrations stamp set (SL-ES-STAMP388).  


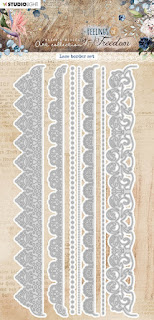
And finally a closeup of the cover.  I layered a handmade flower from the Fresh as a Daisy Cutting Dies (SL-BB-CD483) over a lace border from the JMA Lace Border Cutting Dies Set (JMA-FOF-CD515).  I stamped a title with the Celebrations stamp set and the "sunshine" from the JMA Sentiments & Wishes (JMA-ES-STAMP340).  I'll share a flip through on my Instagram account @sewpaperpaint.  I really hope you've enjoyed this little mini book and will give it a go with your favorite papers.  xx, Autumn

Studio Light Products Used:


Apr 17, 2023

Studio Light Sunflower Stamps and Masks Cards


Hi friends!  Today I'm delighted to share with you some samples I made for Studio Light featuring the new Sunflower Kisses collection.  

My first card features the gorgeous Sunflower Picnic stamp (SL-SK-STAMP437).  I had a lot of fun working with this stamp.  I put it in my stamping platform and stamped the picnic cloth portion of the stamp in Blueprint Sketch, then used my mini Versafine cube to stamp the flowers and text in black.  I colored the sunflowers with Mustard Seed and Fossilized Amber and filled in the background with the same colors mixed with Vintage Photo.  I fussy cut one of the sunflowers and layered it over bundled sisal fibers.  


The sentiment from the Sunshine stamp set (SL-ES-STAMP387) worked perfectly to complete the design.  


Next I played with the Sunflower Pattern Mask (SL-SK-MASK199).  I did two panels, one dipped in a light layer of Vintage Photo and then stenciled using Studio Light ink blending brushes, the other I rubbed extra ink onto the stencil and did a mono print.  This card features the mono print.  


I stamped the bicycle from the Sunflower Silhouette (SL-SK-STAMP439) set in black and the grasses in green below.  I then stamped a patterned strip using the gingham stamp from the Vintage Labels set (SL-SK-STAMP440).  I made a batch of labels and colored them and cut them with postal edge scissors.  I layered over a folded sunflower die cut from the Layered Sunflower Cutting Dies (SL-SK-CD527).  I added some partial stamping of the Text Background stamp (SL-ES-STAMP369) to give a more collage look to the card.  


Next, I made a card with the stenciled background.  I layered with another label and gingham strip and a sunflower made from the same dies.  The sentiment comes from the Sunshine set and I cut it into a little banner.  


I drew a little stitched border around this one and distressed the edges.  


My final card features the Wildflower Basket stamp (SL-SK-STAMP438), my favorite of the release!  I made this card for my bestie for her birthday.  I carefully watercolored the panel, then when I was cutting my mounting papers, I somehow smeared brown ink at the top left of the piece.  I quickly brushed water on it, but the only way to salvage the panel was to add more color there, otherwise it would have had a bleu and green only background.  


I finished with my go to sentiment set by JMA, Sentiments & Wishes (JMA-ES-STAMP340).  I really hope you've enjoyed these cards today and will check out this fabulous new release by Studio Light.  I shared a couple more cards with the Die Cut Block and Gingham stencil on my Instagram account @sewpaperpaint and hope you'll stop by.  xx, Autumn