Feb 25, 2017

Tim Holtz New Release Sizzix Dies for Creativation 2017


Hello everyone!  Today I thought I would wrap up my Creativation designs created for Tim Holtz for Creativation 2017.  I hadn't meant to drag these posts out, but I have been one busy girl.  This card was not received in the show, but I love it so much.  It is much more striking in person, as are all of my neutral, grungy palette projects.  I cut the bird die from watercolor paper, then dipped the cutout into my Distress Ink puddles to color.  I layered over a gessoed printed paper panel and adhered with Mod Podge beneath and on top.  It gave the project such a cool leathery feel.  I cut a word from inky paper and layered over the new gold kraft core.  The hexagon brads are a favorite!


This little number did make it into the show.  I inked up a sheet of watercolor and then embossed with the new leafy embossing folder.  Simple layering of metallic craft core and stitching, highlighted with a few sequins.


This final card was sent as a thank you to Tim for allowing me to create for him.  I used colored kraft core and sanded it to reveal the embossing folder pattern.  A dear friend loaned me this elephant stamp that Tim designed about a decade ago, at the beginning of his career.  I just love it!


A very masculine and dark palette.  I loved the chipboard wildflowers inked up like this.


I am so looking forward to seeing what you all do with the new products.  I went to a local stamp convention this weekend, in hopes of picking up some of the new floral embossing folders and stamps.  They weren't out yet, nor was the new little house die.  I did enjoy getting the new Distress Oxide pads and have enjoyed playing with them, as you know.  


 Have a wonderful day!

Feb 23, 2017

Distress Oxide Mixed Media Canvas Tutorial


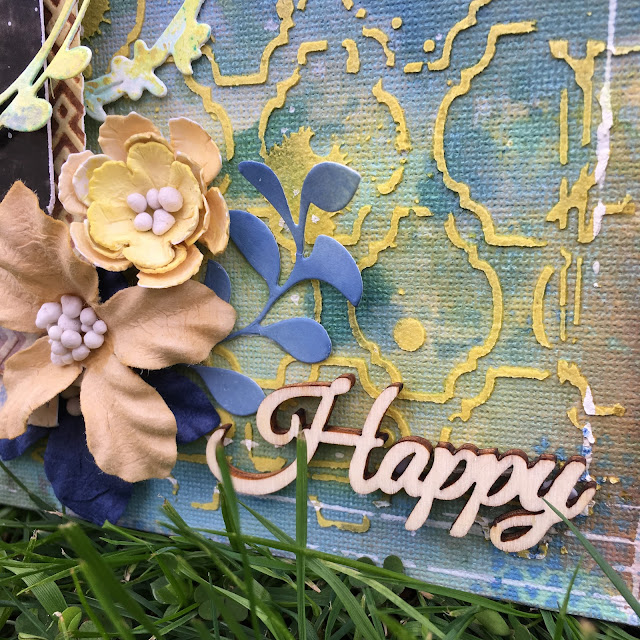
What a fun time I've had this week playing with my new Distress Oxide pads.  I created this happy little canvas as a nod to warmer days a coming.


Some closeup details of this yummy DOX background.


Make sure to check out the full background tutorial at Stamps & Stencils.


I layered my found relative with various DOX inky papers and Spellbinders wreath dies, also inked with DOX.


I just love this little girl!  I am part fish, so she and I have a lot in common.  :)


I used a combination of Prima flowers with my new Tim Holtz Small Tattered Florals die.  These yellow flowers make me so happy!  I used Art Stones for my centers.  The leafy die is by Verve Stamps.  Thank you for visiting today!


I'm sharing with:
Happy Little Stampers: Tear/Rip (I tore the corner off of my Found Relative)

Feb 21, 2017

Background Stamping Techniques and Upcycled Journal


Hello friends!  I am sharing a second spread in my upcycled journal at the Darkroom Door blog today.  Come on over and get a closer look!  I've featured several of the old favorite background stamps and the new sentiment collection, Simple Sayings Vol. 2.  Here I've stamped onto canvas to make a unique title for my journal spread.  Thank you for your visit and support.

Feb 20, 2017

New Mixed Media Blog & Giveaway!


Have you heard of the new Mixed Media & Art challenge blog?  They have an awesome giveaway running:

Our prize contains:
- wooden double-sided background
- collection kit from 7Dots Studio - Fortune Teller
- chipboard from Scrapbox
- 2 sprey, deco-dlaze and topping colored sand  from Fabrika Decory

Feb 19, 2017

Layered Love Floral Collage Card


Hello my lovelies!  I'm sharing inspiration with my team at the IndigoBlu blog today.  Hop on over and see what my teammates have created!  Continuing with our love theme this month, I created a romantic mixed media card featuring  the large flower stamp from our Blooming Great stamp set.


I dipped my watercolor panel in Fired Brick and Picked Raspberry Distress ink puddles for coverage, then embossed Vintage Flourish in white.  I selectively stamped portions of the Honeycomb Background by pressing the stamp (without attaching to an acrylic block) carefully with my hands in select places.


To create the two toned stamped image, I inked with both colors onto my stamp, then spritzed with water and stamped.  I fussy cut this image.


I watered down a bit of black GeeSso Good gesso and flecked it onto my background.


To complete my card, I mounted my stamped flower over a few folded paper flowers and basket filler, then attached a Tim Holtz die cut sentiment.  I hope you are inspired to create some inky backgrounds of your own today.  Thanks for paying me a visit!


You are invited to the Inlinkz link party!
Click here to enter

Feb 17, 2017

Paper Artsy Mask Dots and Doodles and Lynne Perrella


Well I'm 2/2 with my resolution to play along with every PaperArtsy challenge in 2017.  :)  Why am I so committed you ask?  Well, these topics really stretch the though process and encourage me to play with some favorite stamps.  Plus the chance to win hot new PA plates - well it's a win win!  But I digress...


I remembered once reading that a watercolor artist had used rubber cement as a mask and came across a bottle in my recent purge.  First I colored my panel with Shabby Shutters and Frayed Burlap to give some color to where I was resisting.


I used the applicator and made dots or blobs in a rough pattern.  Then patiently let it dry.  NOT!  I waved it around to fan it, heated it lightly, and in the end just inked it slightly wet.  The top layer is Evergreen Bough and Chipped Sapphire.  It worked!!!  I heated it lightly to dry.  Then came the fun part of rubbing off the rubber cement.  :)


I could have left well enough alone, but in typical PaperArtsy spirit, I decided to layer up a wild and crazy background like I see so many of the PA artists do.  I don't have any PA background stamps, so I used my new Darkroom Door Grunge Marks set.


I stamped the ovals in Shabby Shutters onto the resist portion and the lines in Evergreen Bough onto the blue portions.


And because I was feeling quite melancholy I decided to use the surface to doodle some journaling in my barely legible script.  I outlined the circles with a pen and added some dots for interest.


I had some coordinating patterned paper laying by so I used it to stamp and build my layers.


Again using the new Small Detailed Butterfly die by Tim Holtz.  I liked her hiding behind it slightly, peeking out into the world from her very small house.  I doodled above her to make the house and below her to elongate the design.  A TH key and a book page text strip finished it off.  I know this was terribly long and rambly, but I hope you pick up an idea or two from this resist technique.  Thanks for your visit!


I'm sharing with:

You are invited to the Inlinkz link party!

Click here to enter

Feb 15, 2017

Inspirational DIY Pop-up Easel Card Tutorial


I'm so excited to share this fun pop-up easel card tutorial with you on the Tutti Designs blog today!  Why buy expensive pop-up card sets when you can create cards like this with our Nesting Stitched Circle dies.  This set is only $12 and can be used in many other ways.  Hop on over for the 411.  I've highlighted my card with my favorite Tutti Design die of all time, the Flower Orchestra Corner.  I just know you will love using this die as much as I do!  This lovely scripture is by Verve Stamps and the flowers are by Prima.


Feb 14, 2017

Pink and Grey Floral Mixed Media Tag


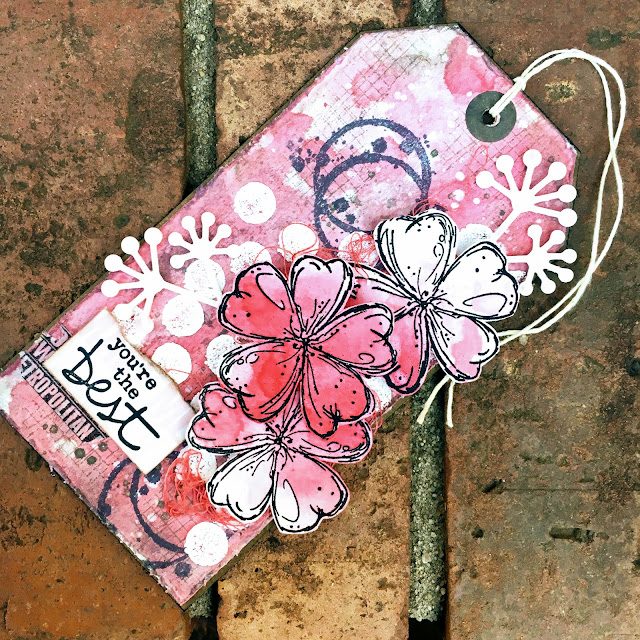
I have a lot of posts to share this week, so visit often and thanks for humoring me!  ;0  I'm back sharing a second tag made with the fantastic new Grunge Marks stamp set by Darkroom Door.  I am still in the mood to create for Valentine's Day, so I went with a pink and grey floral theme that can last all year, but still fulfills my need for making Valentines!


I embossed the dots row in white and inked my tag with Worn Lipstick, Spun Sugar and Pumice Stone.  Adding some flecked Pumice Stone in the end and flecks of water to grunge it up.


One of my favorite stamps is the coffee stains from the Coffee Time set.  I stamped it in grey and added some washi tape to complete my background.  Next, I embossed the flowers from the new release, Fine Flowers Vol. 2.  I colored them in with the pink inks by dipping them into my puddles.  I like the random coloring that gives.


I went back and stamped the Mesh stamp on my background for extra texture, then mounted my flowers atop of a bundle of pink string.


You have to love these heart shaped petals!  OH MY GOODNESS!!!  <3 <3 <3


Finally, I stamped this sweet sentiment from the Simple Sayings Vol. 2 set onto a scrap of patterned paper to complete my tag.  What fun!  To all of my faithful followers and readers - YOU ARE THE BEST!!!  I wish you love and blessings from above.

 This is love: not that we loved God, 
but that he loved us and sent his Son 
as an atoning sacrifice for our sins.
1 John 4:10 (NIV)


I'm sharing with:
(My heat gun!  To emboss and dry my inky layers.)
(I do think these flowers and dies are cute - I tried!)

Feb 13, 2017

Darkroom Door at Home Mixed Media Tag


I'm finally catching up from the holidays and busy creating season for Tim Holtz and Simon Says Stamp.  I am officially two weeks ahead of schedule with my DT commitments, and to celebrate I had a play date with my new Darkroom Door stamps.  :)


First I inked my tag with Frayed Burlap, then stamped the stripes from the Grunge Marks set with Versamark and clear embossed.  I added Shabby Shutters and Pumice Stone inks over the entire tag.  Then I embossed a row in brass, then a row in Pumice Stone.  I built some base layers with a section of torn book page, some holey tape, and some chipboard torn from a spiral notebook.  I sponged the edges of the tag with Vintage Photo.


I used Tim's Wildflower dies, cut from chipboard and inked then clear embossed.


I absolutely adore this tiny numerals stamp.  I circled 4 because we are in our 4th home together and have 4 kids.  <3  The Tiny Tattered Florals and some jute twine finish the bottom bundle.


The Distress embossed Small Detailed Butterfly was in my pile of leftovers and I thought it added a great bit of texture and detail over the house.  The house stamp (and numerals) is one of three houses in the Home Sweet Home set.  I stamped in brown archival ink onto inky paper, then sketched with a fine black pen for interest.


I had so much fun creating this tag.  I do hope it inspires you today.


I'm sharing with:
(My favorite tool is my heat gun!  I use it to dry my inky layers & emboss.)
(Two Wildflower Dies, Two Layered Butterfly and "2" in the Numeral Stamp)

You are invited to the Inlinkz link party!

Click here to enter

Popular Posts