Showing posts with label Dollar Store Paper Crafts. Show all posts

Aug 1, 2018

Tim Holtz Entomology Eileen Hull Wrap Journal


Hello friends!  Today we begin a new challenge at Mini Album Makers.  Our sponsor this month is Eilleen Hull, so I've used Eileen's new Wrap Journal Die to create this Entomology notebook, filled to the brim with Tim Holtz products and vintage finds.  I was hugely inspired by the talented designers of the EcoPaper blog and look forward to blending some of this style into my work in the future.


We'd love to have you join our challenge this month for a chance to win an Eileen Hull Journaling Cards - Hearts Die!


I covered my black chipboard with Tim Holtz Idea-ology Etcetera Paper Stash.  Sadly, I cut this one piece of bug paper I had on the wrong side, so I decided to use a japanese binding and present my journal Manga style!


My friend Madelyn gave me some Japanese/English pocket translation book pages and I wrinkled them up and stuffed them into my inserts.  I imagine a Japanese immigrant coming to the states and exploring our national parks, stuffing this journal with his collections...  :)


I made a little piece of faux amber by stamping one of Tim's Entomology stamps onto a tea bag and adhering it to a wooden token with Mod Podge.  I covered it with Seth Apter's Vintage Beeswax Embossing Powder.  I layered with sisal fibers, a library card divider my awesome friend Mimi sent me, a found feather and a ticket I made with Gathered Twigs Distress Ink, Tim's Ticket Booth Stamps and the Sizzix Dies to match.


These are SOOO much fun to play with!  Thanks Madelyn for sharing your awesome crafty stash with me!  :)


I had a tiny glassine envelope that I filled with tiny feathers and added to my layering, along with torn Design Tape and a toy compass, which I colored with alcohol ink.


I tinted a Wildflower 2 die cut with Bundled Sage Distress Ink.


Inside I added a vintage find, more book pages, a library card my friend Mimi gave to me - so personal and precious to me!  Thanks my friend!  I added more tea bag stamping and Design Tape scrunched up here and there.


I layered a piece of mica with another ticket, Tim's Crocheted Lace, a Clipping Sticker and a Quote Chip.


I used one of Tim's Hinge Clips to bundle another library card, a feather and some holey paper we get at a specialty shop in Saluda, NC.


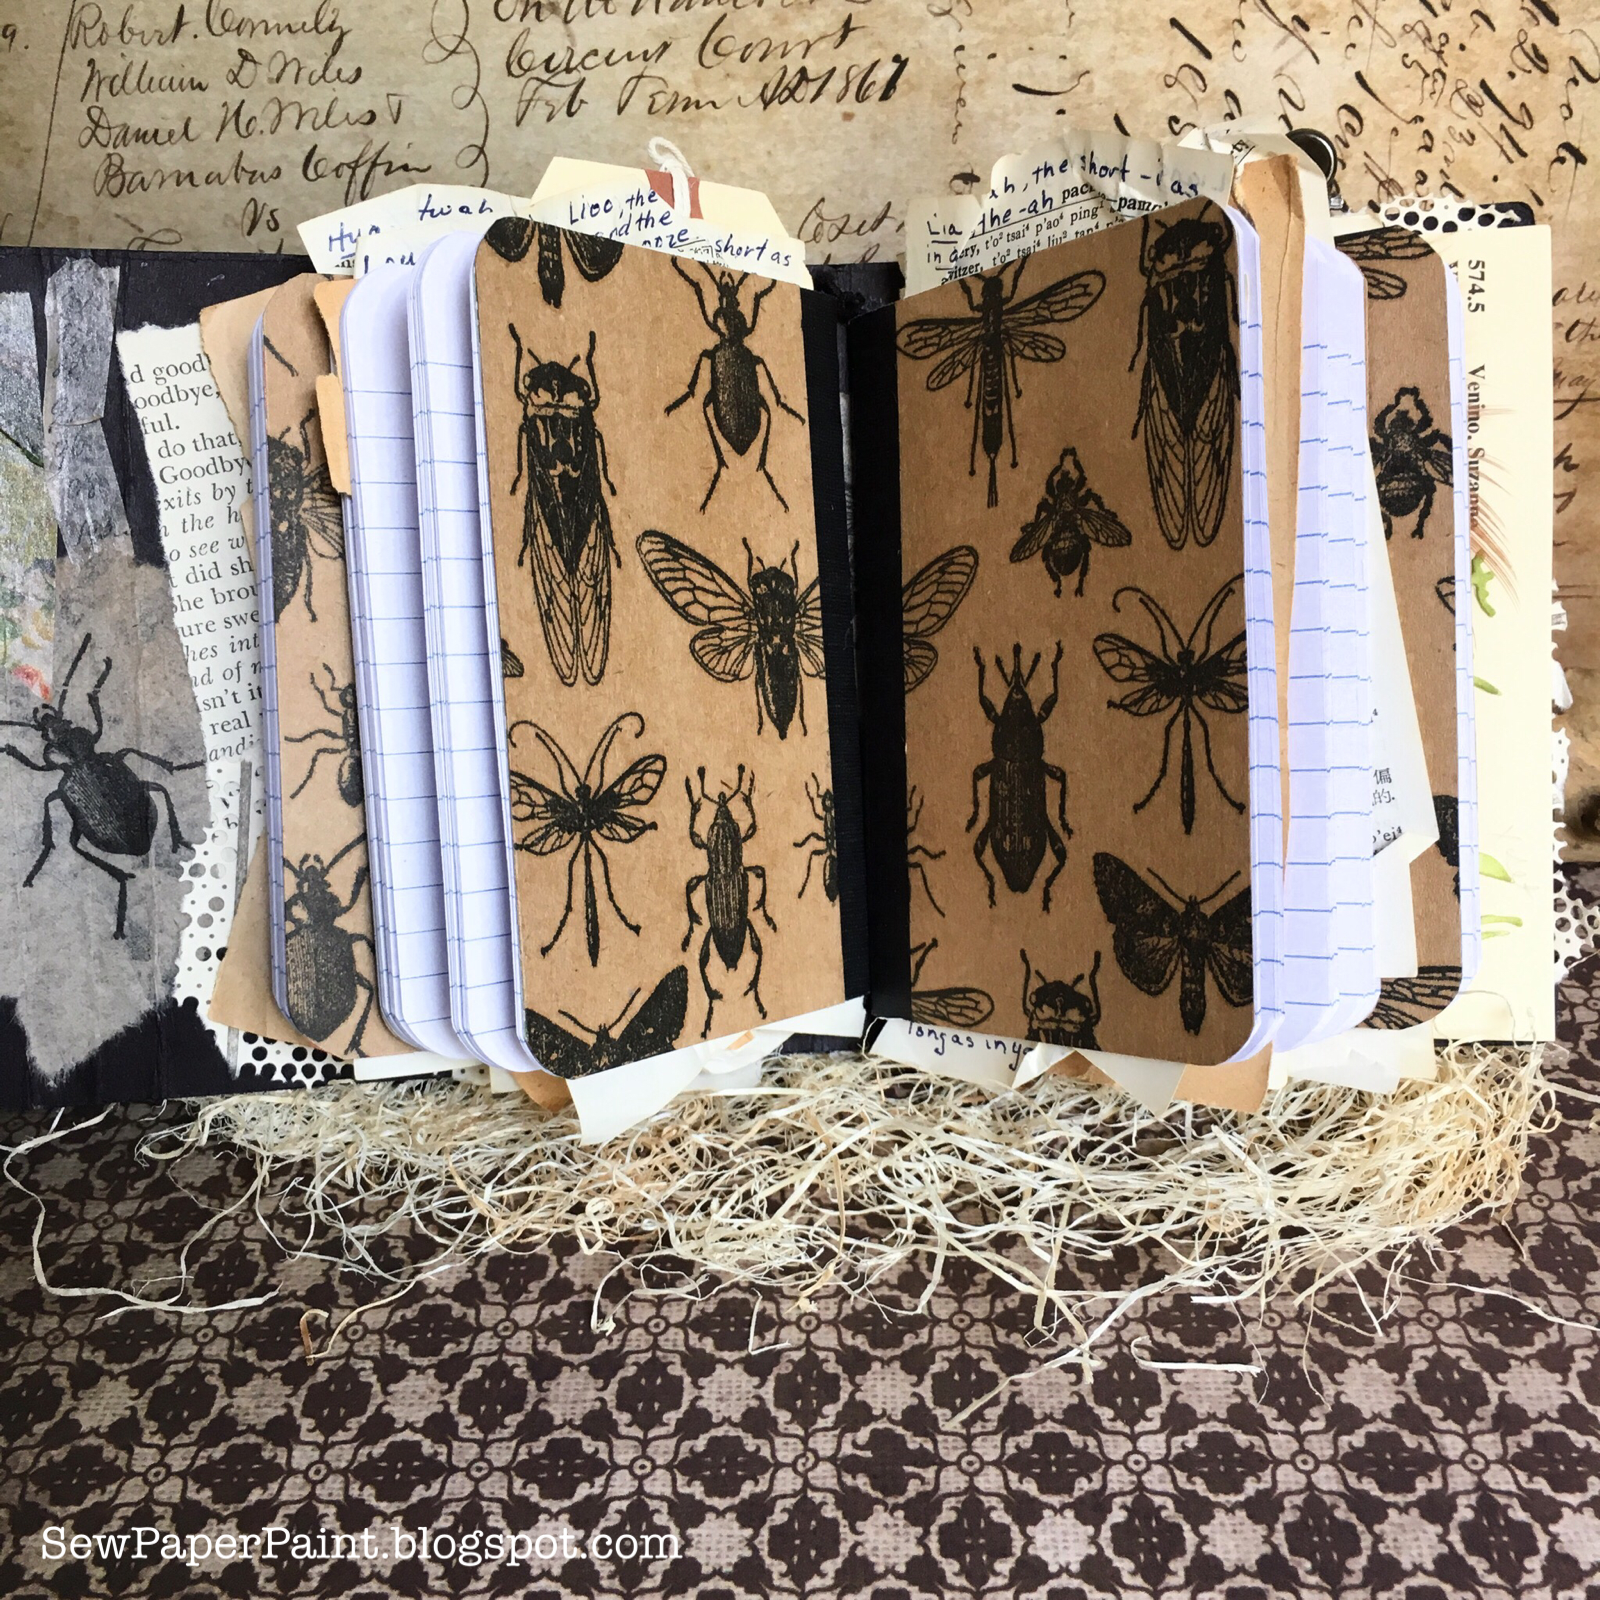
For my inserts, I purchased mini composition notebooks from the Dollar Tree.  I stamped images from Tim's Entomology Stamp Set with Versamark onto kraft paper and adhered to the front and back cover of four of the notebooks.  I can't take credit for this idea, as all of the talented members of the Eileen Hull Facebook Group are doing the same.  The notebooks fit perfectly inside Eileen's Wrap Journal.  Nevertheless, this goes right along with my posts on Dollar Store Crafts.  You can see all of those HERE.


I seriously love these little notebooks!  :)


Another closeup of the tea bag stamping...


I truly hope you're inspired today and will play along with our challenge at Mini Album Makers this month.  I apologize that this isn't a typical tutorial, but I hope you've learned some tips and tricks along the way.  Make sure to check out my other posts HERE for more in depth mini album tutorials.  Hugs, Autumn


You are invited to the Inlinkz link party!
Click here to enter

Jun 30, 2018

Tim Holtz Framed Patriotic Patchwork Quilt


Hi again!  I'm back today to share a second Tim Holtz 4th of July panel.  I had an idea to do a quilted background with Tim's Stitched Square dies and am so happy that it worked out!  To me, quilts scream Americana!


I had updated my sofa pillows and created a coffee table vignette and thought this panel would tie in perfectly.  For those who wonder about the Sew in SewPaperPaint, the red pillow covers were sewn by me.  I use french seams on my pillow covers so I can wash them.  :)  I found the blue printed pillows on clearance at Pottery Barn and the gingham at a discount store in our town.  


I used the cut out letters from THIS sister panel for today's project. 


To arrange the "quilt blocks" perfectly I first cut a watercolor panel to 5x7".  Then I marked a pencil line straight down the middle.  I cut 15 squares from Tim's Correspondence paper stash.  The trick was to use wet glue so the pieces can be wiggled around as needed.  I used Eileen's Tacky Glue and it worked great.  Once all 15 pieces were in place, I cut the excess from the sides and used those little pieces to fill in the gaps around the perimeter. 


I glued my 1" Alpha Numeric letters to a piece of heavy vellum and stitched the border.  I wanted a transparent panel so the blocks would show through, but the letters would be defined.  I glued the stitching to the quilted panel.  I cut the bow from Tim's Festive Greens die set and sponged it with Fired Brick DI. 


And here she is atop another sewing project, a fringed linen table runner, which you can see in more detail on my Tim Holtz Tea Party Invites post HERE.  :)  I needed another frame, so I picked up this faux weathered wood frame from the Dollar Tree and it worked perfectly.  Make sure to check out my other Dollar Store craft projects HERE.  Here's to wishing you and yours a safe and festive 4th of July celebration!  God bless America! 


Jun 1, 2018

Dollar Store Crafts Canvas Notebook Cover Tutorial


How could it possibly be the sixth month of the year!  Where does it go?  Today we launch the June challenge at Mini Album Makers.  I have been wanting to launch a new blog series on Dollar Tree / Dollar Store crafts.  Make sure to follow along for other ideas of how you can make fun craft projects with simple dollar purchases.


I picked up this journal for a buck and created a "souped up" cover for it.  The journal slides in and out of the cover so it can easily be written in and also replaced when filled with thoughts.


Here you can see how it easily slides out.  I was pressed for time this month, but you could easily add pockets and flaps and more to the left side.


To make the covers, first measure your journal insert.  Add 1/4" to the width and 1/2" to the height for your covers.  My insert measures 3 3/4 x 6 3/4 so I cut my covers to 4 x 7 1/4.  I used canvas board by Heidi Swapp.  Next, make a flexible spine.  I used two sheets of sticky back canvas by Ranger with the sticky sides adhered together.  Measure the width of the spine of your journal insert and add 1 1/2" to that (more if you want to add stuff to the left side inside your journal).  My spine measured 1/2" so I cut my canvas to 2" wide.  Adhere 1/2" Red Line tape to either side of the canvas and adhere one of your canvas boards to each side to form your book.  I cut off the excess with scissors once it was adhered.  


Please forgive me for not showing enough process pics...  I opened my covers and laid them on a paper towel then laid the Unblocked Stencil Girl stencil over the canvas and sprayed first Sea Mint Green Shimmer Spray by Lindy's, then C'est la vie Cerise Flat Fabio Spray, alternating the design and drying between colors.  


While I had the stencil wet I did a monoprint of each color onto some watercolor paper.  I cut these pieces to the size of my covers to decorate the inside of my journal.  I stamped the top of the monoprints with Seth Apter's Dot Matrix stamp to coordinate with the pattern of my $1 journal.  I made a wrap to hold my journal and adhered it around my paper then glued them inside to line my covers.  

I used more watercolor paper to mop up the extra spray inks and cut the new Stacked Baroque die and layered with a Mini Detailed Butterfly die which I embossed with Wendy Vecchi Watering Can EP.  


For my cover I embossed my IndigoBlu butterfly in Watering Can and then stamped the sentiment from Tim's Theories stamp set, both onto my  mop up paper.  I finished with a couple of Prima flowers and a vintage seam binding bow.  The ferns are from Tim's Garden Greens dies.


Here's a side view.  You can see the way the canvas boards look with their raw edges.  I love the feel of the canvas and it took the sprays very well.  Of course, you could wrap your covers with designer paper if you like and make a leather or fabric spine.  You could use iron-on interfacing to adhere two pieces of fabric together if you have some fabric you'd love to use.  There are so many options, this is just the basic.  I hope to make another similar design in the future and build upon this concept.  We'd love to see your albums in our June challenge.  One lucky winner will receive a $25 Stencil Girl certificate!


You are invited to the Inlinkz link party!
Click here to enter

Popular Posts