Showing posts with label ink blending. Show all posts

Oct 9, 2023

Winter and Christmas Release at Sweet 'N Sassy Stamps


Hi friends!  I'm delighted to be joining Sweet 'N Sassy Stamps as a guest designer for October.  It was great fun to make a batch of Christmas cards with the new releases.  Up first, I used the incredible Large Snowflake 6x6" background stamp.  


I used Distress Ink in Festive Berries with my stamp platform to stamp the snowflakes, then over stamped in Versamark ink and embossed in holographic glittery embossing powder.  I really love the shimmer!  


I finished the card by adding a strip of glitter cardstock in aqua and a row of cocoa or lattes - you choose - using the adorable Coffee Talk stamps & coordinating die set.  I tucked in a folded doily and added the stamped "Joy" using the same technique as the snowflakes with Distress Ink in Evergreen Bough.  The stamp is from the Choose Faith set.  I finished with a loopy crinkled bow.


Up next, I played with the perfectly cozy new Knit background stamp.  I inked it with Distress Ink in Evergreen Bough and spritzed it with water for a different effect.  

I layered two of the mugs from the Coffee Talk stamps & coordinating die set over a Vintage Photo inky circle and paired with a sentiment from the Blessings in Disguise stamp set.  I used my tiny attacher (stapler) and a little bakers twine to finish it off.

My last card for today is an ink blend design.  I used torn paper as a mask and blended snowy hills using Distress Oxides in Salty Ocean and Faded Jeans.  I gave the panel a splash of water, watery gesso and each watered ink color for a faux snow look.  I stamped the deer from the Scene Silhouettes stamp set.

I finished by repeat stamping the beautiful new Christmas Pine stamps with Distress Inks in Chipped Sapphire and Black Soot, then cutting with the coordinating dies.  I topped the card with a loopy bakers twine bow.  


Make sure to take advantage of this awesome stamp & die bundle sale!


Other beautiful products used:


Jun 30, 2023

Tracy Evan’s AALL & Create Stenciled Cards


Hi friends!  I have another batch of Tracy Evans cards to share with you today that I made hanging out with my mom.  If you missed my last post where I shared a fun video tutorial on using pigment powders with stencils, hop on over HERE.  For this card I just used ink blending brushes with Distress Inks in Lucky Clover and Salty Ocean.  I didn't blend in the center so I could put my focal stamp there.  I spritzed the ink with water and blotted for a more mottled look.


I used a pretty coral pink for the tips of this flower because it reminded me of a succulent.  :)


I tried to get a good print from the ink left on the stencil by spritzing it with water.  The result was very faded, but pretty.  I added some light ink blending along the edges for more contrast.  


This time I colored the tips with a pretty orchid color of ink - fun!


Next, I made a couple of cards for Tracy's FB challenge for June/July, themed Heartfelt.  I used Distress Inks in Wilted Violet and Picked Raspberry.


I used my label tape maker to fill in the sentiment.  The three birds represent my girl gang at work.  I wanted to give the girls these cards to express my gratitude to them for joining me in a beautiful Bible study last month.


For the second card I used repeat stamping with my stamp platform to stamp some background stamps in multiple colors.  I used Distress Oxides in Squeezed Lemonade, Picked Raspberry and Cracked Pistachio.


I fussy cut the center flower for dimension and left it more white.


I moved onto a couple of CAS cards in a more shabby look.


This flower by Tracy is one of my absolute favorites.  I fussy cut a second flower and offset it for a fuller flower.  I used Spun Sugar and Evergreen Bough.


And for the last card I fussy cut several of those blossoms for extra dimension.  The colors are prettier IRL on this one.  I used Spun Sugar and Vintage Photo.  I hope these cards inspire you today!  xx, Autumn


Mar 24, 2023

Studio Light Floral Butterfly Stamped Card and Altered Envelope


Happy spring friends!  It's butterfly bliss in my neck of the world with the gorgeous spring Studio Light Grunge Collection.  I have had just so much fun playing with these new stamps, as you've seen from my previous posts.  Today I have two very different projects to share with you.  First, a CAS square card featuring the new Floral Butterfly stamp (SL-GR-STAMP402).  Isn't this stamp gorgeous!  I used Distress Inks to watercolor the image (Peacock Feathers, Evergreen Bough, Wilted Violet, Picked Raspberry, Antique Linen and Squeezed Lemonade).  I finished with a sentiment by Jenine's Mindful Art (JMA-ES-STAMP340).


For my next project, I made an envelope from an older Grunge Cutting Dies set.  On the front, I used the Butterflies stamp (SL-GR-STAMP399) as the focal image and filled in with stamps from the Spring Crafts set (SL-GR-STAMP398).  I particularly like the line sentiment stamped to add a baseline for the handwritten address.  


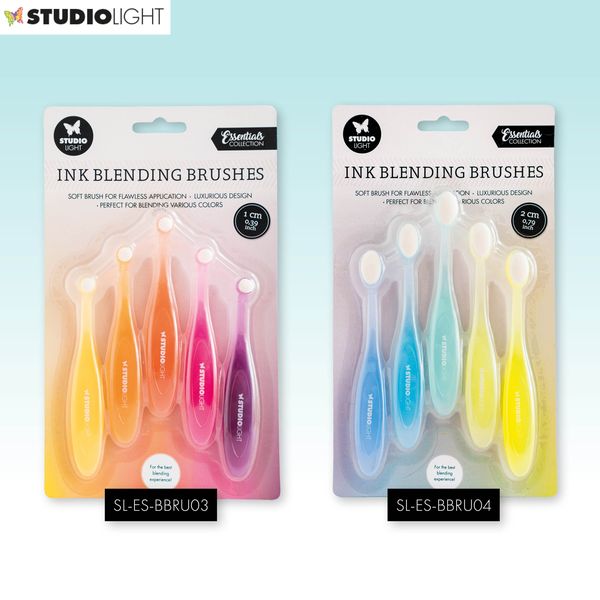
I watercolored the imagery and used my Studio Light ink blending brushes to add Aged Mahogany, Peeled Paint, Vintage Photo and Fossilized Amber.  I flecked with water to add some texture.  


The envelope die is so cool!  It has these great rings for a closure.  I attached brads and some twine.  


For the back, I used the Floral Butterfly stamp (SL-GR-STAMP402) and added in some Shaded Lilac Distress Ink, for an unusual pop of color.  I'm hoping this happy mail will make someone I know smile.  It had so much fun making these projects and hope they've inspired you today.  xx, Autumn


Spring 2023 Studio Light Grunge Collection


Feb 20, 2023

Distress Ink Blends with Studio Light Silhouette Stamps


Hi friends!  Today I have several new cards to share with you using a variety of Distress Ink blends, all featuring the gorgeous new Essentials Silhouette stamp collection by Studio Light.  For this first card I used the Dried Twigs stamps (SL-ES-STAMP382) in black permanent ink over a blend of Wild Honey, Rusty Hinge and Walnut Stain.  


I used the new Studio Light Dots Background stamp (SL-ES-STAMP370) to add interest around the perimeter and finished with a sticker from the new Essential Stickers pack (SL-ES-STIC06).


For my next card I achieved a really unusual effect, which I hope to experiment with further!  First I embossed the flower in the Butterfly Silhouette stamp (SL-ES-STAMP384) in blue.  Then I worked on my ink blend using Peacock Feathers, Chipped Sapphire and Seedless Preserves.  I stamped the twig from  the Dried Twigs stamps (SL-ES-STAMP382) in Seedless Preserves.  Then I gave a heavy splash of water, but it made my panel look polka dotted!  Not a good look on this particular card.  After all of that work, I wanted to salvage the card.  So I sprayed the entire panel heavily with water and blotted with a piece of paper.  


The result was this beautiful, ethereal look, similar to watercolor.  I was really happy to save the piece!  I added a dreamy Sticker sentiment and adhered some of the new Studio Light Shaker Sequins (SL-ES-SHAKE07) for texture along the top.  


I was hoping to give you guys plenty of color combos and stamping options for these gorgeous Silhouettes, so for my next card I embossed the Little Flowers stamp (SL-ES-STAMP381) in white and blended my inks in a more circular motion to resemble a sunset.  I used Scattered Straw, Spun Sugar and Tumbled Glass, with a tiny hint of Peacock Feathers along the top edges.  I used the heart from the Floral Heart Frame cutting dies (SL-ES-CD465) to pop up a portion of the background and finished with more of those gorgeous Stickers.  


For my final card I created a blend with Shaded Lilac, Stormy Skies and Hickory Smoke.  I added lots of small splashes of the same inks, watered down.  I stamped the butterfly from the Spring Silhouette stamps (SL-ES-STAMP383) at the top and watercolored it to match the background.  I stamped the Little Flowers stamp (SL-ES-STAMP381) along the bottom, highlighting with a Posca paint pen.  I finished by embossing a sentiment from the Bubbly stamp set (BL-ES-STAMP356) in white on black card and adding some of Jenine's Mindful Art adhesive pearls.  I really hope these cards have inspired you today and you'll check out this fabulous new collection of Silhouette stamps!  xx, Autumn


Popular Posts