Showing posts with label Christmas. Show all posts

Jul 29, 2025

Tim Holtz Stampers Anonymous Christmas in July Cards


Hi friends!  I found this post I prepared last year and forgot to publish!  Ha ha, I'm barely getting it published this year while it's still July, but loved these cards and wanted to still share.  I have a couple of Christmas cards for with Tim Holtz stamps.  Have you started your Christmas in July projects?  THIS year I have not, but last year I must have been more froggy!   Anyway, for this first set of cards I used the gorgeous Department Store stamp set to create some vintage style cards.  

I dipped the panels in Distress Ink in Frayed Burlap and Gathered Twigs, then stamped the misted music in Vintage Photo.  I watercolored and fussy cut the images with more DI.
I finished with a sentiment stamped from PaperArtsy stamp set ESN29 by Sara Naumann.  It's such a wonderful sentiment that works perfectly with these bells.  
Next I created some very simple stamped cards, first using the Stripes and Holiday set to stamp the stripes on a background panel using Fired Brick Distress Ink.  Next, I stamped the Doodled Greetings 1 set in black and watercolored over it in the shape of a tree using Distress Inks in Peeled Paint and Rustic Wilderness.
I haven't really used these doodle stamps much and really think they make beautiful CAS style cards.  I hope you're inspired to get crafty.  xx, Autumn

Nov 25, 2023

Studio Light Christmas Cards


Hi friends!  I’ve been in Christmas cardmaking mode and have had a few great sessions using new Studio Light stamps. My first card features the Poinsettua Song stamp by Jennie’s Mindful Art (JMA). 


I did a simple white embossing and colored with Distress Inks in Chipped Sapphire and Blueprint Sketch with Festive Berries and Lumberjack Plaid. I finished with a bow using the SL Craft Twine. 


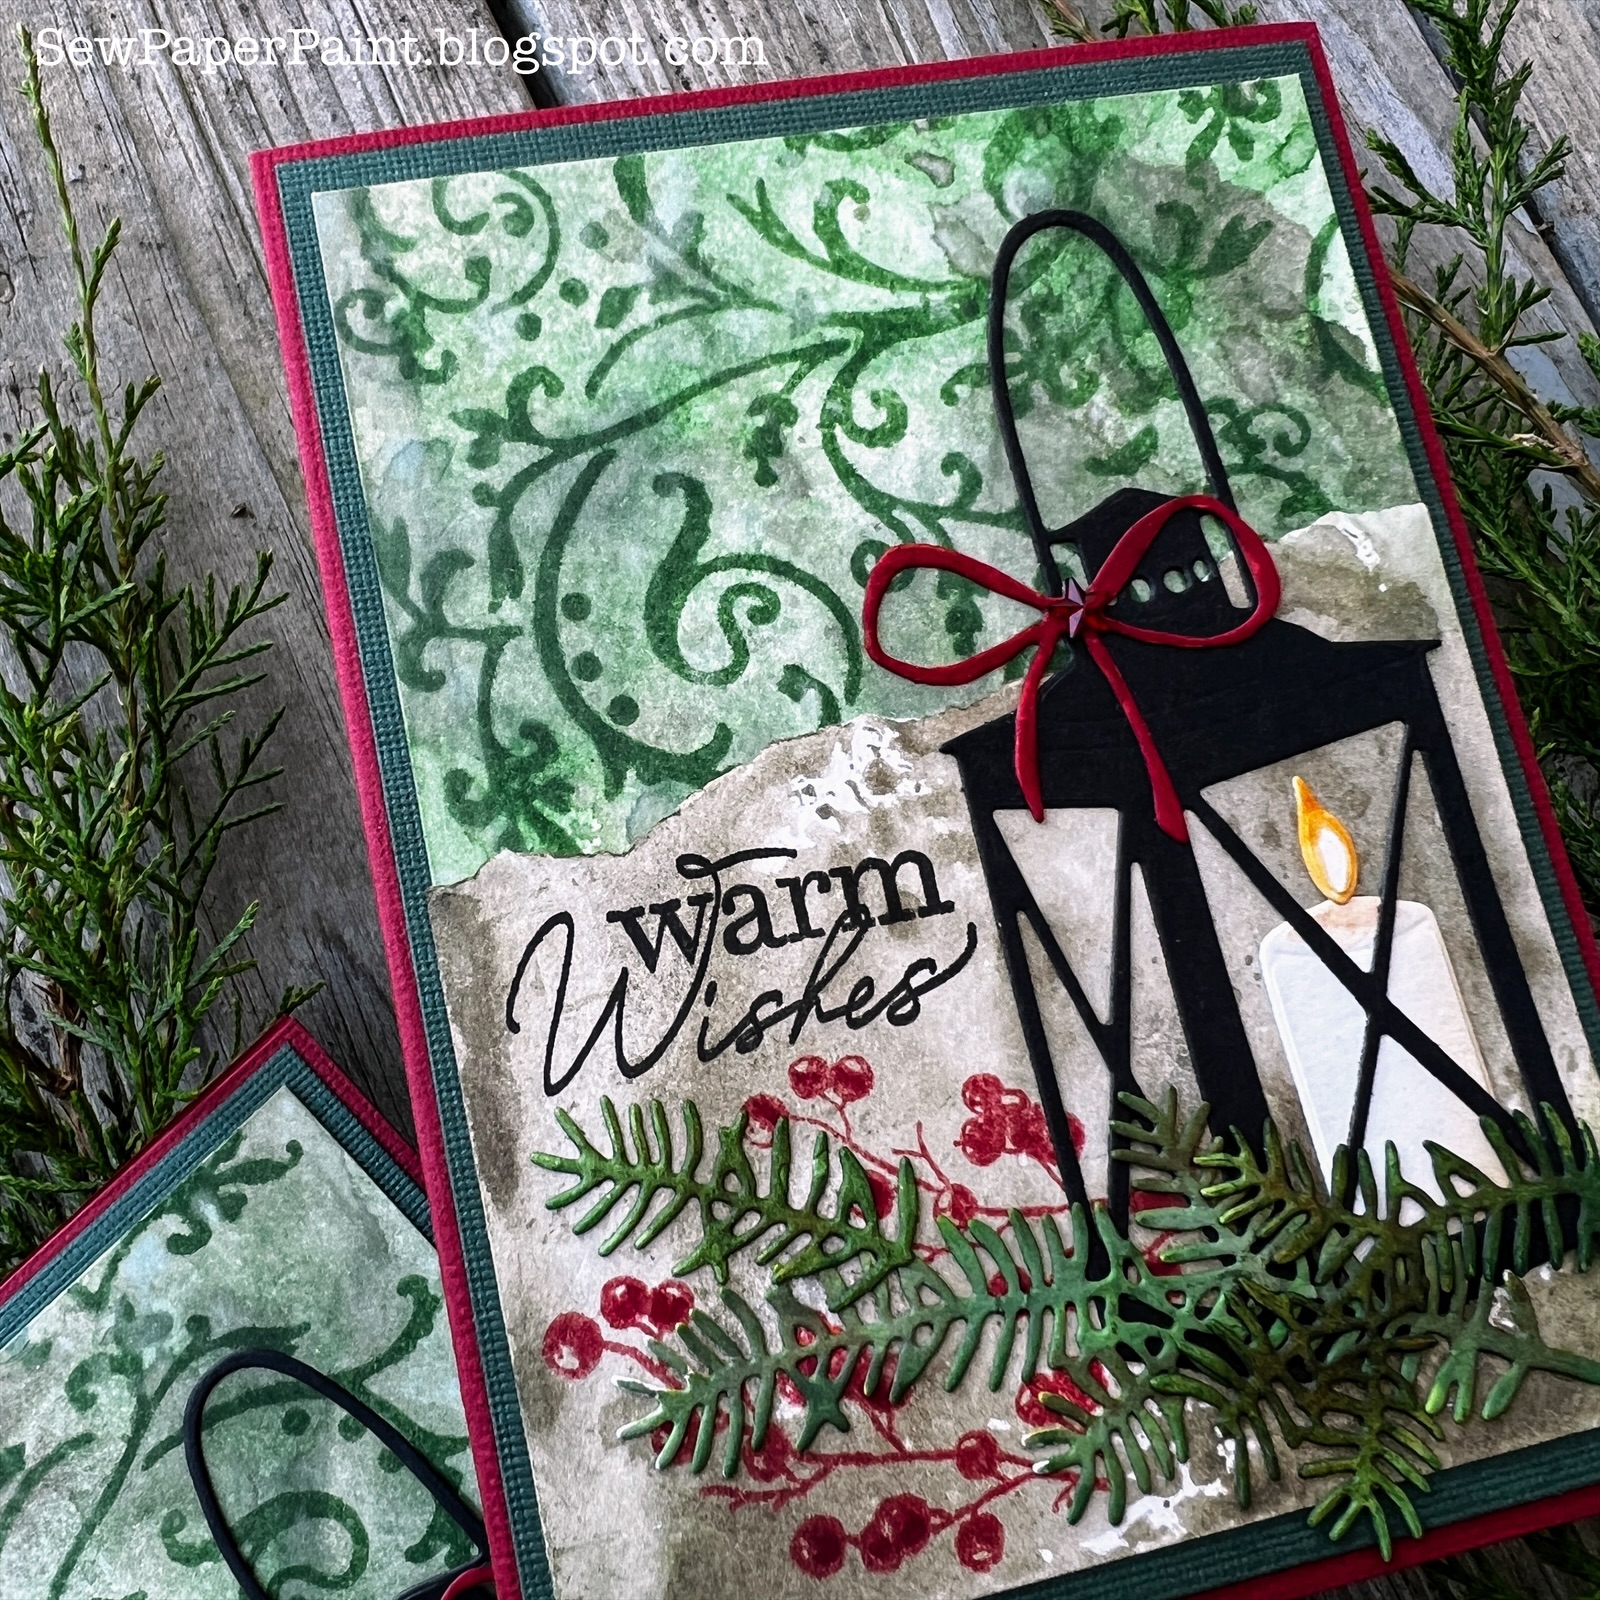
My next card features the Lantern Scenery dies. I sponged an inky Rustic Wilderness background with the Ornamental Swirls stencil for the top portion. 


Behind the die cut greenery I stamped berries from the Christmas Greenery set in Lumberjack Plaid. I finished with a sentiment from the English Sentiments and a Self-Adhesive Star gemstone. 


This card also features the English Sentiments with a background made using Antique Linen and the Christmas Script stamp. I embossed the Making Christmas poinsettia in gold and colored with Peeled Paint, Old Olive, Fired Brick and Rustic Wilderness. 


This card has an inky background of Frayed Burlap and Antique Linen with a spray stamped from the Christmas Greenery set and Sentiment from English Sentiments. 


I absolutely love these stamps and look forward to using them again soon. 


This card features my favorite set from the Magical Christmas collection, Birds. I enjoyed repeat stamping this robin with my stamp platform then adding additional watercolor details. 


I layered him over another of the sentiments and a flower made from the Poinsettia Cutting Dies. The center was filled with SL Adhesive Pearls in black. The background was stamped with the Wood Background stamp. 


I made another card with the Birds stamps and Lantern Scenery dies. This one has a Chipped Sapphire and Black Soot background stenciled with paste using the Winter Sparkle stencil. I added ornaments from the Christmas Embellishments Cutting Dies. 


I finished with the SL Snow Effect 3D snow writer. I love the dimension!  I hope these cards have given you some ideas for your own cardmaking fun. xx, Autumn


2023 Studio Light Christmas Collections


Dec 10, 2022

Tim Holtz Christmas Cards: Trees, Wreaths and Poinsettias


Hi everyone!  I'm back with part two of my Tim Holtz Christmas card extravaganza.  If you missed it, find post one HERE.  My first two cards today feature one of my absolute favorite sets, Winter Watercolor.  I am crazy over this fabulous tree and the accompanying greenery sprays.  

I did a little cheat and took the ornaments and garland from the Watercolor Trees set to adorn this larger tree, which I stamped in Rustic Wilderness.  I embossed the ornaments using gold and Lumberjack Plaid.  I then stamped the Stripes and Holiday background words in Antique Linen over the tree.  I used torn paper to mask off the bottom base and then sponged some coordinating Peeled Paint/Crushed Olive to "frame" the panel.  I added the greenery stamped around the corners with the same inks.  The sentiment is from the Watercolor Trees set.  You can see another post with the smaller tree from this set HERE.


I decided to make another version in different colors, so I used the new Lumberjack Plaid this time.  I stamped the card base with the Perfect Plaids and added some extra gold embossing in my layers to this one, as it goes so well with the red and blacks.


For my next card, I decided to give some inky love to one of my other favorite stamp sets, Winter Watercolor.  I fell in love with this set and used it in THIS post.  It's great for creating wreaths and sprays.  I made this spray with a base dipped in Peeled Paint.  I used the Flurry and Pine stamp set to make the dots at the bottom and the Christmastime stamp set to emboss the sentiment.


This next card is my favorite!  I love the masculine, rustic nature of it.  I used the woodslice from the Great Outdoors stamp set and overstamped with a sentiment from the Festive Overlays.  I created the background by loosely inking the pine bough from the abovementioned Winter Watercolor set and spritzing with water over a panel dipped in Antique Linen.  


I messed up one of my last cards, so I die cut a circle to cover the mistake.  I'm sharing because I want to encourage you all to play and experiment and not let one small mistake ruin your progress.  I created the wreaths with stamps from the Winter Watercolor and Watercolor Trees (gold embossed berries) sets.  The bow is from the Deck the Halls die cut set, and I cut it to change the direction of the bow tails.  

I carefully (well I tried to carefully) stamp only the edges surrounding the wreath with the Nordic and Plaid stamp set in Fired Brick.  The sentiment inside is from the Festive Overlays. 

And that's a wrap!  It was a fun cardmaking session and I truly hope you're inspired by these projects.  Remember, when you click the affiliate links, you are supporting me and enabling me to continue sharing cardmaking inspiration with you.  You can see all of the Tim Holtz Christmas stamps HERE at Scrapbook.com.  Thanks for joining me!  I'd love to hear from you in the comments.  Find all of my Tim Holtz projects HERE.  Merry Christmas and happy stamping, Autumn

You are invited to the Inlinkz link party!

Click here to enter

Dec 8, 2022

Tim Holtz Snowmen Stamps Christmas Cards


Hello friends!  I'm so excited today to share a new batch of Tim Holtz Christmas cards with you.  It's been too long since I had a good play with my TH stash and I'm so glad I was able to squeeze these in this year.  Today's cards focus on the adorable snowman from the Winterscape stamp set and I've used a variety of background elements to create these variations.  

For the background, I dipped my panel in Tumbled Glass, then stamped the greens and berries in Rustic Wilderness and Lumberjack Plaid Distress Inks using the Winter Watercolor stamp set.  (More cards coming with this amazing set soon!)  I finished by watercoloring my snowman to match.  I really love this red, blue and green combo for Christmas!  


For my next card, I cut my watercolored snowman with a circle die, then used the base of the Snowglobe 2 to turn it into a snow globe.  I added one of Tim's label tape stickers over that and hand drew the marks on the "glass" to resemble highlights.  


For the background, I dipped my panel in Lumberjack Plaid, then stamped the diagonal Perfect Plaid background stamp in the same ink.  Next, I used my embossing marker and a ruler to draw lines over the plaid and embossed in white.  (Note: you need to use an embossing buddy between layers to avoid powder sticking everywhere!)  I finished by stamping my card base with the Flurry and Pine background stamp.  Love those snowy splatters!  


You may remember the scenes I stamped last year with the Winterscape set.  You can find those HERE.  In fact, you can view all of my Tim Holtz projects HERE.


Well, this year, I wanted to do another version and chose green!  I'm so in love with Rustic Wilderness, so I used it as my primary blending color.  This card is definitely a bit grungier, but was really fun to create.  The sentiment is one of those clear stamp & stencil sets from Joann.com.  The embossing powder got a little carried away when I heated it over the stamp, so I used my Posca to draw some more lines and blended them out to gift the effect of a blizzard/snowy winds.  It was my effort to salvage the card and I think it worked.  I hope to try again with more green later.  


I made one more pair of cards using that same stamp/stencil combo.  I used the Plaid and Nordic stamp set for the bottom half and texture paste through the snowflake stencil.  


For the garland and bow, I used dies from the Deck the Halls die cut set.  The colors of these cards are Faded Jeans and Cracked Pistachio.  


I do hope these cards have given you some ideas.  Remember, when you purchase items through my clickable links it helps support me and enables me to bring you even more crafty ideas.  Thank you for it all and have a merry merry Christmas season.  I'll be back soon with my Tim Holtz Christmas card part 2 post.  Until then click HERE to see the TH Christmas stamp collection at Scrapbook.com.  Hugs, Autumn

You are invited to the Inlinkz link party!

Click here to enter

Popular Posts