Feb 26, 2020

How to Make a Vintage Gelli Print Journal


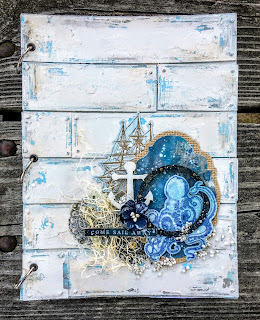
At first thought, you might not think this is a journal made from gelli prints, since most people visualize "gelli prints" as bold and vibrant.  In fact, you can make gelli prints from any color palette you can think of.  Since I am drawn to neutrals and earth tones, I've chosen a range of Fresco Chalk Acrylics by PaperArtsy to include: Blue Oyster, Waterfall, Toad Hall, Sage, Hint of Mint, Taupe, Concrete, Cloudy and Chalk.  There are many techniques in which you can use stencils with your plates, but I prefer to make more "solid" pages that pick up the under paint and texture but still serve as blank canvases for me to use with my rubber stamps.  If you would like to see how I finished this book with PaperArtsy stamps, head on over to the PaperArtsy blog for the details.


I learned this style of book making from Elena Morgun.  To start, I cut three sheets of 11x14" bristol in half to make six 11x7" panels.  I printed both the front and back of each panel with my range of colors.  I three of my six sheets and prepared two like the first image and one like the second (which makes fun flaps).  This gave me three inserts for my book, plenty of pages to collage.


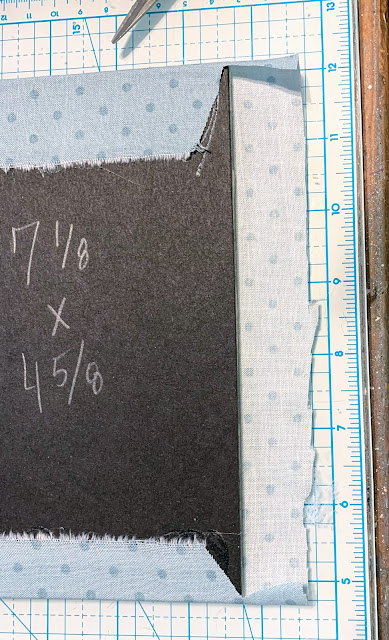
Next, I cut my covers from medium chipboard.  I added 1/8" to the finished page measurement (7 1/8 x 4 5/8").  I decided on the thickness of my finished book and cut that width times the finished height (1 1/8 x 7 1/8").  You could definitely add more pages and make a thicker book if you'd like.  I glued the chipboard to fleece/batting with a nice 1/4" gap between the covers and spine (to allow plenty of wiggle room for the covers to open and close with all the bulk).  I cut around the edges so the fleece was only on one side. 


You could omit the fleece and fabric and use paper for your cover, but I wanted a vintage style book and I love how soft the book feels in my hands.  I cut a piece of fabric just larger than my covers and glued the top and bottom edges around them as shown.  I use Beacon 3 in 1 or Beacon Mixed Media glue for this.  You do not add glue to the fleece side or else it would show through on your finished cover.  Pull the sides taught and rub them firmly into the glue.  


Next, cut the corners as shown to miter, making sure not to cut too close to the chipboard corner so it will wrap nicely.  


Apply a tad of glue along the fabric edge and then a bead along the chipboard.  Fold the edge in and adhere to the chipboard.  


This is what your mitered corners will look like.  This is the time to add a closure if you like.  I used torn fabric strips, but you can use any non-bulky trim.  


I took one of my three leftover printed papers and cut it in half, then glued it to the inside back of my covers.  I carefully formed a crease in the area between the back cover and the spine.  Once it was burnished well, I glued the other half on the other side and creased it too.  This cut helps your book to have a little give when you open it.  By gluing the back then the front, it becomes almost invisible.  


I then added three medium eyelets to each end of my spine with my Cropadile.  You can add more if you've chosen to make your book thicker.  


I took my inserts and marked with a pencil the placement of the eyelets on the back of the fold.   I punched these marks with the smaller punch on my Cropadile.


I used every smidgen of my leftover prints for stamping, die cutting and collage. 


Once I designed my pages the way I wanted, I simply tied them into my covers as shown.


Then I was able to focus on my cover collage.  Now hop on over to the PaperArtsy blog to see how I finished my journal.  Thanks so much for joining me today and don't forget to pin this project for future reference.

Check out these other journals/album tutorials with PaperArtsy stamps:
(Click on the photo for the full post)

http://sewpaperpaint.blogspot.com/2018/05/mixed-media-planked-wood-tutorial-paperartsy-stamps.html


I'm sharing with:

Feb 24, 2020

Katzelkraft Steampunk Mixed Media Bird Tag


Hi friends!  I have a deliciously grungy tutorial to share with you over on the Topflight Stamps blog today.  I had so much fun making this tag from the Katzelkraft Carte Postale stamp set and hope you will head over for the details.

Affiliate links to my chosen products:


http://www.shareasale.com/r.cfm?u=1457823&b=33086&m=7429&afftrack=&urllink=www.scrapbook.com%2Fstore%2Fsz-661817.html

I'm sharing with:

Feb 10, 2020

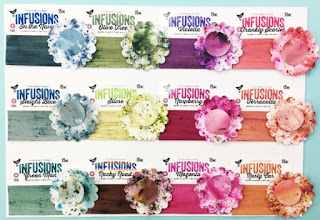
Sara Naumann Valentine Cards with PaperArtsy Infusions


Hello lovelies!  I'm so happy to be sharing a new post on the Topflight Stamps blog today featuring some of my favorite PaperArtsy stamps designed by the very talented Sara Naumann.  I've used yummy Infusions powders to create my backgrounds.  Please hop on over and check out the details...

Enjoy this YouTube video tutorial:
 

SAVE 12% ON YOUR PURCHASE TODAY
WITH CODE: SEWPAPERPAINTSEWPAPERPAINTsSEWPAPERPAINTSEWPAPERPAINT

https://topflightstamps.com/?ref=sewpaperpaint

https://topflightstamps.com/products/paperartsy-sara-naumann-33-rubber-cling-mounted-stamp-set?_pos=23&_sid=18c8a65a8&_ss=r&ref=sewpaperpaint

https://topflightstamps.com/products/paperartsy-sara-naumann-34-rubber-cling-mounted-stamp-set?_pos=25&_sid=18c8a65a8&_ss=r&ref=sewpaperpaint

https://topflightstamps.com/products/paperartsy-seth-apter-mini-41-rubber-cling-mounted-stamp-set?_pos=22&_sid=3409f862f&_ss=r&ref=sewpaperpaint

https://topflightstamps.com/products/paperartsy-stencil-sara-naumann-ps092-1?_pos=15&_sid=18c8a65a8&_ss=r&ref=sewpaperpaint
  
https://topflightstamps.com/collections/types?q=Infusions%20Dye%20Stain&ref=sewpaperpaint

Feb 1, 2020

Tim Holtz Cabinet Card Valentine Mini Album Tutorial


Today we begin a new challenge at Mini Album Makers.  We would love to have you join us with your own book creations.  I have made a Valentine's "junk journal" from various packets of Tim Holtz cabinet cards, baseboard frames and ephemera.  This December my friend @carolinasweetlee and I started Christmas albums along the same design, but much larger.  Sadly I became overwhelmed and never finished mine.  But the thought kept tugging at me, especially after seeing @shabbysoul's amazing canvas journal from Creativation.  So I pulled out the leftover cards from my stash and tried again, only this time in a much smaller format.  My finished journal is shy of 4x6".  I will share a flip through video on Instagram @sewpaperpaint and on my YouTube channel soon. 


I distressed all of my paper with sandpaper and cumpling and let my pages be as thick as I wanted, resulting in a true junk journal look...


I always like to pick out the elements and embellishments that I might like to use and display them all over my table and pick and choose like a crafty buffet!  LOL!  This method helps me to "try things on" for size and make the best collages.  Here I layered with the Lady Rose stamp set, similar to the Ladies and Gentlemen images only larger.  


Basically, to make this type of album you need to collect five or more cards to form your collages, the fun is in adding the flaps and utilizing the windows to showcase elements on the pages before and after.  Decide where to put your holes and punch them as you go along.  In the end, tie with twine or attach with jump rings.  The 14 page was stamped with Distress Oxide using the Ornate & Lace stamp set, with embossing from the Numeric set.


I only added a little true vintage ephemera, but these buttons from Carol had to find their home here!  <3


This is the first time I've used Tim's Transparent Wings, but I knew they would be perfect for my windows.  I made this page with inky paper and Tim's Stacked Baroque dies.


My dear friend Bonnie shared some vintage tatting with me and I added a snippet here, along with Tim's Lace Baseboard (my favorite set) and his Ribbons & Bows Adornments


It's been a while since any Photo Booth or Paper Doll characters came to play in my crafting, but these images just scream dreamy Valentines...


This page is my favorite.  This happy gal reminds me of someone.  :)


The paper for this book comes from Tim's Etcetera collection.  Oh how I wish Tim would release a new 12x12 pad!!! 


Find my tutorial for these cracked glass enamel hearts HERE.   The enamel cracks after it sets if you bend it, but you can certainly leave it smooth. 


The heart below is from a DecoArts 3 step crackle process Sara Emily showed me at the beach the other year.  I have hoarded that paper we made all this time.  


I used the rest of the panel to make the back cover for my book.  The texture is incredible!  I tied more vintage trims onto Tim's gorgeous twine.


The front cover of my book features Tim's Cathedral Window, embossed with chunky gold EP.  I tucked a Tattered Floral behind the happy couple.  The idea of a romantic Valentine's wedding...  Oh how delightful!  I really hope this book has inspired you to make your own dreamy Valentine album.  We would love for you to share in our challenge at Mini Album Makers this month.  Big hugs, Autumn


I'm also sharing with: 

Make sure to check out my other Tim Holtz Valentine album tutorials:
And all of my Valentine projects.  


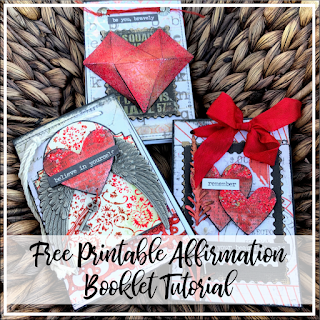
https://sewpaperpaint.blogspot.com/2020/01/free-printable-valentine-affirmation-book-tutorial.html
You are invited to the Inlinkz link party!
Click here to enter

Popular Posts