Showing posts with label steampunk. Show all posts

Feb 2, 2023

Studio Light Steampunk Dreams Grunge Slimline Cards


Hi everyone!  I'm happy to share a couple of cards with you today that I had a wonderful time creating.  After making my Zig Zag Tag Book with the Steampunk Dreams DIY Block (SL-ES-DCB37) by Studio Light, I could not stop myself from creating more!  If you missed the post, find my first grungy creation HERE.

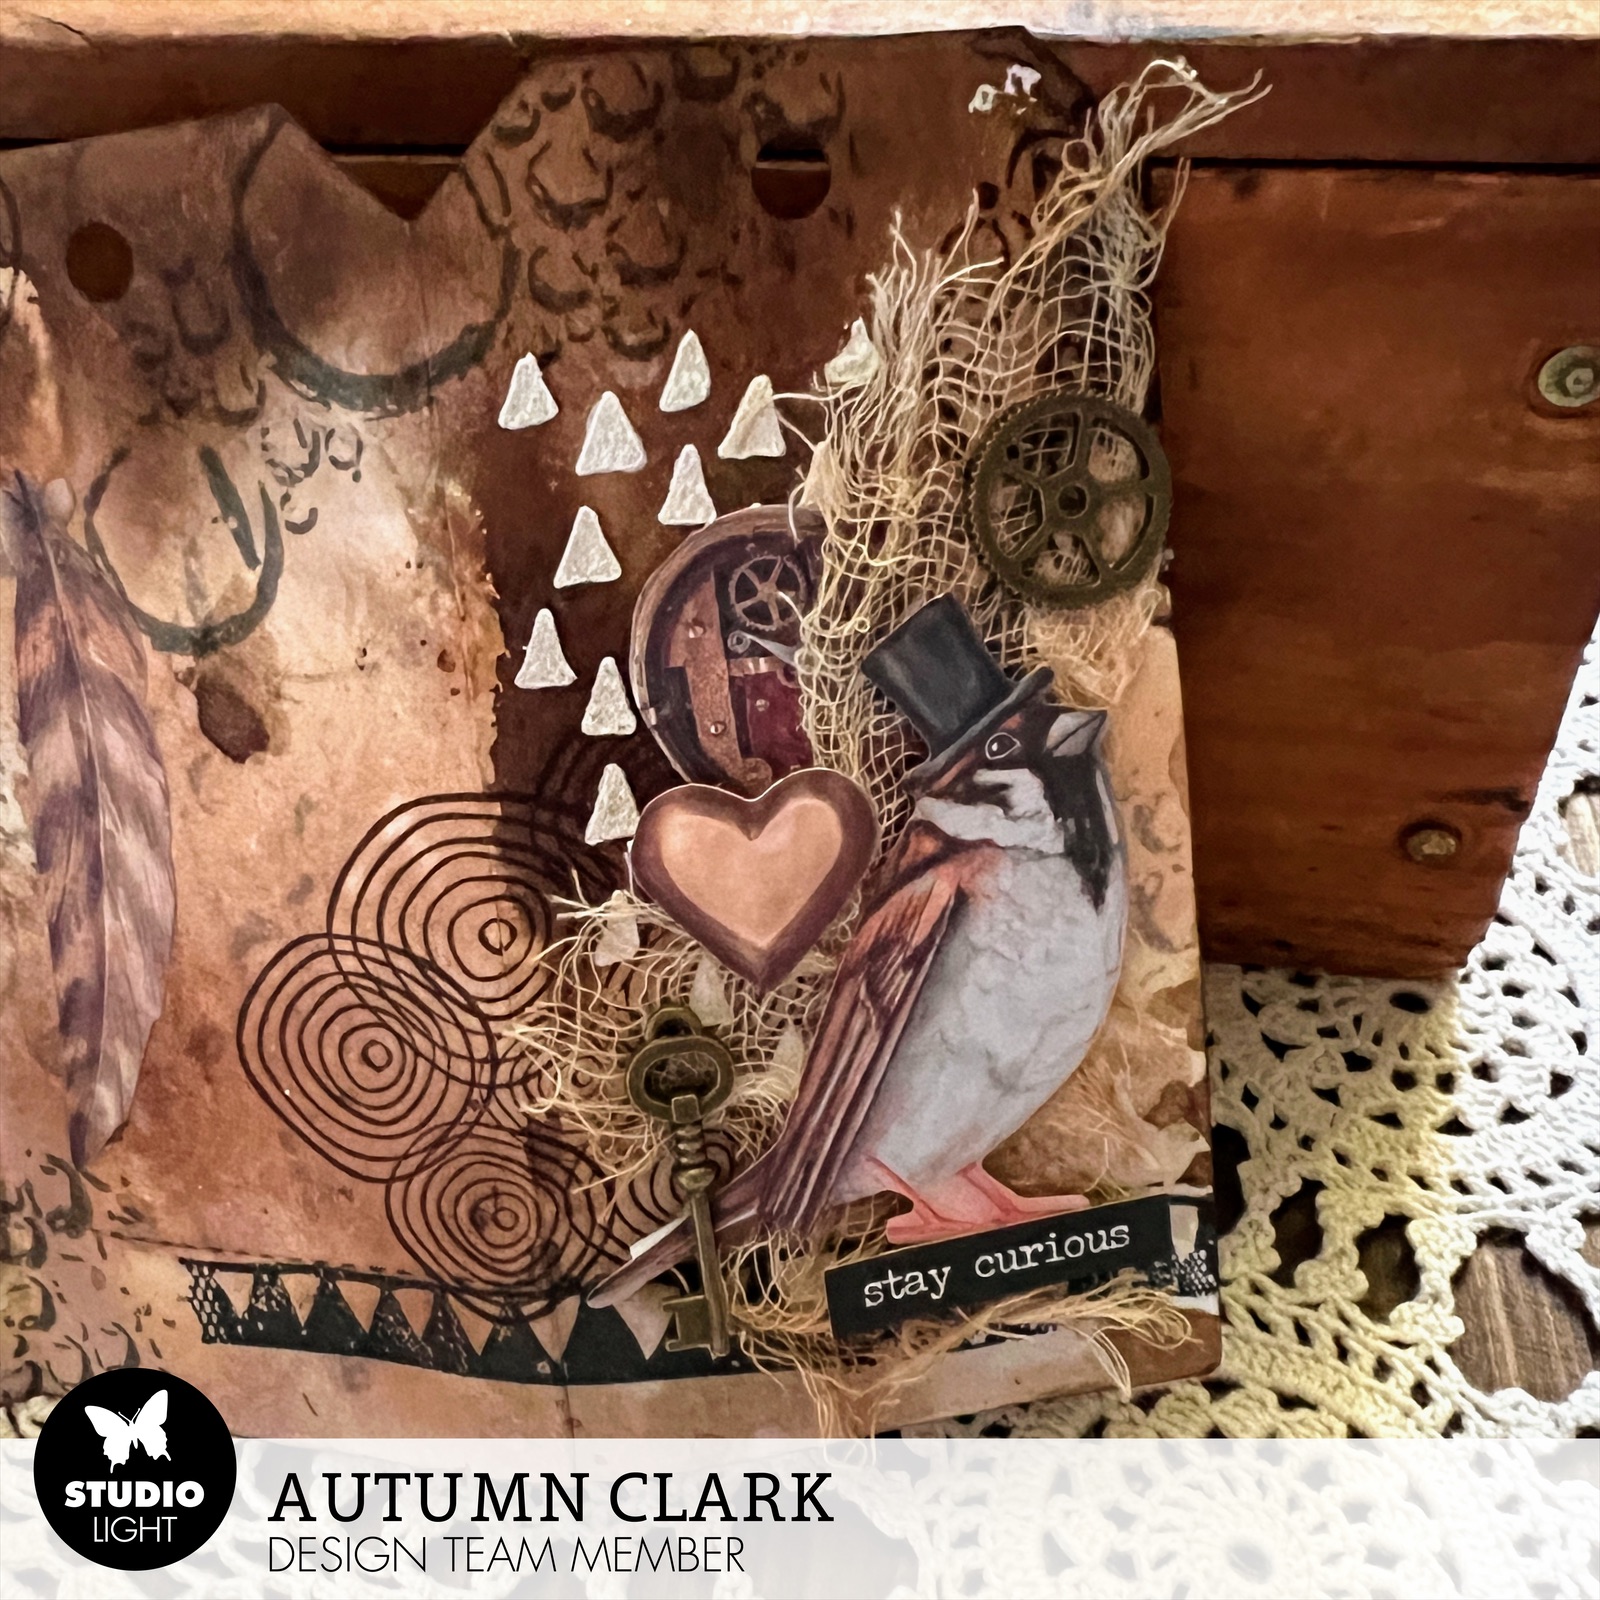
There are hundreds of cutouts just waiting to be collaged in this one paper pad and I was happy to oblige!  I have recently purchased some of the older slimline Grunge dies by Studio Light and was anxious to give them a try.  I used the Card Shapes Film Grunge Cutting Dies (SL-GR-CD198) to cut the awesome background edge and focal paper from the pad for both cards.


I am really crazy over the birds and cages included in the pad, but wanted to use the hat and "steam airship" as the focus for this slimline card.  


I tried to create two completely different colorways so you could see how versatile the elements are.  


For my second card, I added a bundle of sisal fibers.  I gave both finished cards splashes of watery gesso and a sentiment sticker.  


I really hope these cards have inspired you today!  Make sure to check out all three of the new DIY Blocks, and visit my post HERE with the Romantic Forest DIY Block.  I just know you'll love these pads as much as I do!  xx, Autumn


NEW from Studio Light!


Jan 28, 2023

Studio Light Steampunk Dreams DIY Block Tag Book


Hi everyone!  I'm back with another Mix It Up Mini Zig Zag Journal (ABM-MUC-CD417) by Art by Marlene for Studio Light, which I used HERE in a totally different way.  Yes, it was very bright and very cheery and I've done a 360 by using dark, grungy colors and images this time, LOL!  I'll let you decide which book is best, but I love using products in totally varied ways and getting the most out of my supplies.  And I love BOTH of these little books.  It's also been super fun to get back into making mini books again.  You can see all of my mini albums HERE.  


My inspiration for this book came from the new Steampunk Dreams DIY Block (SL-ES-DCB37) by Studio Light.  I shared my projects using the Romantic Forest DIY Block HERE if you missed it.  As I said, there are 12 pages of precut images (two of six designs) that you can simply punch out and use with no fussy cutting involved!  (I did cut off the tiny two or three perforations on each element, but that's it.)  There are also 20 sheets of double sided paper in the block (10x2).  The Steampunk Dreams images are SO COOL!  I only used a few elements and have zillions left for another project.


I used a combination of Distress Inks in Vintage Photo, Walnut Stain, Ground Espresso and Hickory Smoke with a spritz of water and dipped my die cut tag book (cut from Bristol) into the inks, spraying with water to let the colors flow together.  I stamped loads of Grunge Elements stamps using stamp sets SL-GR-STAMP33 and STAMPSL450.  


I used Studio Light texture paste through portions of Stencil/Mask SL-GR-MASK18 for even more texture.  


I did some white embossing as well.  For the cover, I layered several of the DIY Block cutouts over some dyed cheese cloth and adhered a key and cog from my stash.  


For the rest of my book, I just adhered elements here and there for a collage look.  


It was great fun and very relaxing.  I hope you've enjoyed this project and will check out the new DIY Blocks and Grunge stamps by Studio Light.  And if you haven't snagged your Zig Zag Tag Book die cut set, you need to grab it fast because they are selling out quickly.  Big hugs, Autumn


Feb 24, 2020

Katzelkraft Steampunk Mixed Media Bird Tag


Hi friends!  I have a deliciously grungy tutorial to share with you over on the Topflight Stamps blog today.  I had so much fun making this tag from the Katzelkraft Carte Postale stamp set and hope you will head over for the details.

Affiliate links to my chosen products:


http://www.shareasale.com/r.cfm?u=1457823&b=33086&m=7429&afftrack=&urllink=www.scrapbook.com%2Fstore%2Fsz-661817.html

I'm sharing with:

Jan 24, 2019

Tim Holtz New Faceted Heart and Ideaology


Hi guys!  Thank you so much for your sweet comments on my projects for the Tim Holtz Sizzix Chapter 1 release.  I had so much fun using the Faceted Hearts die for my rusty heart tag shared HERE that I decided to do another sample.  For that tag I tried to mimic pieced sheet metal, then it occurred to me I could use the Mechanics 3D texture fade to cut my heart for "easy sheet metal".  :)  I wasn't sure how the embossed panel would die cut, or if it would flatten the embossing, but it worked beautifully since it is a padded Bigz die.


I cut the 3D Mechanics from Metallic Kraft Core and colored with Distress Crayons.  I should have shared this tip in the first post, but for easy assembly make sure to crease all of your score lines with a bone folder before gluing the Faceted Heart together.


I layered lots of Tim Holtz ephemera/Ideaology together over a Paper Stash base.  I love sanding and altering this faux ephemera, distressing the edges and adding little tears and folds to give it a more authentic look.


I finished my paper doll collage with a snippet that reminds me of my own sweet boys.  Oh how I love this boy image!  I'm super excited about the new paper dolls and ephemera Tim is releasing.  Find out more HERE.


You are invited to the Inlinkz link party!
Click here to enter

Aug 30, 2018

Tim Holtz 3D Embossing Steampunk Masculine Tag


Hi friends!  Today is a 5th Friday and we celebrate at A Vintage Journey with Tag Friday.  Hop on over and see what my uber talented teamies have created for your inspiration. We would love for you to share a tag you've been working on this month. 


I had a play with my friend @carolinasweetlee's new Tim Holtz 3D Embossing Folders and we made a number of backgrounds with different techniques.  I adhered two portions of my backgrounds made with the Foundry and Mechanics folders to a chipboard tag.  These were both done by simply sponging Distress Inks onto the panels.  I added various strips of Tim's tissue tape and sanded it with a nail file to remove the sheen.


I embossed a Gadget Gears 2 die with Seth Apter Chunky Rust Baked Texture and tucked it beneath my collage.


I used one of Tim's Fluted Fasteners as my tag topper.


My collage elements are all from an older pack of Tim's Snippets Ephemera.  The sentiment is from the Clippings sticker set. 


I dyed my sisal fibers with Black Soot.  The Paper Doll image was sanded lightly and sponged with Vintage Photo DI.  I hope you'll hop on over to A Vintage Journey for more tag inspiration and make sure to share a tag in our link up.

You are invited to the Inlinkz link party!
Click here to enter

Jul 21, 2018

Tim Holtz and Eileen Hull Steampunk Travelers Journal Tutorial


Hi my friends!  Today I'm sharing a steampunk themed travelers journal and a neat idea for upcycled packaging idea with you, as inspired by recent conversations on the Tim Holtz Addicts Facebook Group.  If you're not a member, you should be!  This is such an incredible group with so much talent and daily inspirational shares.


Now, normally the first thing I do when I get a haul is unpack everything and sort it into containers.  I always throw away the packaging because it takes up so much room and I have a tiny space.  I do save my acrylic packaging and use it for making shaker cards, but everything else goes.  Someone had mentioned using the backings for their projects and when I unpacked a new stencil, I saw the backing in a whole new light!  :)  I decided to cut off the top and emboss it to see what it would look like.  I lined up the folder along the bottom and embossed a second time for a continuous pattern.


I sanded the raised portions and dipped the panel in Distress Oxides (Fired Brick, Iced Spruce, Frayed Burlap), then dabbed my Veramark randomly and embossed with Seth Apter's Baked Texture, first in Rocky Road, then in Chunky Rust.  OH MY GAH!  I could have eaten it like rusty candy!  LOL!  Now, I was just playing around and supposed to be doing something else, but when I had gotten this far I just had to turn this awesome panel into something cool!  So I reached for my Eileen Hull Travelers Journal die.


I was thrilled that the stencil package backing was exactly the right width to use for this journal die, but it was too short.  To make it work with my size, I centered the rusted panel on my cover, then marked pencil lines to cut off each end.  Then I traced the front onto the back and cut off the ends of the back cover.  BTW, I used Graphix black chipboard to cut my covers.


I used the cut off portion to help mark new holes and cut those with my Crop-o-Dile.


I wrapped a piece of Tim's tissue tape around the spine of my front panel and extended to the inside so it didn't come off.  I put a bit of glue stick below it, then sanded it and coated it with matte varnish. This worked perfectly to remove the sheen and seal the tape.  Next, I lined my insides with Tim's Dapper paper stash.  I ADORE this script!  This time I lined the center panel, which is connected to the back side when the covers are sandwiched.


You can see how great it looks inside without the mass of black space.  I like making my journals with two inserts so the spine lines up better.  I used more Dapper paper and kraft paper with a long reach stapler to make my inserts.  I left things simple inside for the recipient of this journal to customize.  I have to say how much I LOOOOOVE the kraft paper inserts!!!  I cut my sheets all to 8.5 x 7" and folded them in half for a finished insert of 4.25 x 7".  


I put a huge stack of books on them to help them flatten, since kraft paper is a bit thicker than copy paper or graph paper, which I usually use.  I only added 4 sheets of kraft to each insert.  I wanted room for ephemera and pockets, and maybe a pen inside.


Now back to that collage...  I used one of Tim's older ephemera pack to build my composition.  I sponged a Small Talk sentiment with Antique Linen DOX.  I tried tinting my paper doll, as inspired by the one and only Paula Cheeny.  Only I don't have any Distress Markers.  So I tapped my ink pad onto my mat then used a dry brush to paint him.  I had sanded him, so you see how those areas accepted the ink more.  I sealed him with Distress Micro Glaze.


Behind him I added a die cut Bigz Gadget Gears #2 cut from chipboard and repeated the same embossing process.  I added some Fluted Fasteners in all of the corners with a brush of Prima Rust Paste, watered black gesso, and Walnut Stain DOX.  I covered the backs with the interior lining as shown above.


Oh my gosh how I love those gears!  Now, I used an old gear texture fade for my background, but imagine this technique with Tim's new 3D Mechanicals Texture Fade!!!  What!  #wishlist  The only thing missing is a matching back panel, so I need to buy a new stencil for that packaging!  I truly hope you've been inspired by this post and have thought of some new ways to use your packaging and die cuts.  Have an amazing weekend, Autumn

You are invited to the Inlinkz link party!

Click here to enter

Popular Posts