Showing posts with label Lynne Perrella. Show all posts

Feb 16, 2021

Bleed Through Technique with Lynne Perrella PaperArtsy Stamps

 
Hi friends!  I'm so excited to be sharing a new blog post on the PaperArtsy blog.  I've used images by my all time favorite stamp designer, Lynne Perrella, to create a vintage inspired journal. 
 

Along the way, I discovered a really neat technique, which I'm calling Ethereal Bleed Through Stamping.  I shared a video tutorial on Instagram HERE.

Here you can see the front and back, with the gorgeous bleed through.  It's such a fun technique and I hope you will try it!

This gorgeous stamp is set LPC041, which you can find at TopFlight Stamps.  I also used stamp set LPC010, a true favorite!


Make sure to visit the PaperArtsy blog for all of the juicy details and thanks so much for your continued support.  Hugs, Autumn


Sep 15, 2020

Mixed Media PaperArtsy Posts for Topflight Stamps

Hello dear friends!  I have neglected my blog of late because I find it quite difficult to create duplicate posts on a regular basis.  The remedy, I have decided, is to give you a few power packed posts with my latest creations from the companies and teams to which I contribute regularly.  First up, I've chosen to share all of the PaperArtsy projects I have made this year for the Topflight Stamps blog.  This first pair of cards was posted HERE.  I shared a neat tutorial for dying tissue paper in the post.  I used stamps by Lynne Perrella and Alison Bomber for PaperArtsy. 


PaperArtsy ELB07 at Topflight Stamps

These may have been my favorite projects of the year.  I shared a mixed media journal and greeting card in THIS post.  I used the Eileen Hull Wrap Journal with one of my all time favorite stamp sets by Gwen LaFleur for PaperArtsy.  I share a really cool technique for Direct to Paper in this post, which correlates with THIS video tutorial.  

The Eileen Hull Wrapped Journal Die is hard to find!  Grab yours while you can on Amazon.


I shared a fun technique for using PaperArtsy Infusions Powders in THIS post, featuring Sara Naumann stamps and stencils.  I made another video tutorial and shared that HERE.  I used Magenta and Terracotta Infusions and stamps by Sara Naumann.


Finally, my inaugural post on the Topflight Stamps Design Team shared HERE.  These cards feature Mini Stamps by PaperArtsy with a quirky flair.  Such fun!


I absolutely love this company and am proud to be an affiliate! 
 

Aug 2, 2018

PaperArtsy Stamps Mixed Media Journal Pages


Today we begin a new challenge at A Vintage Journey.  Our hostess, Amanda, has chosen the theme How Can You Resist?  She says, "There are any different products in mixed media that you can use to do a resist technique - gesso, distress glaze, wax, embossing powder, etc. We would like you to use at least one resist technique on your vintage, shabby, mixed media, art journaling, industrial, timeworn or steampunk project."  

I was remembering my favorite resist project in a chunky little mini album I shared HERE.  Now, I had created this album to be a journal of sorts and hadn't added any pages in a while.  I decided to continue on with my theme of Passages and repeat that very fun to make resist technique.  I picked some stamps that would work well with my theme: PaperArtsy Lyne Perrella Collection (LPC011), Eclectica Emma Godfrey Collection (EEG25) and (EEG26).


I first painted my chipboard pages with PaperArtsy Fresco Chalk Acrylics in Jade and Hint of Mint.  I used the stamps as a guide to do my stencil work.  I made a stencil by using a Tim Holtz Mixed Media Thinlet die and a file folder.  I chose this design so I could add stamping of the cobblestone tile.


I used clear paste through my "stencil" on each panel.  I dried them some with a heat tool, then laid them aside to finish drying while I began work on my stamping.  I stamped each image onto tissue paper.  I find the Archival black pad works much better than a Versamark for this technique due to the oil content of the pads.  It is important to stamp over a scrap of paper.  I heat set the images, then painted the reverse with Hint of Mint and Caramel.  To cut them out, I trace around the design with a wet paintbrush then tear the edges.


I spritzed and sprinkled Royal Blood Infusions onto my painted panels.  Because PaperArtsy Fresco Chalk Acrylics are a very matte finish, the Infusions adhere to the painted surface perfectly, however the clear paste resists the Infusions.  Here's a before and after shot.


Next I used Mod Podge to adhere my tissue stamping onto my panels.  I brushed on Mod Podge where the image should go, then carefully pressed the image into the glue.  I burnished with my fingers, taking care not to move the tissue around.  Finally I went over the entire panel with Mod Podge to blend the various sheen.  When it was mostly dry, I looked for any white places where the tissue didn't become transparent and went over it with watery Infusions to blend out the white.  I added some Tim Holtz tissue tape and white embossing.


Here you can see how seamlessly the tissue blends in, even over the textured stencil work!


This sweet flower is by Petaloo.  I added some tattered crocheted ribbon, bundled string, Tim Holtz Small Talk sticker and a TH finding.


I'm totally crazy over the Royal Blood Infusions over Jade Frescos!  I decided these panels should go at the beginning of my book.  I hope you're inspired today and will play along with our current challenge.


Review this journal / mini album in my posts thus far.

See the Cloth Cover Bookmaking / Binding Tutorial HERE:


See the Cover Art Tutorial HERE:


See my Lynne Perrella Pages HERE:


See my DIY Chipboard Word Pages HERE:

You are invited to the Inlinkz link party!

Click here to enter

Jan 1, 2018

PaperArtsy Progressive Four Fold Mini Album Tutorial


Happy happy New Year!!!  The first of the year is such an exciting time and for us at Mini Album Makers Challenge because we are able to share a new array of exciting challenges and monthly inspiration and tutorials with you.


I am thrilled to announce our January sponsor is Lindy's Stamp Gang.  I have created a 4.5" square progressive style album tutorial for you and have used some beautiful sprays from Lindy's.  I hope you will take a moment to peruse the online shop.


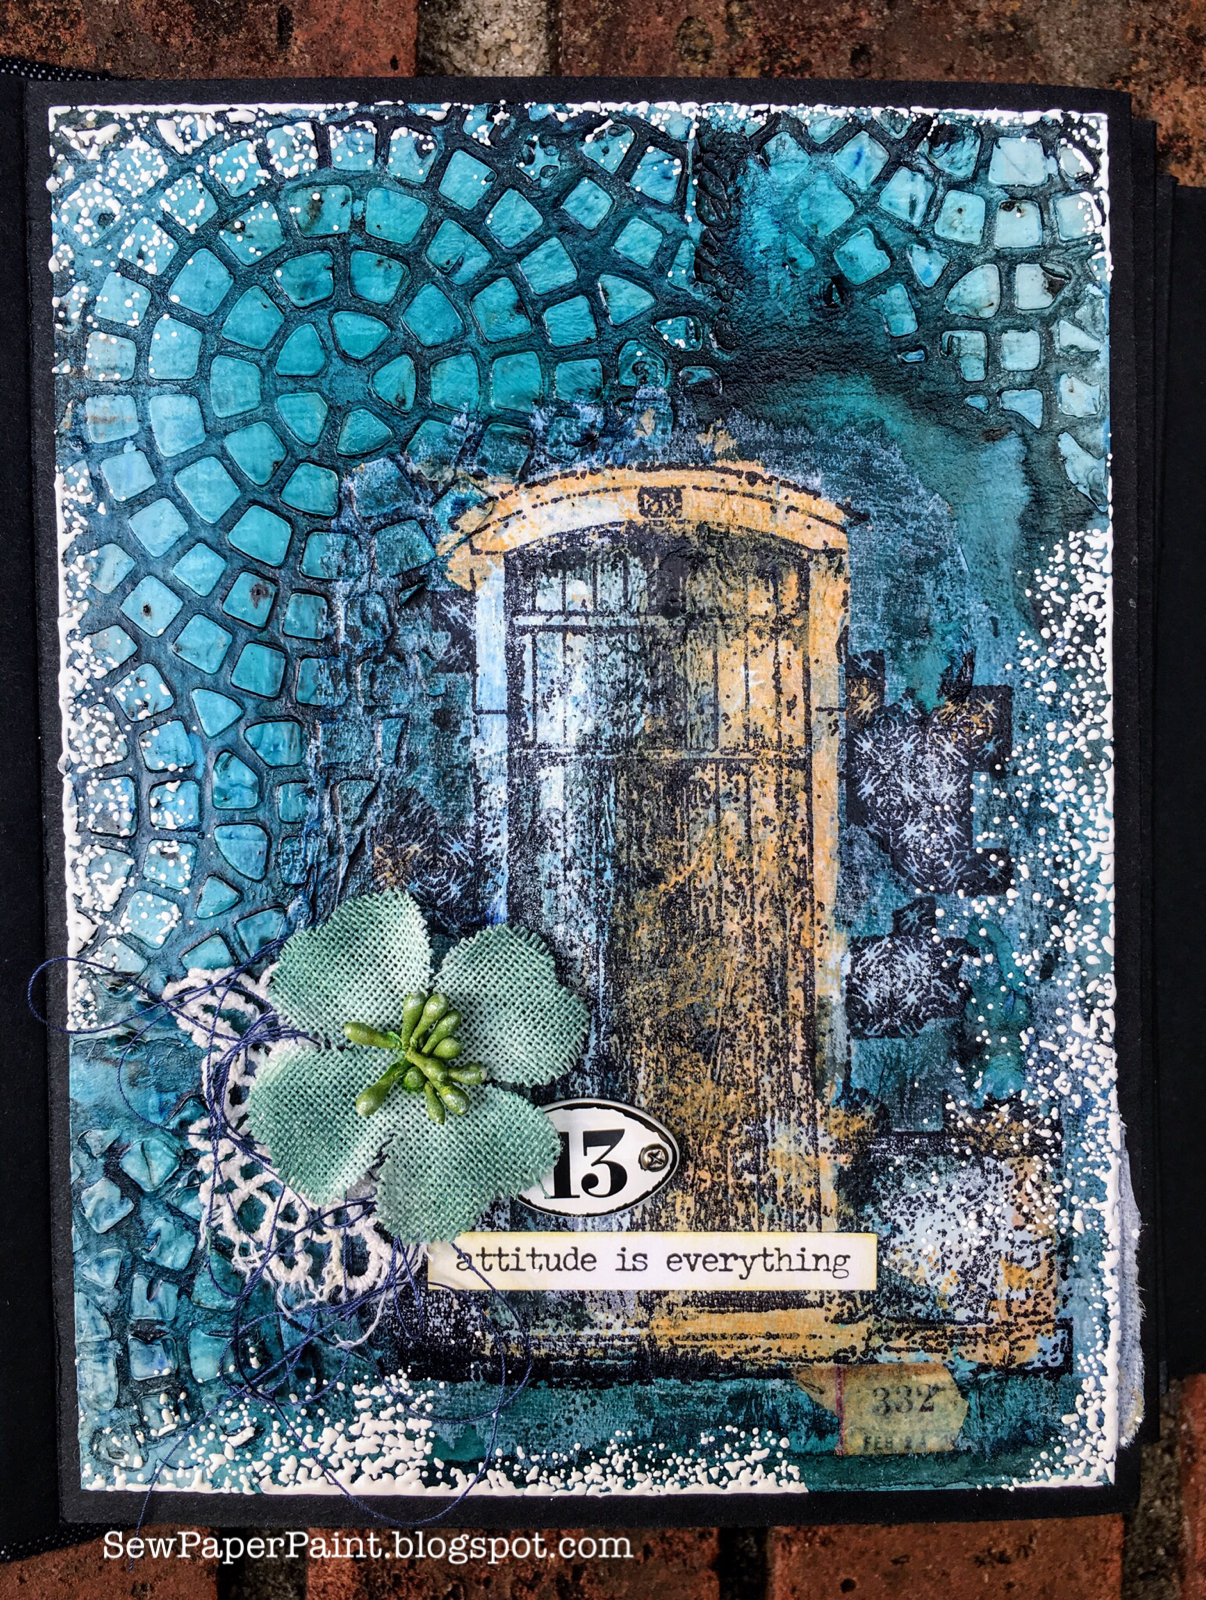
I must say I started this book in September and almost ruined it, but after a few other failed attempts for this challenge I pulled it out and gave her a good coat of gesso and started again.  Each page was stenciled with modeling paste, then sprinkled with PaperArtsy Infusions and coated with DecoArt Clear Crackle Glaze.  I wasn't keen on the vivid tie dyed color I had made paired with my white crackle cover, so I gessoed the pages and sprayed with Lindy's sprays for a much subtler effect


I used Long John's Silver Vintage Moon Shadow Mist, Sandra Dee Sepia Flat Fabio and Cafe au Lait Flat Fabio sprays over the gesso.  Now some of the Infusions colors beneath did show through, so I achieved a nice variegated look.


I unified the pages by adding vintage laces along with my 
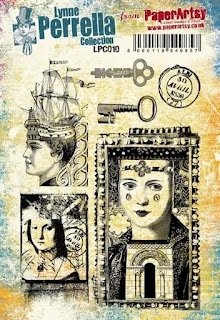
Lynne Perrella stamped images by PaperArtsy.


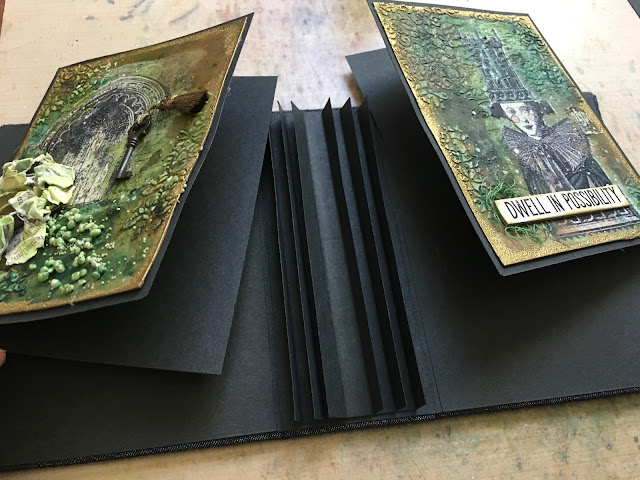
The cover boards were some my sweet friend Sara Emily and I used for her to show me DecoArt two step crackle when we met at the beach last summer.  I treasure them and wanted them to become the covers for an album.  I layered with more laces, a Prima flower and berries, Tim Holtz greenery die, a Kaisercraft wooden clock, and a vintage pom pom, tucking my smallest Lynne Perrella image into the bundle.


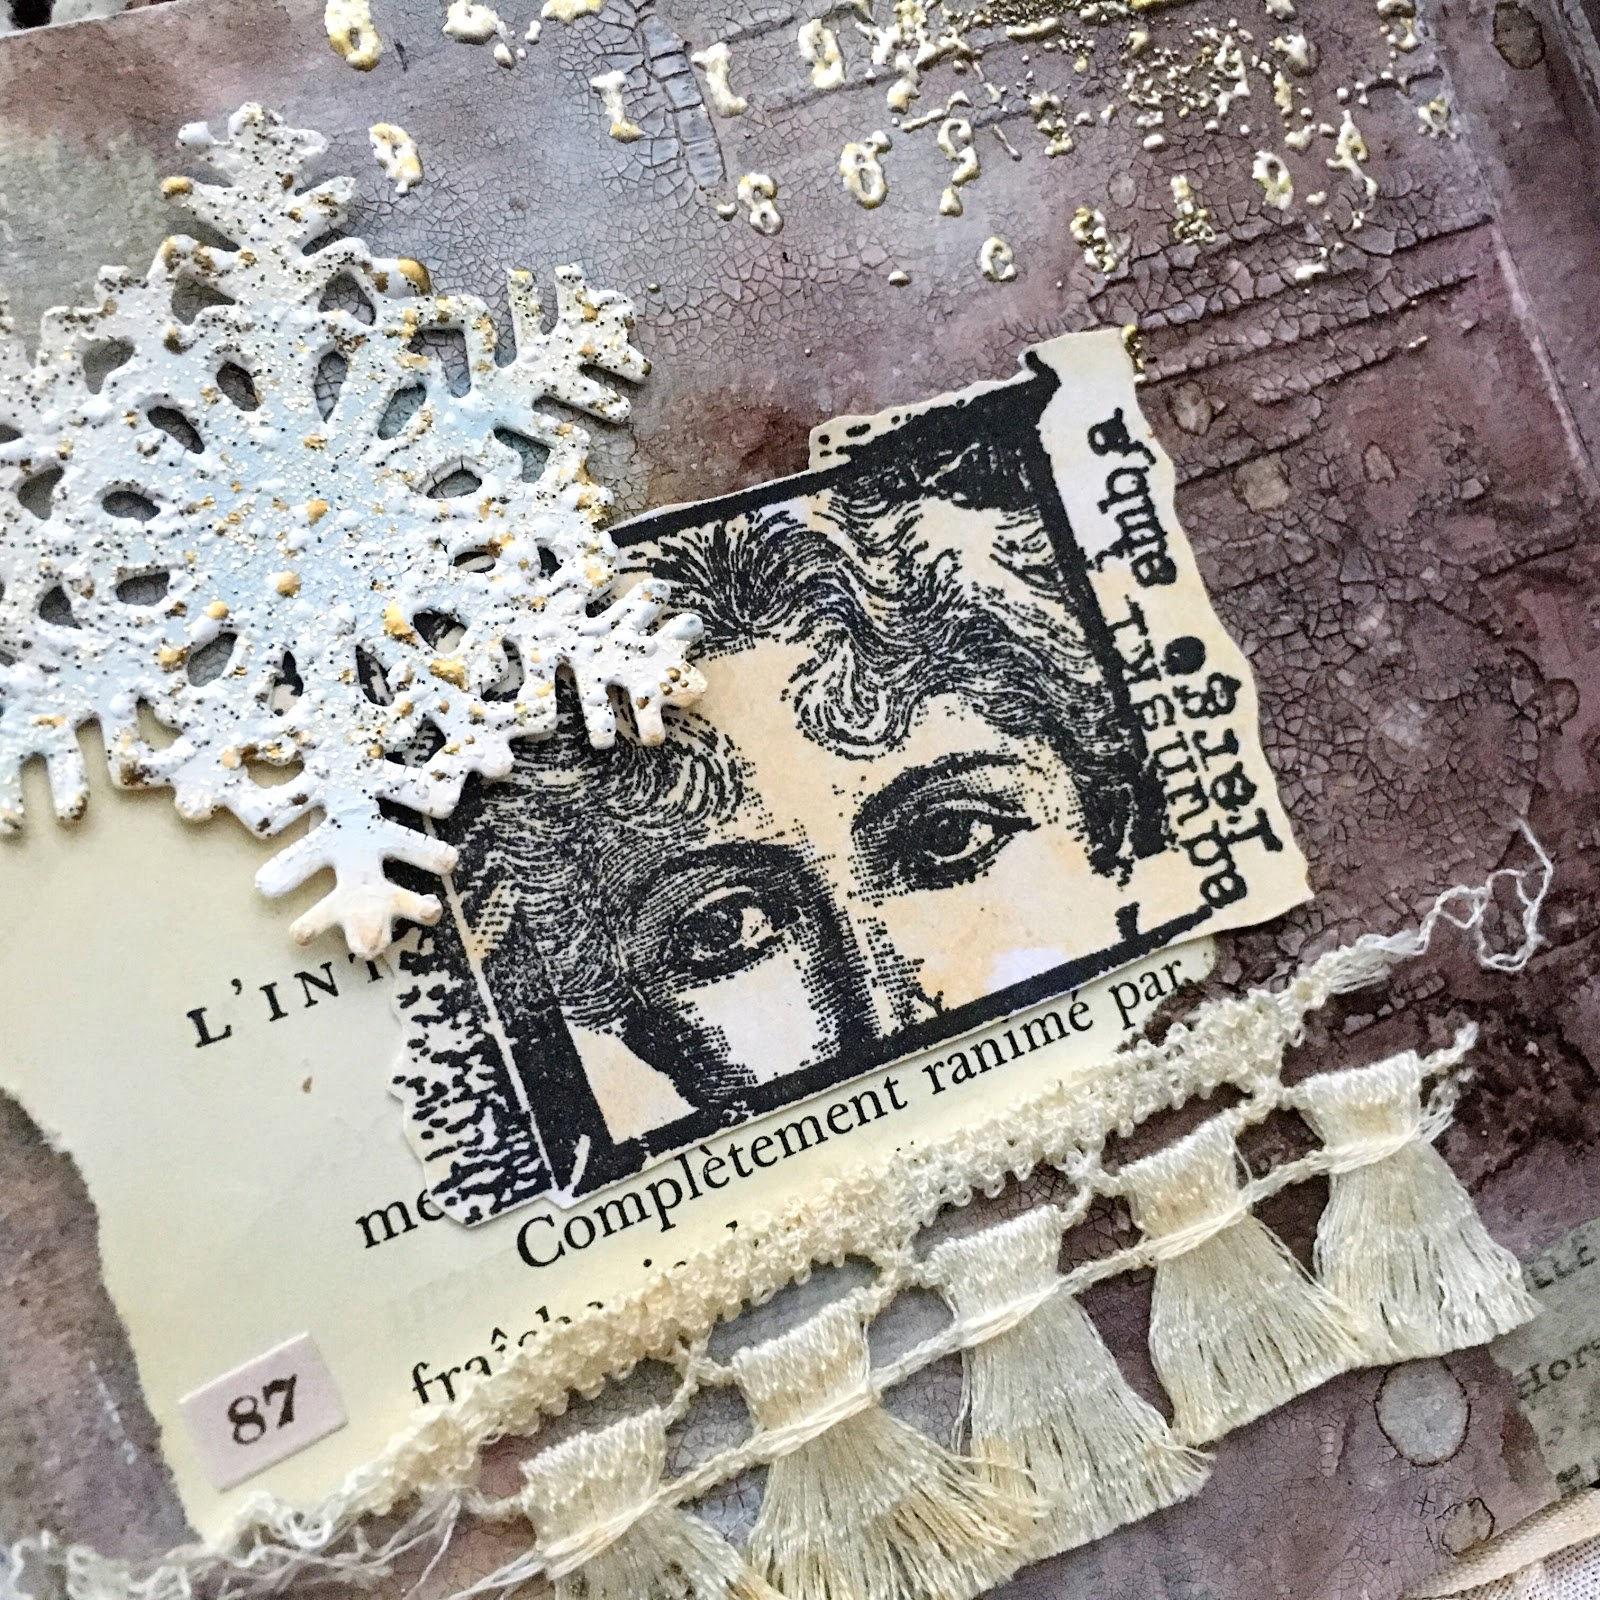
You can see that luscious crackle here.  I embossed PaperArtsy: Ink & The Dog (Mini Stamps 23) with Pewter chunky embossing powder for a bit of metallic on each page.


The sentiments are from the Tim Holtz Clippings sticker set.


The pages all folding out to tell a story of a girl with big dreams and a soft heart.  These laces are so important to me, special gifts from beloved friends.


This style of album is so easy to make and the chipboard is a perfect base for mixed media, but would be equally beautiful decorated with designer papers and layered photos. 


Start by making three spine sections.  The center of the first being 1/4, the second 3/8, and the third 1/2 with a half inch section on each side to adhere to the pages.

Cut three sections to:
1 1/4 x 4.5
1 3/8 x 4.5
1 1/2 x 4.5
Score each section half an inch from each end.


Burnish the folds well.


Cut eight chipboard panels to 4.5" square.  Use Score Tape or heavy adhesive to adhere the chipboard to the spine pieces like shown.  Flip the panels over and adhere the remaining chipboard panels directly over the base layers.  In photo three you can see how I adhered lace between my layers so that it would fringe over my pages when the album was folded up.  The section next to the largest spine will be your cover.  The fourth photo shows how I finished attaching the remaining chipboard over the adhered spine pieces.


I hope you'll pin this project for future reference.  Please let me know if you have any questions and leave me a comment with a link to your project if you try this out.  :)


I truly hope you've found the tutorial helpful and inspiring.  We would love for you to take the time to play along with our January challenge for a chance to win a $25 gift voucher from Lindy's Stamp Gang.  Thanks for visiting and have a blessed New Year!


I'm also sharing with:

Popular Posts