
Showing posts with label paper dolls. Show all posts

Jun 5, 2024

Vintage Gel Printed Accordion Book Tutorial


Hi everyone and happy spring!  I've enjoyed some playtime with my mom this spring and we've done a lot of gel printing.  I was trying to think of a way we could use our stash prints and decided we should make an accordion book.  I picked one of my favorite 8x10" prints and cut it in two to cover two pieces of 4 x 6.5" chipboard, wrapped around the sides with mitered edges.


Here is my pile of gel prints.  Honestly, I didn't put a dent in this set alone!  This project didn't take as much printed paper as I had hoped...  But it was a fun project nonetheless.


I cut two pieces of white cardstock and scored them to fit inside and adhered the overlap to make the accordion panels.  Then I glued these to each cover and covered with gel prints measuring slightly smaller than the covers, 


I looked at my wooden stamp display and was inspired by this darling Character Constructions girl and called up a good friend and asked to borrow some of her doll stamps so I could complete my book.  Thanks Barbara!


I stamped all of my dolls onto book pages and added a bit of watered Tea Dye Distress Ink to give them a slight coloration.


Next I dipped all of my die cut Tim Holtz Wildflower in a combination of Tea Dye, Walnut Stain and Rusty Hinge Distress Inks.  


I mixed in my favorite scripture stamps with other favorite old wood mount stamps.


I always enjoy stamping on old paper.  Here I tea dyed some graph paper and it was a great backdrop to the scripture.


How many of you still own these stamps.  Personally, I treasure mine!  Both my friend and I have them on display in our art rooms.  
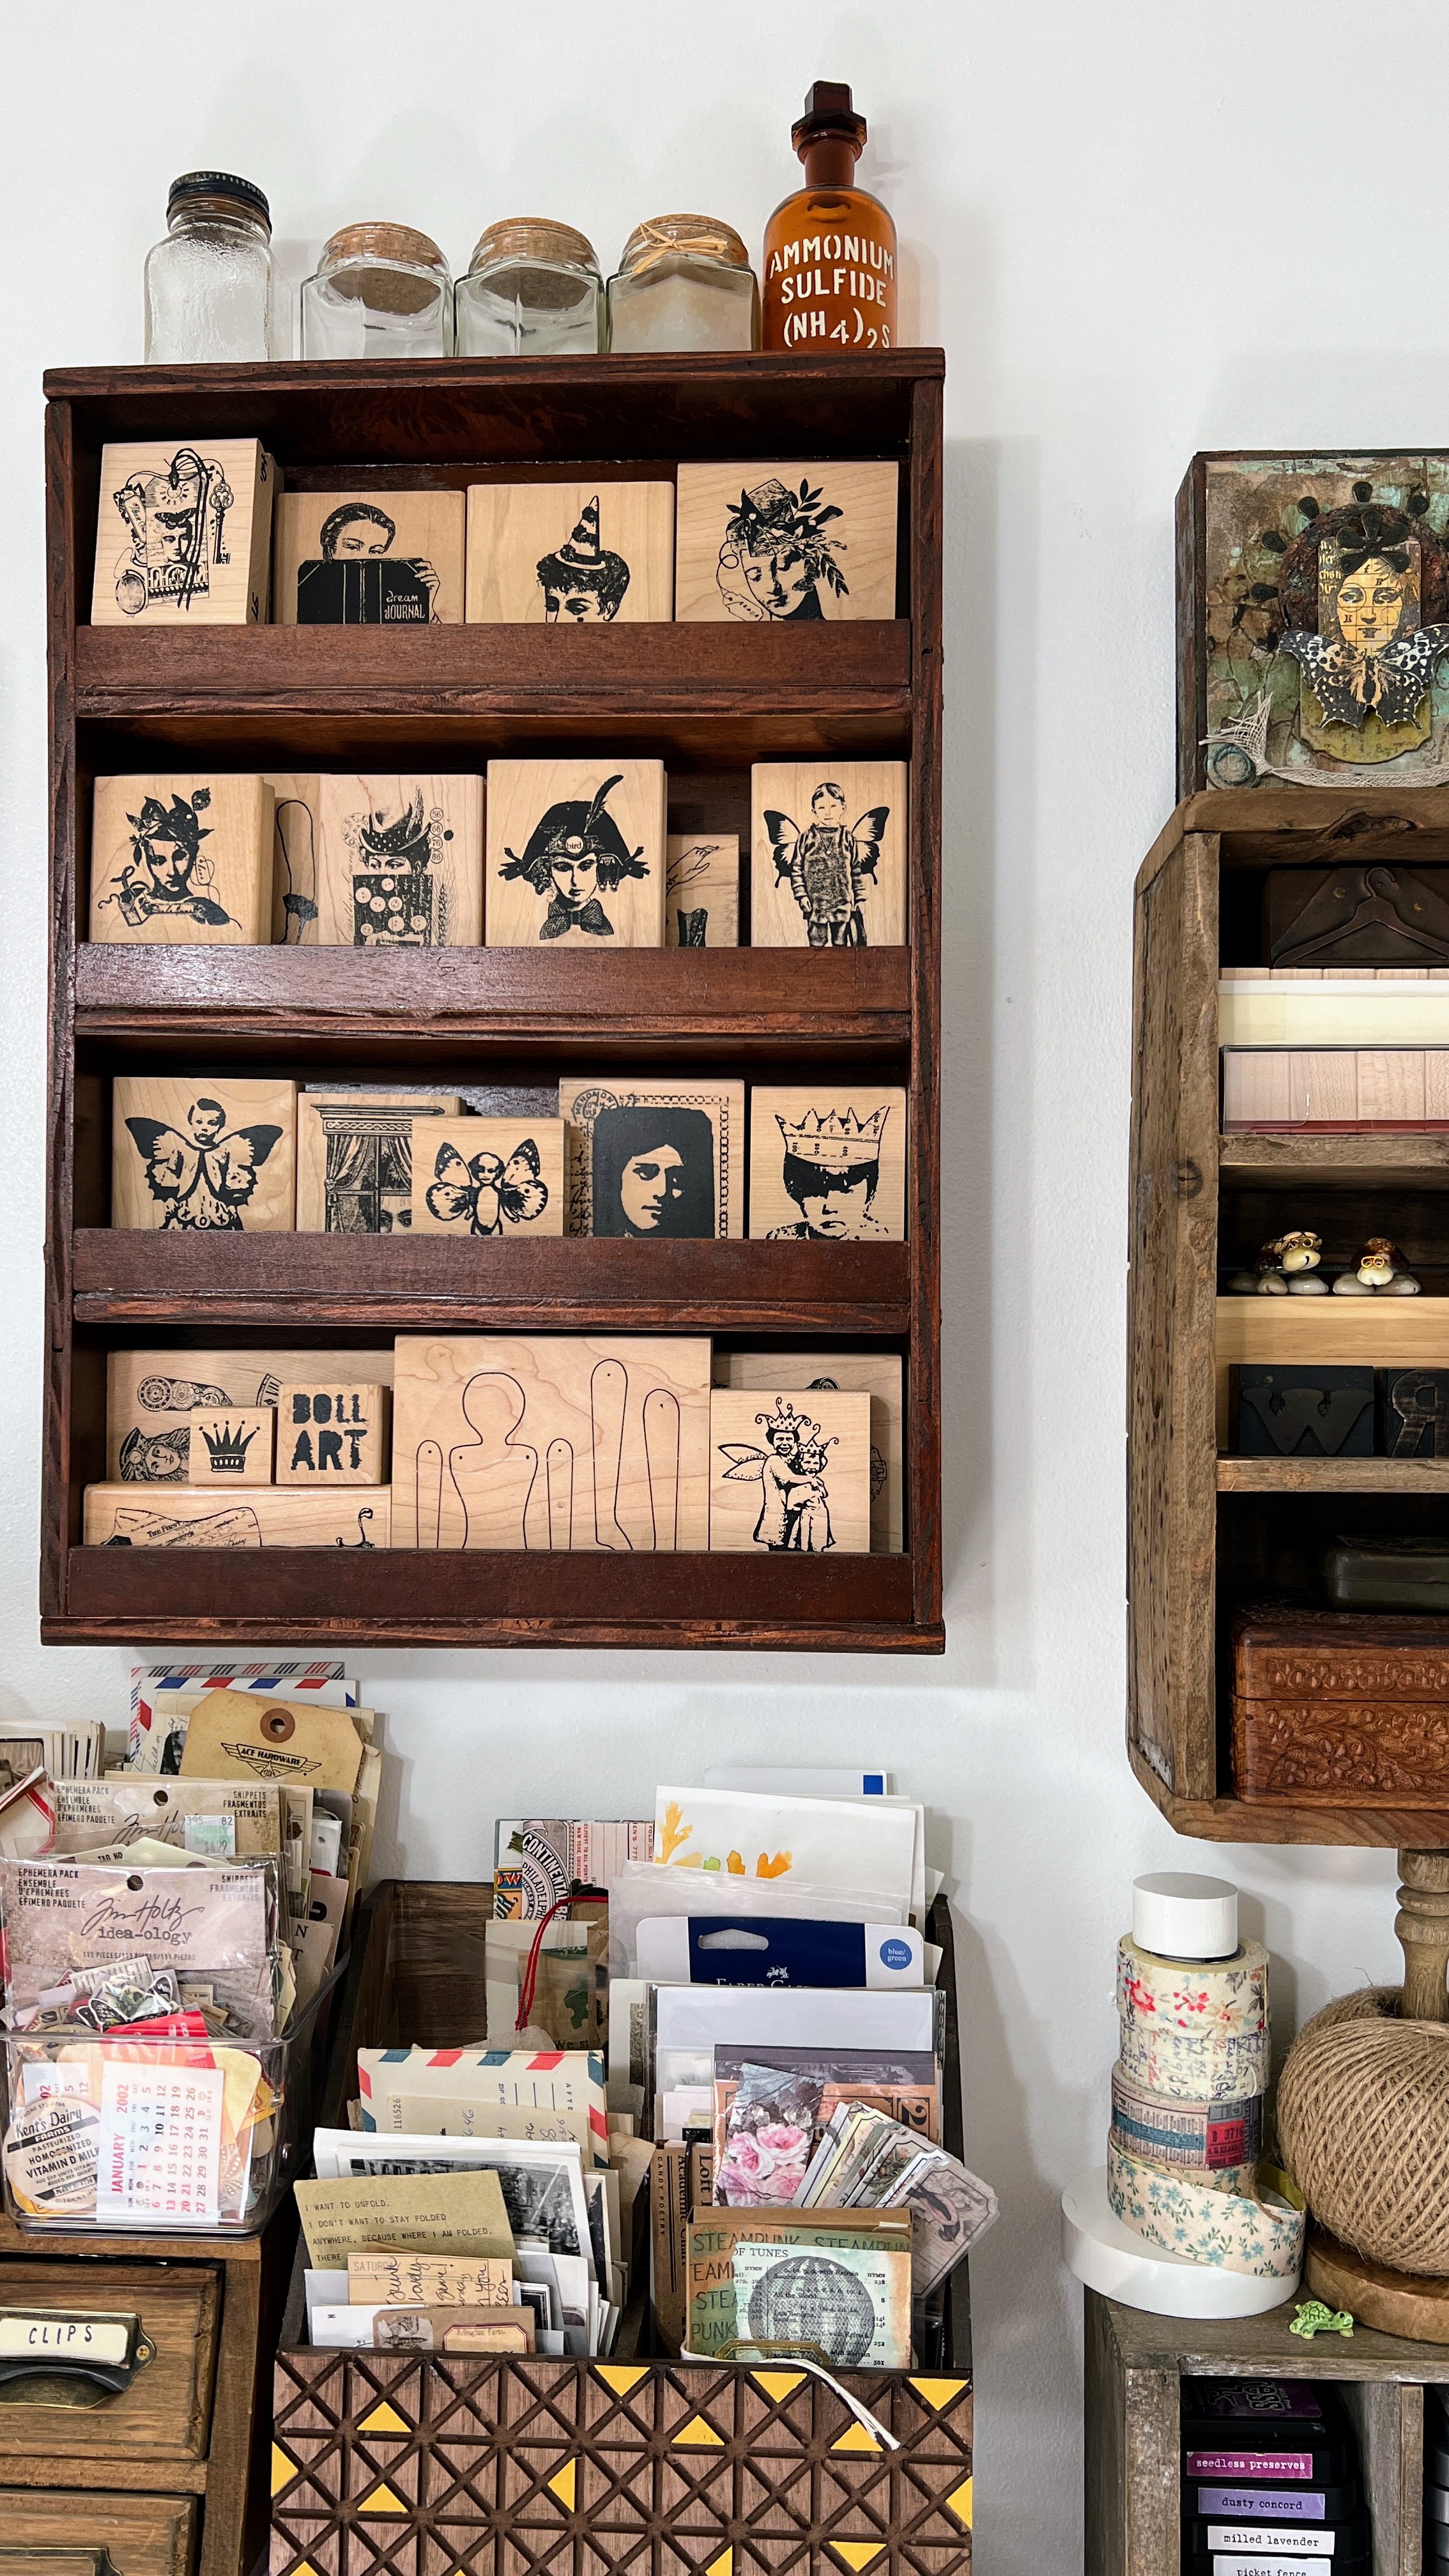

Here's a shot of mine from last year.  I've since changed things up a little, but still love this image.


I also took some free vintage label images and overlaid a typed font scripture and printed it.  I love the look and pop of aqua!


My finished book is a little busy, but fun to inspect.  I really hope it has made you smile today and has you considering how to incorporate your old stamps into your current work.  


I finished the book off with a sari ribbon binding.  
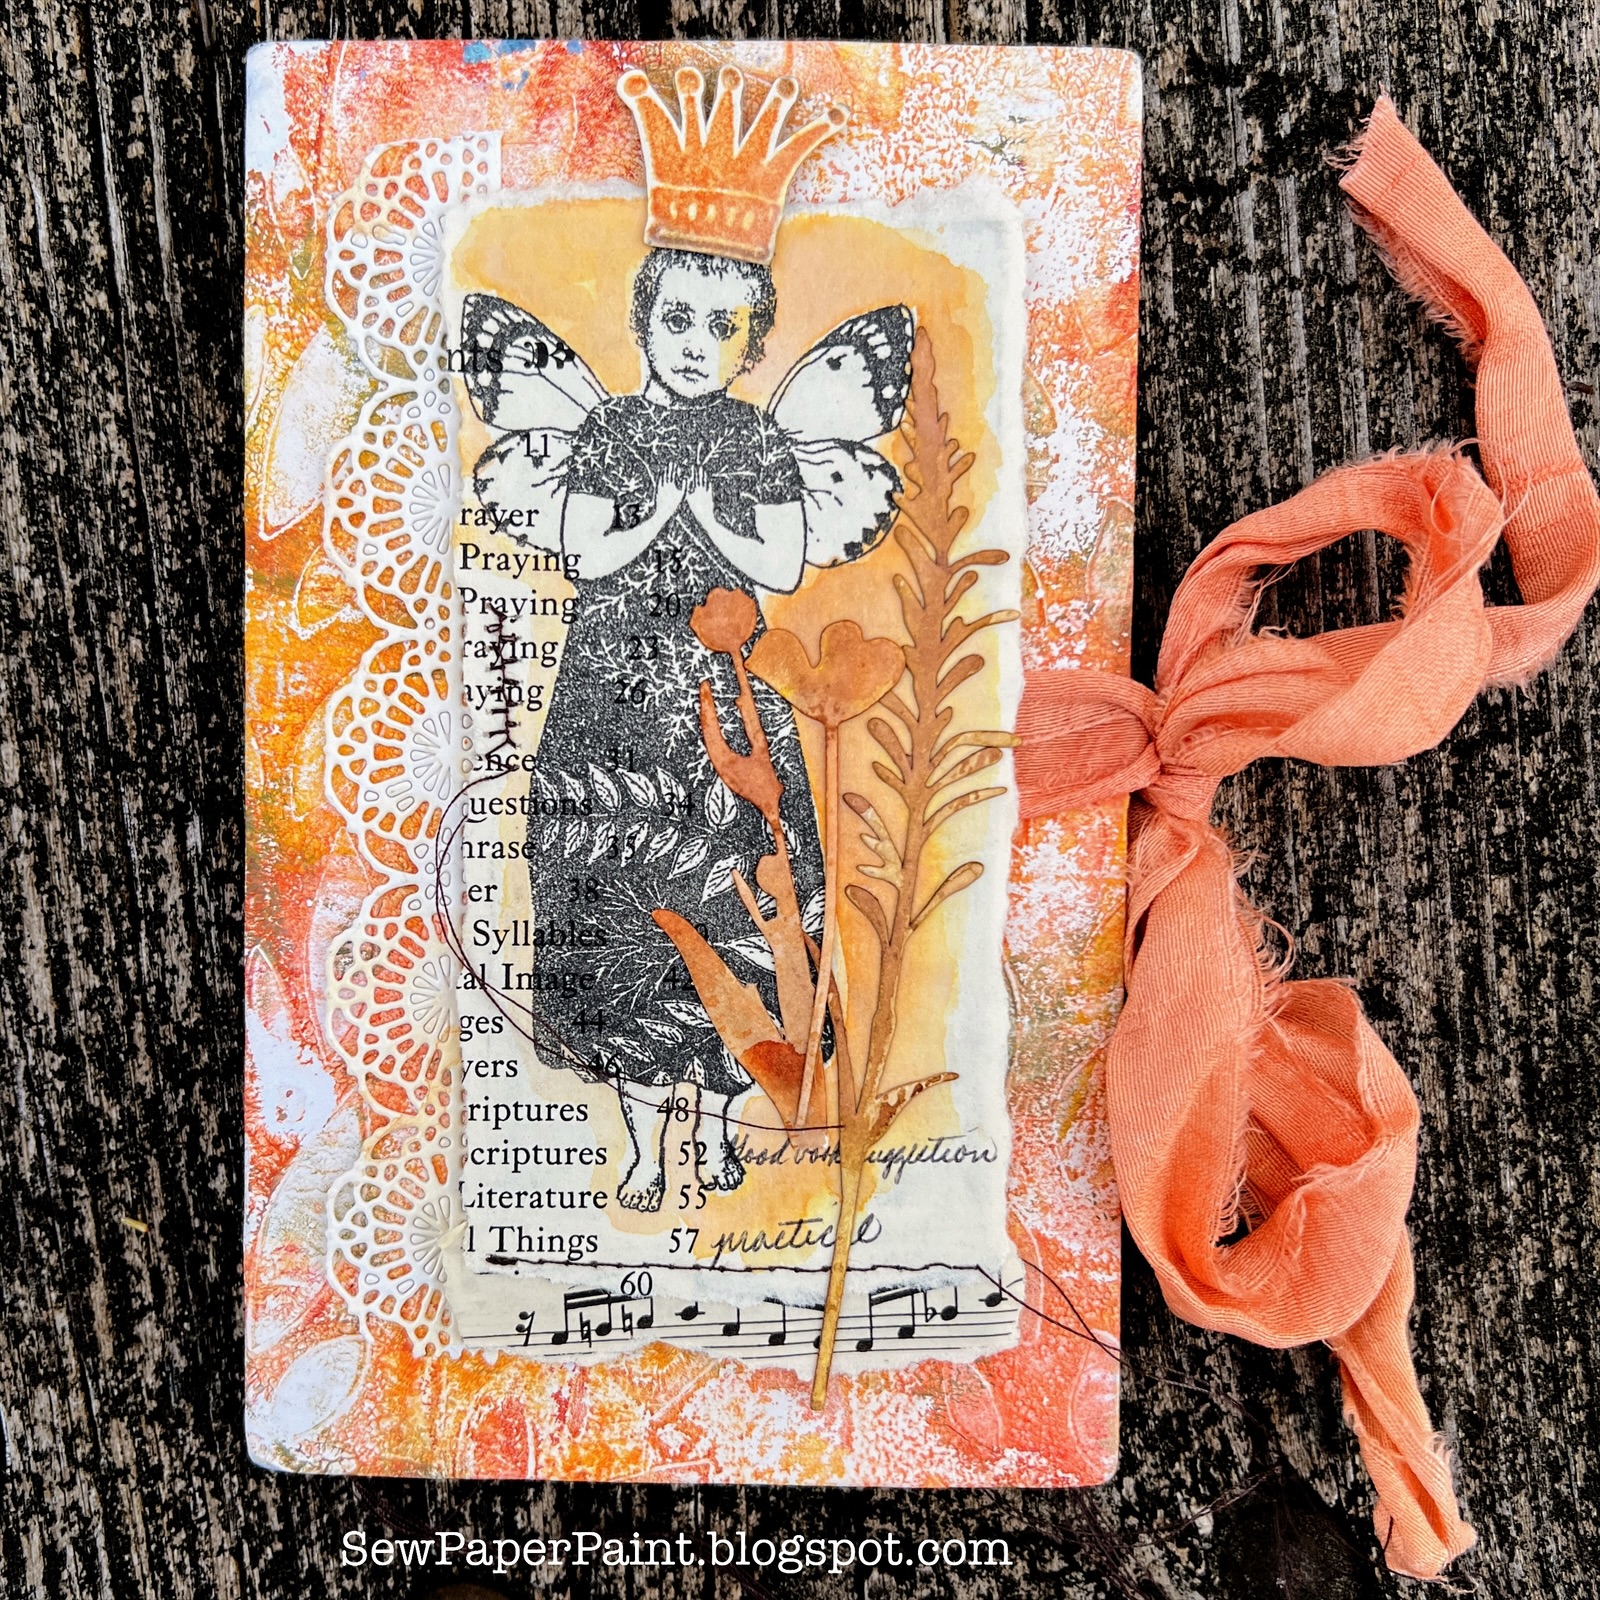

I just loved this particular gel print and was happy to make it the focal point of my book.  Happy crafting!  xx, Autumn


Aug 19, 2021

Darkroom Door Enchanted Doors Postcard Altered Book Cover


Hi everyone!  I'm so excited to be sharing my finished altered address book cover with you today!  I've been working on this journal for a couple of years, just taking my time and enjoying the process, and have finally altered the book cover.  I used chipboard to make the pages, replacing the old paper.  You can see all of the pages thus far HERE.  I have one more spread left to do.  It was complete serendipity when Darkroom Door released their new line of postcards, because the Enchanted Doors were meant to be my focal point for this book and I'm so glad I waited!

These postcards make great ephemera for your journals and mixed media. I gave mine a good sanding and distressed the edges, then dipped it in Distress Inks in Vintage Photo and Weathered Wood, stitching along the edges.  I layered over torn lace and made a faux closure with some tattered ribbon and one of my Grandfather's old keys. 

I chose a pair of paper dolls to coordinate, because I had used a lot of paper dolls throughout my book and they work so well with the doors.  They were also sanded and tinted with Peacock Feathers and VP Distress Inks.  I used gesso and Lindy's Stamp Gang sprays to tint the linen cover of my book, then made faux stepping stones with crackle paste through the Arty Circles stencil.  I sanded it some once it was dry to create highlights.

I used the word blocks from the You Are Everything stamp set and added handwriting around the postcard with a white Posca.  I added a cancellation from the Global Postmarks stamp set to further grunge up the door panel.  The brass medallion was a gift all the way from India, sent along with a handmade journal by my friend Remya.  It's a treasure to me!

I really hope this project has given you some ideas for using your new Darkroom Door postcards.  I know you will love them as much as I do!  xx, Autumn

Find more inspiration on the Darkroom Door blog!


I'm sharing with:

Simon Says Stamp Wednesday: Add a Sentiment!

Let's Craft and Create: Polka Dots and/or Stripes

Country View Challenges: Monochromatic 

Apr 12, 2021

Tim Holtz Starry Night Paper Dolls Tag


Hi friends!  I'm happy to be back with you to share my latest mixed media tag as inspiration for this week's "Not a Card" theme at Simon Says Stamp Monday Challenge.  I have been hoarding my Etcetera thickboard tags for far too long, so I chose to use one as my substrate this week.  The funny thing is that I was going to make a steampunk tag, but it turned out terribly.  I loved the background so much, so I tore everything off of it and repainted areas where the adhesive had torn away the surface and then went in an entirely different direction, a middle school dance theme!  LOL! 

I used PaperArtsy Midnight Frescos to paint my tag. Then I scraped on crackle paste and let it dry.  I went over the dried, cracked portions with PaperArtsy Infusions in In the Navy.  I added some light sponging of Space Cadet Frescos to blend the harsh lines where the crackle met the dark blue background.  I stamped the Fragments stamp by Tim Holtz in Brilliance gold ink over the painted background.  The background reminded me of a magical night, so I chose a group of young girls from Tim's Groups Paper Doll collection, who reminded me very much of girls all dressed up and waiting to be asked to dance.  Because of this, I colored tinted them with Distress Inks in fancy dress colors, AKA Worn Lipstick, Chipped Sapphire and Antique Linen.  :) 

I added distressed wings from Tim's Botanical ephemera.  I embossed Tim's 3D Faceted star die in Tinsel Gold.

I cut down the ABCs from the Field Notes Ephemera to give the girls a perching place.  I painted a Vignette Frame to coordinate and added a bit of sisal for texture.  I added the flowers also from the Botanical ephemera, sanded and dipped in watery Frayed Burlap, like I did to the butterfly wings.  This was a lot of fun to make and I'm so glad I didn't chunk the tag after my first failed attempt.  I am filled with nostalgia when I look at it.  I hope it gives you inspiration today!


Make sure to join this week's Not a Card challenge for your chance to win a $25 voucher to Simon Says Stamp. 

Jan 24, 2019

Tim Holtz New Faceted Heart and Ideaology


Hi guys!  Thank you so much for your sweet comments on my projects for the Tim Holtz Sizzix Chapter 1 release.  I had so much fun using the Faceted Hearts die for my rusty heart tag shared HERE that I decided to do another sample.  For that tag I tried to mimic pieced sheet metal, then it occurred to me I could use the Mechanics 3D texture fade to cut my heart for "easy sheet metal".  :)  I wasn't sure how the embossed panel would die cut, or if it would flatten the embossing, but it worked beautifully since it is a padded Bigz die.


I cut the 3D Mechanics from Metallic Kraft Core and colored with Distress Crayons.  I should have shared this tip in the first post, but for easy assembly make sure to crease all of your score lines with a bone folder before gluing the Faceted Heart together.


I layered lots of Tim Holtz ephemera/Ideaology together over a Paper Stash base.  I love sanding and altering this faux ephemera, distressing the edges and adding little tears and folds to give it a more authentic look.


I finished my paper doll collage with a snippet that reminds me of my own sweet boys.  Oh how I love this boy image!  I'm super excited about the new paper dolls and ephemera Tim is releasing.  Find out more HERE.


You are invited to the Inlinkz link party!
Click here to enter

Jul 21, 2018

Tim Holtz and Eileen Hull Steampunk Travelers Journal Tutorial


Hi my friends!  Today I'm sharing a steampunk themed travelers journal and a neat idea for upcycled packaging idea with you, as inspired by recent conversations on the Tim Holtz Addicts Facebook Group.  If you're not a member, you should be!  This is such an incredible group with so much talent and daily inspirational shares.


Now, normally the first thing I do when I get a haul is unpack everything and sort it into containers.  I always throw away the packaging because it takes up so much room and I have a tiny space.  I do save my acrylic packaging and use it for making shaker cards, but everything else goes.  Someone had mentioned using the backings for their projects and when I unpacked a new stencil, I saw the backing in a whole new light!  :)  I decided to cut off the top and emboss it to see what it would look like.  I lined up the folder along the bottom and embossed a second time for a continuous pattern.


I sanded the raised portions and dipped the panel in Distress Oxides (Fired Brick, Iced Spruce, Frayed Burlap), then dabbed my Veramark randomly and embossed with Seth Apter's Baked Texture, first in Rocky Road, then in Chunky Rust.  OH MY GAH!  I could have eaten it like rusty candy!  LOL!  Now, I was just playing around and supposed to be doing something else, but when I had gotten this far I just had to turn this awesome panel into something cool!  So I reached for my Eileen Hull Travelers Journal die.


I was thrilled that the stencil package backing was exactly the right width to use for this journal die, but it was too short.  To make it work with my size, I centered the rusted panel on my cover, then marked pencil lines to cut off each end.  Then I traced the front onto the back and cut off the ends of the back cover.  BTW, I used Graphix black chipboard to cut my covers.


I used the cut off portion to help mark new holes and cut those with my Crop-o-Dile.


I wrapped a piece of Tim's tissue tape around the spine of my front panel and extended to the inside so it didn't come off.  I put a bit of glue stick below it, then sanded it and coated it with matte varnish. This worked perfectly to remove the sheen and seal the tape.  Next, I lined my insides with Tim's Dapper paper stash.  I ADORE this script!  This time I lined the center panel, which is connected to the back side when the covers are sandwiched.


You can see how great it looks inside without the mass of black space.  I like making my journals with two inserts so the spine lines up better.  I used more Dapper paper and kraft paper with a long reach stapler to make my inserts.  I left things simple inside for the recipient of this journal to customize.  I have to say how much I LOOOOOVE the kraft paper inserts!!!  I cut my sheets all to 8.5 x 7" and folded them in half for a finished insert of 4.25 x 7".  


I put a huge stack of books on them to help them flatten, since kraft paper is a bit thicker than copy paper or graph paper, which I usually use.  I only added 4 sheets of kraft to each insert.  I wanted room for ephemera and pockets, and maybe a pen inside.


Now back to that collage...  I used one of Tim's older ephemera pack to build my composition.  I sponged a Small Talk sentiment with Antique Linen DOX.  I tried tinting my paper doll, as inspired by the one and only Paula Cheeny.  Only I don't have any Distress Markers.  So I tapped my ink pad onto my mat then used a dry brush to paint him.  I had sanded him, so you see how those areas accepted the ink more.  I sealed him with Distress Micro Glaze.


Behind him I added a die cut Bigz Gadget Gears #2 cut from chipboard and repeated the same embossing process.  I added some Fluted Fasteners in all of the corners with a brush of Prima Rust Paste, watered black gesso, and Walnut Stain DOX.  I covered the backs with the interior lining as shown above.


Oh my gosh how I love those gears!  Now, I used an old gear texture fade for my background, but imagine this technique with Tim's new 3D Mechanicals Texture Fade!!!  What!  #wishlist  The only thing missing is a matching back panel, so I need to buy a new stencil for that packaging!  I truly hope you've been inspired by this post and have thought of some new ways to use your packaging and die cuts.  Have an amazing weekend, Autumn

You are invited to the Inlinkz link party!

Click here to enter

Popular Posts
