Showing posts with label Stampin' Up!. Show all posts

Mar 24, 2020

Stampin Up Parisian Forever Blossoms Cards


A quick post before Sale-A-Bration ends to share a trio of cards I made with the Forever Blossoms stamps and dies.  If you purchase this set before March 31, you can pick one free item from the Sale-A-Bration collection. 


I decided to stamp an entire sheet of 8x5x11 paper with the cherry blossoms in Night of Navy to make my own toile pattern.  I cut the panel into four card fronts.


I used sentiments from Good Morning Magnolia embossed in white onto Stitched So Sweetly dies.  I used a different orientation for each card and added a different color way too.  This first one was sponged with Call Me Clover.


The second and all of the flowers were sponged with Crushed Curry.  The final card was left white and I saved my fourth piece for a future design.  So which is your favorite? 


If you order through these links please select demonstrator Carol Lee in SC, who has graciously shared her stamps and inks with me.  I hope you're feeling inspired to make some patterned paper of your own.  Hugs, Autumn


I'm sharing with:

Mar 11, 2020

Good Morning Magnolia Stampin Up Watercolor Card


Hi there!  Today I'm sharing my finished cards from one of my The Daily Marker 30 Day Coloring Challenge plays.  I had been itching to do a full panel repeat print with the background colored in.  I finally broke down and took the time.  Why is it that I don't make more little moments to follow my muse outside of a challenge?!  I am just so happy with how this turned out and wanted to share my tips with you.


I tapped a palette of Always Artichoke, Delightful Dijon and Soft Suede onto my glass mat (Mossy Meadow and Crushed Curry would be good substitutes for the two discontinued colors.)   The trick to watercoloring backgrounds around images is to keep your brush nice and wet so you don't get harsh lines.  I used small flat (stright) and angled natural bristle brushes, rotating the panel so I could get in the nooks and crannies. 


I kept every stroke nice and organic, and at the end made the stems and leaves more detailed to provide contrast against the background.  I used the leftover ink to make the splashes.  At this point, you could go in and added details with a sharpened colored pencil, but since I was using it for a background I didn't need to add that much detail. 


I cut the 6x4" panel in half to get two cards from it.  I used the coordinating stamp and die to make the sentiment and colored a couple more little blossoms, which I popped up as the main focus of the card.

I wanted to do another card with the large magnolia.  I colored it with the same inks, only tried to take more care with shading, etc.  I cut it with the coordinating die and then dipped a panel in the leftover Always Artichoke to make a background. 


My panel was 6x4", so I cut off the bottom section to make a card front.  I decided to use it for my sentiment.  To create contrast, I used the "Subtle" 3D embossing folder  on my background.  


I finished it off with some thin jute and glittered stickers/Stickles.  I hope these cards have inspired you today.  This is my favorite Stampin' Up stamp set probably EVER!  The designer paper is just as beautiful, but I don't have it yet. 


Make sure to select Carol Lee from South Carolina
as your demonstrator when shopping the links below:

https://www.stampinup.com/ecweb/product/151087/good-morning-magnolia-bundle
https://www.stampinup.com/ecweb/product/149298/good-morning-magnolia-cling-stamp-set

Mar 4, 2020

2020 Stampin' Up Sale-A-Bration Cards


Two of my dear friends, Barbara and Carol, have just become Stampin' Up demonstrators and I am happy to share a few projects with the all new 2020 products. My first card was made playing with the gorgeous ink colors: Soft Suede and Crushed Curry. 


I blended the inks with a makeup brush, then stamped first and second generation images of the vine to make the undergrowth.  I stamped the flourish medallion and fussy cut it, then stamped the sentiment in Night of Navy and fussy cut it to layer over the medallion.  I stamped portions of the script/text by curling the stamp in my hand (not mounting to a block) so that only part of the stamp made an impression. 
https://www.stampinup.com/ecweb/product/149275/very-versailles-cling-stamp-set


I decided to play with another color palette: Calypso Coral, Coastal Cabana and Crushed Curry.  I mounted the sentiment strip and tucked in some mini pom pom fringe from my stash.  I accented the flowers with gemstones from my stash. 
 

https://www.stampinup.com/ecweb/product/151345/dandelion-wishes-cling-mount-stamp-set


This card was made at our local stamp Saturday with Dixie Sue, Barbara and Carol's upline.  I went my own way with the card.  We used Aqua Painters with watered down Pigment Sprinkles.  I did a wash over my watercolor paper, then stamped the palm trees in Crumb Cake and went back over them to add watercolor details.  The sentiment was stamped on torn vellum and the Gumballs were from my stash. 

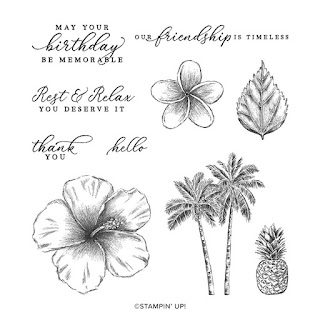
https://www.stampinup.com/ecweb/product/151497/timeless-tropical-cling-stamp-set-english


Since it's Sale-A-Bration time, there are freebies to be had!  I fell in love with this cakestand from Happy Birthday to You.  I colored it with my Zig markers and used the coordinating Birthday Dies (available for a very limited time).   I used the Tin Tile 3D Embossing Folder for my background.  More Gumdrops from my stash. 


And I finished up my cast off card.  We made the Lots of Happy Card Kit when we were away on our girls weekend recently.  The kit is designed to make three of five cards.  I stretched my elements to get seven cards.  We used SU ink pads to watercolor.  I pulled the stamp set from the Notes of Kindness Card Kit for some of the cards.  I've made both of these kits now and L. O. V. E. them to bits! 

Sep 9, 2019

Tim Holtz Festive Funky Poinsettia Christmas Cards


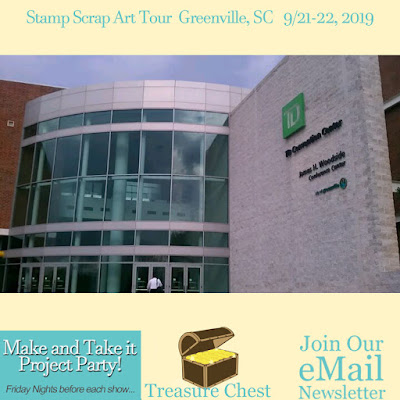
Hi friends!  I picked up a few of the new Tim Holtz Christmas dies by Sizzix at the Stamp and Scrapbook Expo this past July in Duluth, GA.  For those of you in the South, this was my first time going to this show and I loved it!  But I am super happy that the Stamp Scrap Art Tour has come back to Greenville, SC FINALY!  I'm going to the Friday make and take and show on September 20-22.

https://stampscraparttour.com/greenville-sc-sept-21-22-2019/


I only got three new dies, the Poinsettia Pieces, Large Funky Festive Florals and the Adorned scrolls.  I'm desperate for the Crochet lace dies, but they weren't in stock.  I called my good buddy @carolinasweetlee for a messy play day.  We had a ball die cutting and dipping. 


I am soooooo happy that Tim released a jumbo sized funky floral!  Especially for Christmas.  I paired it with the Poinsettia Pieces as a background and some older TH stamps.  I added a little glue stick and Ranger Foil sheets.  I kept the vintage vibe by spritzing my Festive Overlay sentiment and blotting it to give it a more faded look.  


The numbers from the Merchant Stamp Set were embossed in Ranger Princess Gold.  I love this set so much and try to use it whenever possible. 


I've shared a couple of videos on my Instagram page (@sewpaperpaint) on layered stamping using Tim's Stamp Platform.  I made this background using that method with Festive Berries, Aged Mahogany and Faded Burlap Distress Inks and the Ornate and Lace Stamp Set.


I omitted green and added gold embossing to my Adorned scroll die then embossed the panel edges to coordinate.  I cut a window with the Stacked Archway die and put a piece I had made long ago with one of Tim's background stamps and Distress Embossing Powder inside.  I overstamped another Festive Overlay sentiment in black.  I am so glad Tim is releasing more and more sentiments.  :)


My last card is a mop up panel with Antique Mahogany and Festive Berries and that Ornate and Lace stamp again, but embossed in gold.  I embossed the sentiment from Festive Overlays in Ranger's new embossing powder, Vintage Pearl.  It may be hard to tell, but this is an off white embossing powder.  See how it coordinates with my vintage baker's twine?  Usually when I use white embossing powder my twine looks super dirty!  LOL!  I cut the sentiment with the Stacked Baroque dies and added some eyelets for dimension.  I'm so happy I finally finished and mounted these cards.  They are my first three of the year for Christmas. 


I was in the mood to finish them after attending a Dixie Sue stamp party locally where I made the projects below from the Stampin' Up! Holiday 2019 catalog.  What fun!  I shared more details on Instagram, so make sure you're a follower.  Have a great day friends!


I'm sharing with:

Winter Wonderland: Use Your Favorite Embellishments

Check out my custom curated product guide in the Inlinkz  collection by clicking below:

You are invited to the Inlinkz link party!
Click here to enter

Apr 16, 2018

Yellow Authentique and Verve Stamps Mother's Day Card


Happy Monday friends.  Today I'm sharing a sweet and simple Mother's Day card  made for the latest Verve Stamps Inspiration Challenge.


I was happy to settle in and make a Mother's Day card with this gorgeous Verve Stamps sentiment.  I have tons of 6x6 paper pads in my stash and pulled out this older Authentique paper and did some simple layering with a Stampin' Up die cut gifted to me by the sweet Debbie Mageed of Secrets to Stamping.  I finished with a Prima flower, twine bow and little ribbon bow made from the freebie in a Funkie Junkie Boutique package.  :)  I hope this burst of yellow brightens your day!


I'm sharing with:

Popular Posts