Mar 31, 2023

Darkroom Door New Stamps & Inky Distress Backgrounds

Hello friends!  I'm absolutely delighted today to be sharing a couple of samples I made for the latest Darkroom Door stamp release!  This is a fabulous release and I know you will love the stamps as much as I do!  For my first card, I made a super inky background using Distress Oxides in Rusty Hinge, Tumbled Glass and Ground Espresso, drying between layers.  Then I stamped the fabulous new This Way Abstract Stamp over top.  It's easy to mask off the portion of the stamp you don't want to ink to create a shorter image, but honestly I cut my stamp in half!  Ha ha!  With deeply etched red rubber mounted stamps you can easily piece the stamp back together.  I wanted a portion cut for a standard card width and another portion for the standard card height for ease.  Then when I want the full stamp, I just puzzle piece them back together onto an acrylic block or stamp platform.  :)


For my focal element, I used my trusty Butterfly Eclectic Stamp, watercolored to match.  I layered it over a torn table of content from an old book and some bundled string.  I thought it looked like the butterfly was emerging from a crack in the background...?


I finished by stamping the new Enjoy Today Small Stamp onto an inky panel and cutting in a similar arrow shape.  


For my next card I created a two-toned inky background by dipping the top half in Antique Linen and the bottom half in Speckled Egg Distress Inks.  I then splattered both colors and some Walnut Stain onto the panel for a genuine speckled egg look.  I stamped the new Thin Sticks Abstract Stamp in Walnut Stain across the color intersection.  What a cool stamp this is!  


I stamped and fussy cut images from the Love Birds stamp set and layered them as shown.  For the sentiment, I curled the edges with a toothpick.  I just love the Thin Sticks stamp with this bird set!  I hope these cards have inspired you today and you'll head on over to DarkroomDoor.com for more inspiration from the talented Creative Team.  xx, Autumn

Mar 29, 2023

Shabby Chic Cards with Studio Light Ultimate Craft Collection


Hi friends!  I'm back today with a set of shabby chic dimensional cards made with the Blooming Butterfly Ultimate Scrap Collection (SL-BB-PS20) by Studio Light.  What a beautiful collection this is!  You get four double-sided patterned papers and two double-sided element sheets.  I used one of the element sheets, which has 12 floral cards, as the focal elements for all four of these cards.  


I used the second elements sheet, which has fussy cutting elements, to add accents to my designs.  I cut everything out and then had a good old time assembling my finished cards.  I finally got around to making some handmade flowers using the Blooming Butterflies Cutting Dies, (SL-BB-CD485) for the pink flowers and (SL-BB-CD483) for the daisies.  


I mixed in adhesive pearls by JMA, some crocheted laces, a couple of die cut pieces from older Grunge Collection sets, (SL-GR-CD26) for the magnolia petals peeking out behind this card and (SL-GR-CD198) for the notebook paper edge.  


I used the Lemonade Paper Pad for my mounting and some of the die cut backgrounds.  This gorgeous lacy die is called Swirl Frame (SL-ES-CD466).  I tore it into sections to use where it worked best with  my designs.  


I added a seam binding bow and wadded up strings for dimension.  


I was so happy with how the handmade flowers turned out.  For the Daisy I spritzed the petals (cut from Bristol) with water then lightly added Squeezed Lemonade Distress Ink in the centers, letting the ink bleed out on the wet petals.  For the pink flowers, I used a combination of watered down Spun Sugar and Worn Lipstick to dip each layer into.  


I curled all of the butterfly wings with my bone folder.


On this one, I added some of my vintage yellow trim, adhered with Studio Light tearable tape.  


I just love making these types of layered cards!  Playing with printed paper is a creative reprieve that I really enjoy from time to time.  This collection was a joy to work with.  I hope the cards brightened your day.  xx, Autumn


Studio Light Papers & Dies


Mar 28, 2023

Topflight Stamps Birthday Blog Hop Rocking Circle Cards with Jofy PaperArtsy Stamps


Hi friends!  It's Topflight Stamps 6th birthday and to celebrate, I’ve teamed up with some great designers to showcase celebratory projects using the unique products available at Topflight Stamps. Please hop along with us and see all the beautiful talent from this group of amazing designers! There is a master list of Hop stops on the Topflight Stamps blog! We are also Hopping on Instagram! You can start at the Topflight Stamps account @topflightstamps.

Did we mention there will be prizes?

To celebrate, I decided to share a quick tutorial with you on using gel prints to make rocking cards - how fun!  First, let me show you how I made a couple of bright and cheery prints for my backgrounds.  I used my 8x10" Gel Press printing plate, but for this project you could use a 6x6" or 5x7" plate, as you only need two 5.5" circles to make four cards.  


I started with a color palette of PaperArtsy Slimed, Bubble Gum, Cherry Blossom, Sargasso, Aquamarine and Cloud 9 Fresco Chalk Acrylics.  You can see I added a tiny blob of each color along my plate.


Next, I used my small 2" Speedball Brayer to blend the colors all around.  I was careful not to mix the colors, but to blend them in small sections and brayer off onto a scrap paper before switching colors.  


Because I used a lot of colors, even with the smallest blobs of paint, I still had a very wet gel plate.  I wanted to leave a lot of the color on the plate, so I pulled my print by only tapping lightly on the paper.  You can see the result below.  


This left a lot of good paint for me to continue to work with.  Those built up layers are what you want when making gel prints, so never clean your plate!  ;0  Now, I added PaperArtsy stencil 309 by Jofy (PS309) to my plate and added a few dabs of paint to brayer OVER the stencil.  I tried to add the colors in contrast over the base colors.  


I lifted the stencil then pulled some of the dark pink dots onto my first print by lightly bending my paper and pressing lightly into the paint.  


There was still plenty of paint left for a second print.  The second prints are usually the best because you've built up your layers.  This is the one I used for my cards.  


Next, I took the largest cutting dies from the Crealies XXL Nesting Circle Dies and cut four circles from heavy white cardstock.  Then I took the next size and cut two circles from my gel prints.  I folded all of the circles in half and creased with my bone folder.  I cut the printed circles in half.  


Next I worked on my focal images, the beautiful rainbow stamps by Jofy for PaperArtsy, JOFY110.  I stamped them all out onto Bristol using Versafine ink and heat set them.  I stamped an additional image onto a post-it note to create a mask, then used my Studio Light Ink Blending Brushes to sponge the circles from the coordinating stencil by Jofy for PaperArtsy (PS308) around the stamped rainbow.  My Wendy Vecchi Stay-tion worked great for this!  I chose coordinating Distress Inks, choosing Tumbled Glass, Twisted Citron and Picked Raspberry for the sponging.  


I got really excited at this point, seeing all of those loopy borders after removing the mask.  


I used my Prism Brush Markers to color the rainbows and adhered my pieces, layering with stamped clouds from the Studio Light Art by Marlene Sunny Days stamp set, which I tinted to match.  


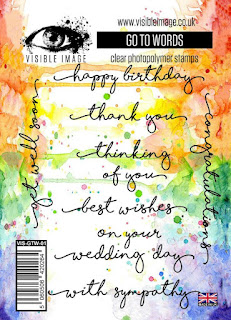
I stamped the happy birthday sentiments using the Visible Image Go To Words set.  I really enjoyed mixing up the color scheme based on the portion of the gel print I used for each background.  As a bonus, the cards rock when you touch them!  Make sure to visit my IG @sewpaperpaint for video clip.  If you haven't tried this style of card or played with your Gel Press in a while, I do hope you've been inspired to do so today!


GIVEAWAY DETAILS
Of course, it wouldn’t be a birthday celebration without prizes! Topflight Stamps is giving four lucky winners $50 Gift Certificates to the store. Two winners will be chosen from commenters on the blog hop and two will be chosen from commenters on the IG hop. For a chance to win, make sure to visit the stops on the hop and leave a comment by April 1st. Winners will be announced on the Topflight Stamps blog on Monday, April 3rd. Please note winners must be US Residents for shipping purposes. Good Luck!


Find these stamping products at Topflight Stamps!


Popular Posts