Jun 14, 2016

Tim Holtz Creative Chemistry 101 Tag Play

tags
 I couldn't let the opportunity pass Tim Holtz's Summer of Creative Chemistry pass.  Though, I have joined in almost two weeks late.  I am committed to setting aside time in the evenings, after work, to working on these classes.  After all, the kids don't want to sleep and I'm staying up late anyway!  YIKES!  Anyway, though my tags are quite simple, I thought I would share.
CC

tags 2
One thing I am trying hard to do is break out of a monochromatic color palette when I mix inks.  That is so hard for me.

tags 3
I only have six sets of Tim's stamps and sadly the set I used in the background and for the text here actually decomposed!  I'm so sad because it had never been used, but the clear material just crumbled when I tried to remove it from my clear blocks.  So now I have FIVE sets.  LOL!  This is why I love red rubber!

tags 4
For this tag I didn't have the specialty stamping paper, but used Marco's matte coat paper.  I think the result is quite similar, though the yellow didn't resist, which you can't see anyway because of the vellum.

tags 5
I really love the Distress stain stamping!  What a pretty, subtle resist. Thank you for looking and I hope to see you in the classroom!

tags 6
I'm sharing the CC101 fun with:

Jun 13, 2016

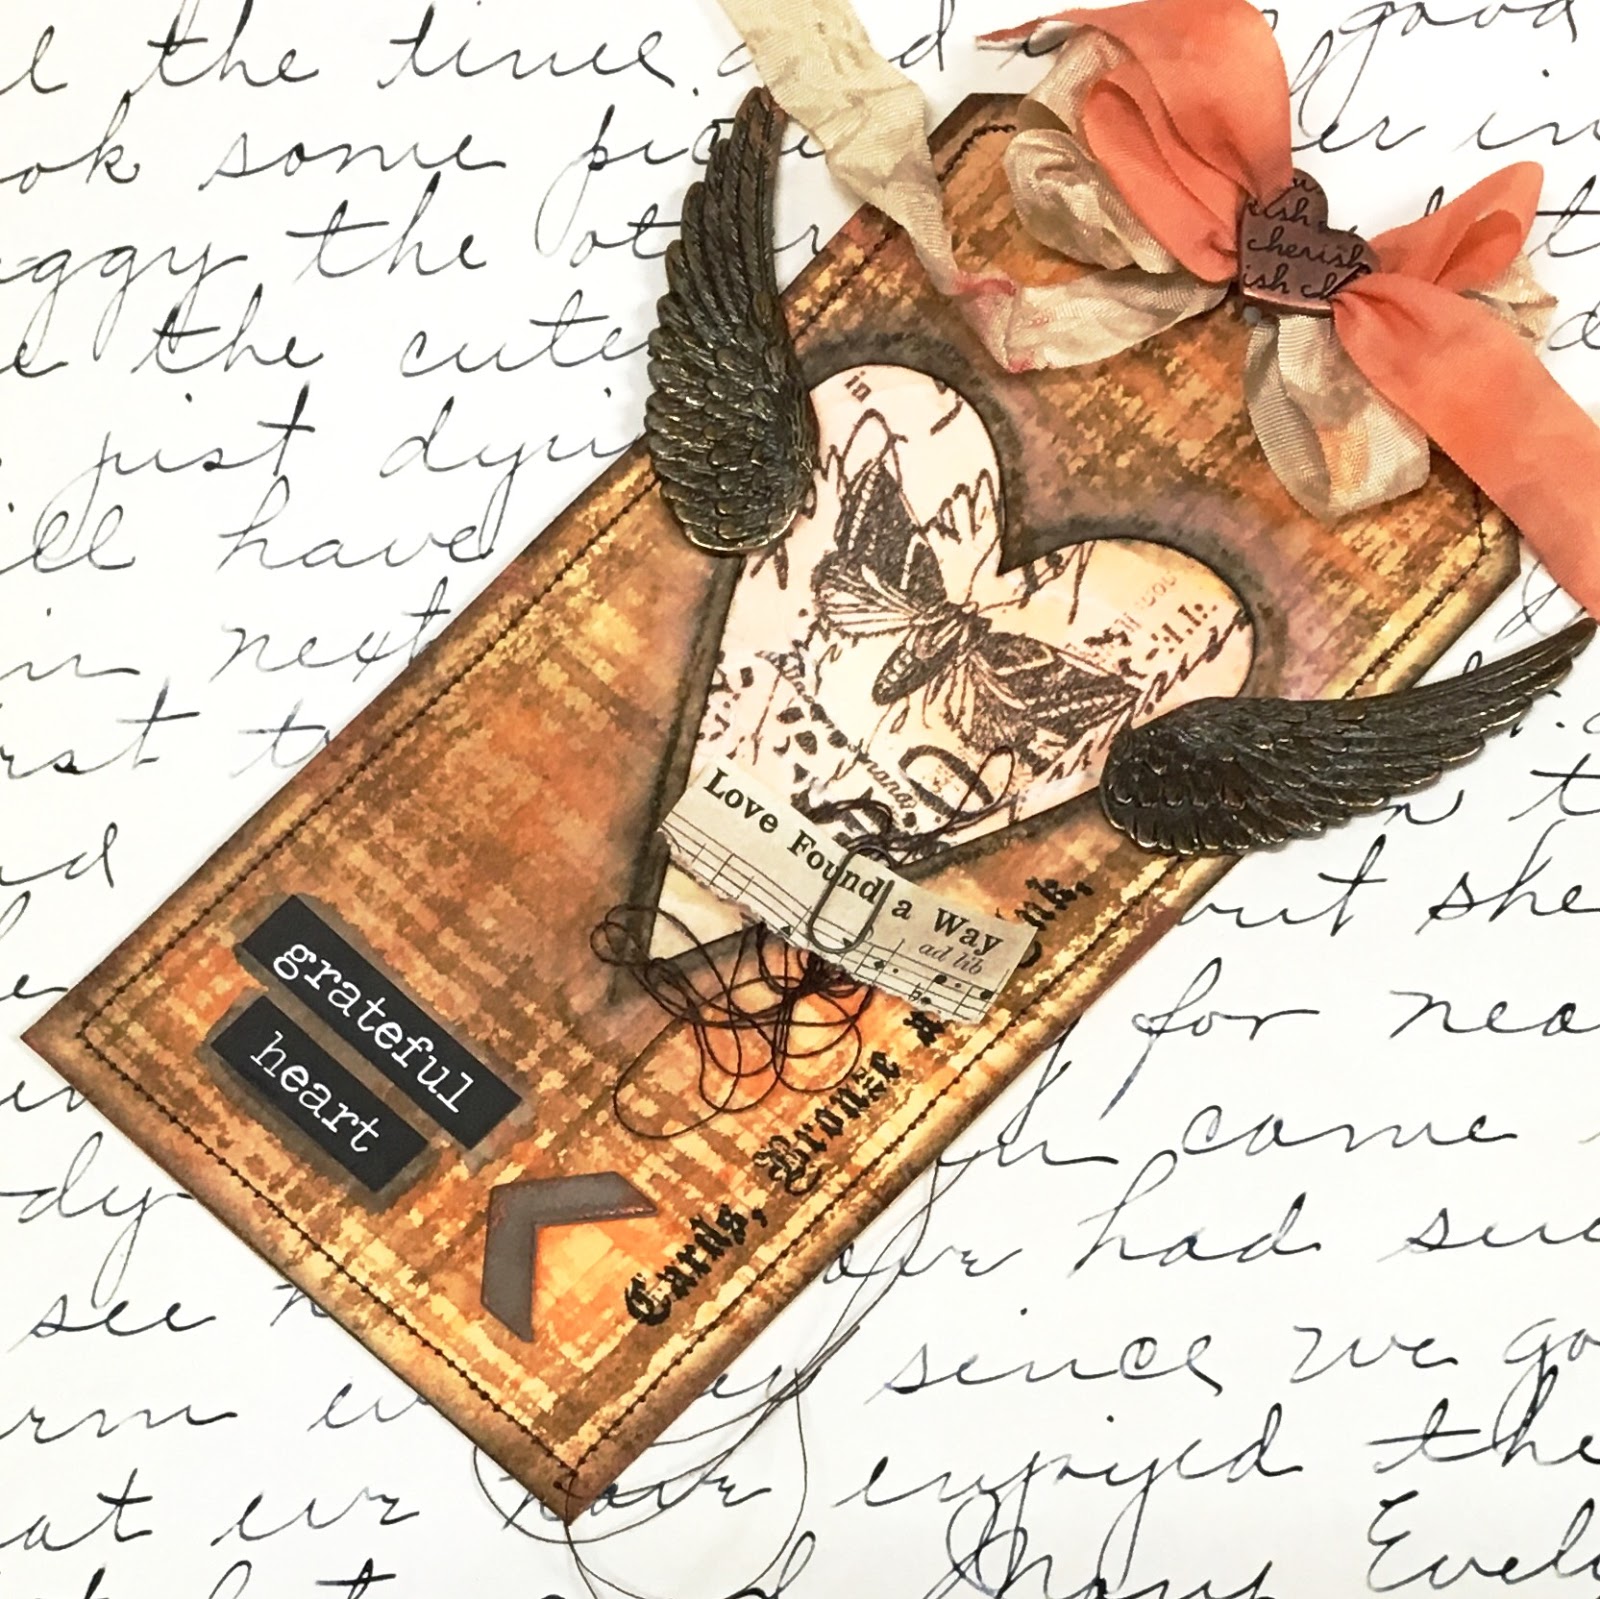
My Tim Holtz June 2016 Tag

tag 1
I had the most lovely weekend teaching at my art group. After class I went to my friend Bonnie's for a girls weekend to celebrate her birthday.  We had a blast playing with all sorts of background techniques.  I decided it was high time to do a Tim take!  I haven't been playing since January.  I love the plaid stencil technique so much and decided to reverse Tim's tag by doing the plaid outside and crinkled tissue wrap inside.  I couldn't decide on a proper die, so I hand cut the heart.

tag 2
I loved Tim's stitching and outlined words.  I used black watercolor.

tag 3
I thought it would be cute to use one of Tim's tiny paper clips to hold some text and make the window more useful.  <3  Some bundled thread, a favorite.

tag 4
Bonnie shared some tissue with me and I highlighted a moth.  The wings remind me of my friend Mimi's pretty mosaic tag that won her a prize from Tim himself!  Go Mimi!  I used Distress crayons to darken the edges around the heart.  Love the mottled look it gave when I wet it.

tag 5
And some bundled vintage seam binding finishes her off.  I colored the wings with alcohol inks to match the copper ink I rubbed randomly on the tag.  I really enjoyed this remix!  Thanks Tim!

tag 6
I'm sharing with these fantastic challenges:

Jun 11, 2016

Bird Canvas Shadow Box Tutorial

canvas 1

Today I am teaching my local art group how to make a bird themed canvas shadow box.  I thought it would be fun to share the tutorial with you and if you are having a lazy Saturday, maybe you can join in and make your own.  If so, leave me a comment and I would love to share it here.

I am the worlds worst at remembering to do a step out, but actually remembered to get photos between the stages for you this time.  I ruined a beautiful canvas I had made and ripped it apart to reuse for this project, hence the random design on image one.  If you have any questions, let me know.

tutorial 1

1.  Use stencil paste to create some texture or glue paper to canvas front and sides.
2. Tie knots around two brads and insert in cardboard cut slightly smaller than your canvas.
3.  Cover cardboard backing with sticky back canvas or scrapbook paper.
4.  Using sharp scissors cut your canvas.

tutorial 2

5.  Test your sections to make sure they roll back nicely.
6.  Stamp text behind each section, use a scrap paper to mask each section, rotating the direction as you go (see 7).
8.  Spray or paint your canvas as desired.

tutorial 3

9.  Stamp patterns onto canvas if desired.
10.  Using a paintbrush handle, roll sections and add hot glue under very carefully.
11.  Tear thin strips of text and adhere to the wood inside of your canvas.
12.  Attach wire inside canvas with hot glue.  Use rolled text paper to fill in any gaps for support.  Finally use hot glue to adhere your elements as desired.

canvas 2

My daughter found this egg in our yard and gave it to me.  So sweet, she knows her mama well!  I thought it would be a great accent to my DIY Nest.


I used an old stash of feathers I found at our first place in Texas and some Prima flowers for embellishment.

canvas 5

This particular bird is from The Graphics Fairy.  I printed her onto cardstock, then adhered her to thin greyboard with Mod Podge and carefully cut her out.   This way I won't have to worry about her getting bent easily.  The bundle of flowers is discretely glued inside of one of the rolls.

canvas 6

 Here you can see how the rolled pages blend in with the stamped canvas.  I rather like the combo and it was very helpful with attaching the wire.

canvas 8

I carefully glued the strings in place so they will stay curved.

canvas 8

Here you can see the partial stamping and texture paste detail.  In the end I am happy with my sample project, but of course have thought of many other ideas for this type of project.  Next time I will glue a canvas wrapped board to the back instead of adhering canvas to cardboard.  I think the price will be the same and will make it much easier.  I hope you are inspired to give this project a go.

canvas 9

I'm sharing with these amazing challenges:

Mixed Media Monthly Challenge: 2nd Anniversary (I chose challenge #23, Dimension)

You are invited to the Inlinkz link party!

Click here to enter

Jun 9, 2016

Simple Elegant Stamping and Distress Inks


 Hello!  Today I am sharing a couple of simple, but elegant cards I made.  This stamp is my mom's and I just couldn't put it away without getting some ink on it first!  I was thinking about a post of Alison Bomber's where she said she rarely stamps in black.  My mind was blown!  I ALWAYS stamp in black.  I don't know why, but I do!  But I ADORE Alison's work and want to learn as much as I can from her.  So I decided to see how two almost identical card designs would differ in both black and sepia inks.  I used distress inks to create a simple colored background, then stamped onto them.  The top card has distressed edges, the bottom card has Distress Crayon rubbed along the edge.  A fun experiment, and I am happy with both results.  But I want to know your opinion.  Is the black too harsh or the sepia too subtle?  Do tell!


Don't forget to share your Floral Frenzy themed project with us at Stamps & Stencils this month.  You have until July 6 to join the fun.

Grab our blog badge
I'm sharing my cards with:
Addicted to Stamps: Make Your Mark (I used Distress Crayons to mark the edges of card 2)

Jun 6, 2016

PaperArtsy Mixed Media House Triptych

house 1

There's a fun new challenge topic going on over at PaperArtsy.  I was so eager to participate in this one and came across this house canvas in my mom's stash.  To answer some of your questions - everything is fine!  She is just making room for a full library and moving her stuff to my studio, where we will create together.  Between the two of us, we have enough supplies to play for a lifetime!  And that's not counting my driftwood stick collection...  ;0  Anyway, I decided to give the canvas a treatment with my new Infusions powders.  They result in such beautiful muddling of color and splotchyness.

house 2

The row houses were clear embossed in Cornflower Blue Archival ink by Wendy Vechi.  What a fantastic color!

house 3

I applied a watery gesso wash over the background to tone it down a bit and splashed it with more watery gesso for variation.  Next, I used Infusions to tint Golden texture paste - WOW!!!  This is so cool.  Look at the dark spots!

house 4

Not wanting to waste any of my paste, I spackled the Ornate Frame die, which I had previously coated with crackle paste.  

house 5

Sharing with these creative challenges:
Popular Posts