Jun 21, 2017

Birds on a Wire Silhouette Card


* This is my second post today - to see my Frilly & Funkie post click HERE. *

It's time for a new challenge at Scrapy Land and our theme is Embossing - wet or dry.  I had a chance to shop with my crafty DT bud Sara Emily while we were at the beach and we both picked out this fabulous new Spellbinders embossing folder by Donna Salazar.  I decided to ink up the folder with Distress Inks and run through my machine.  I went back over the panel by sponging with Distress Oxides around the edges.  I really love the size of these new folders!  I created a window with my Tutti Designs Nesting Stitched Circle and adhered a book page beneath.


I used a tub of Viva Rusty Paper that Sara Emily and I also picked up to give my Birds on a Wire Spellbinders die a vintage treatment.  This die cut thin chipboard beautifully!  I bumped up the birds with foam tape for dimension.


I decided to use feathers in my bundle to compliment the birds.  These are both from the Spellbinders Feathers set.  A little Wild Orchid Crafts flower tops my loopy seam binding bow.  I hope you are inspired to play along with our current Embossing challenge.  I'm thrilled to announce we will now give TWO $10 GC to the winners each round!  Thanks so much for your visit & support.  <3


Lord of the Rings Fanpage Mixed Media Layout


Today I am sharing something quite unusual for me, a scrapbook layout and fanpage for a favorite movie, The Lord of the Rings.  All inspired by our current challenge at Frilly & Funkie, With This Ring.  Our hostess Cec says, "It is wedding season so let's create vintage or shabby chic projects that celebrate the big day.  Your creation might be a card, a gift, a decor item or something to keep the memories of the special occasion."  I decided to take a twist and use a play on words by using the movie theme as my inspiration, all the while keeping with the romantic theme of our challenge.


I found the perfect photo of Arwen and Aragorn from the movie and printed it 8" long to work with my 12x12 layout.


I printed a quote from the movie onto woodgrain paper and cut into sections, distressing the edges.


I painted the edges of a 12x12 chipboard panel with Metallic Goldrush paint.  Next, I dipped a sheet of Tim Holtz Memoranda paper into watery Wild Honey Distress Ink.  I wet the entire page down and then crinkled it up.  I layered a second crinkled torn strip (with Elvish text?) across that.  I mounted my torn printed image onto more chipboard then over the papers.  I took care not to glue the very edges of my layers so that I could tuck in bits and bobs.  I tucked flat flowers from my stash and then layered with Wild Orchid Crafts Brown Cherry Blossoms.


I really wanted a sense of grandeur and light to compliment the photo and majesty of the movie, so I added Finnabair mica flakes and microbeads randomly, as if it were pouring out of the photo.  I adhered with matte gel medium.  I tucked in two Antiqued Bronze Filigree charms.  The ribbon is Silky Crush Wire Ribbon by May Arts, which I carefully removed the wire from, then cut in half and adhered in a crinkled manner along the bottom of my image.


My final touch was a filagree butterfly charm and stained crocheted Vinice lace, which I colored with Frayed Burlap DI and tucked beneath the photo, and a bit of string winding down in opposite corners.   What fun this was to make!  I hope you are inspired and will play along with our With This Ring challenge for a chance to win a $25 gift card to the Funkie Junkie Boutique.


I'm also sharing with:

Jun 20, 2017

Cards for Men with Fancy Neck Tie Die


Do you struggle with making cards for men?  I'm on the Tutti Designs blog today with an easy peasy, no stamping, no coloring masculine card idea featuring our new Fancy Tie necktie die.  This versatile sentiment lends the card for a birthday, Father's Day or new job/graduation theme.  Our design team has certainly impressed with the variety of male cards this month.  I hope you will take a moment to peruse the Tutti blog today.

Purchase your Fancy Tie die HERE today!


I'm also sharing with:

Jun 19, 2017

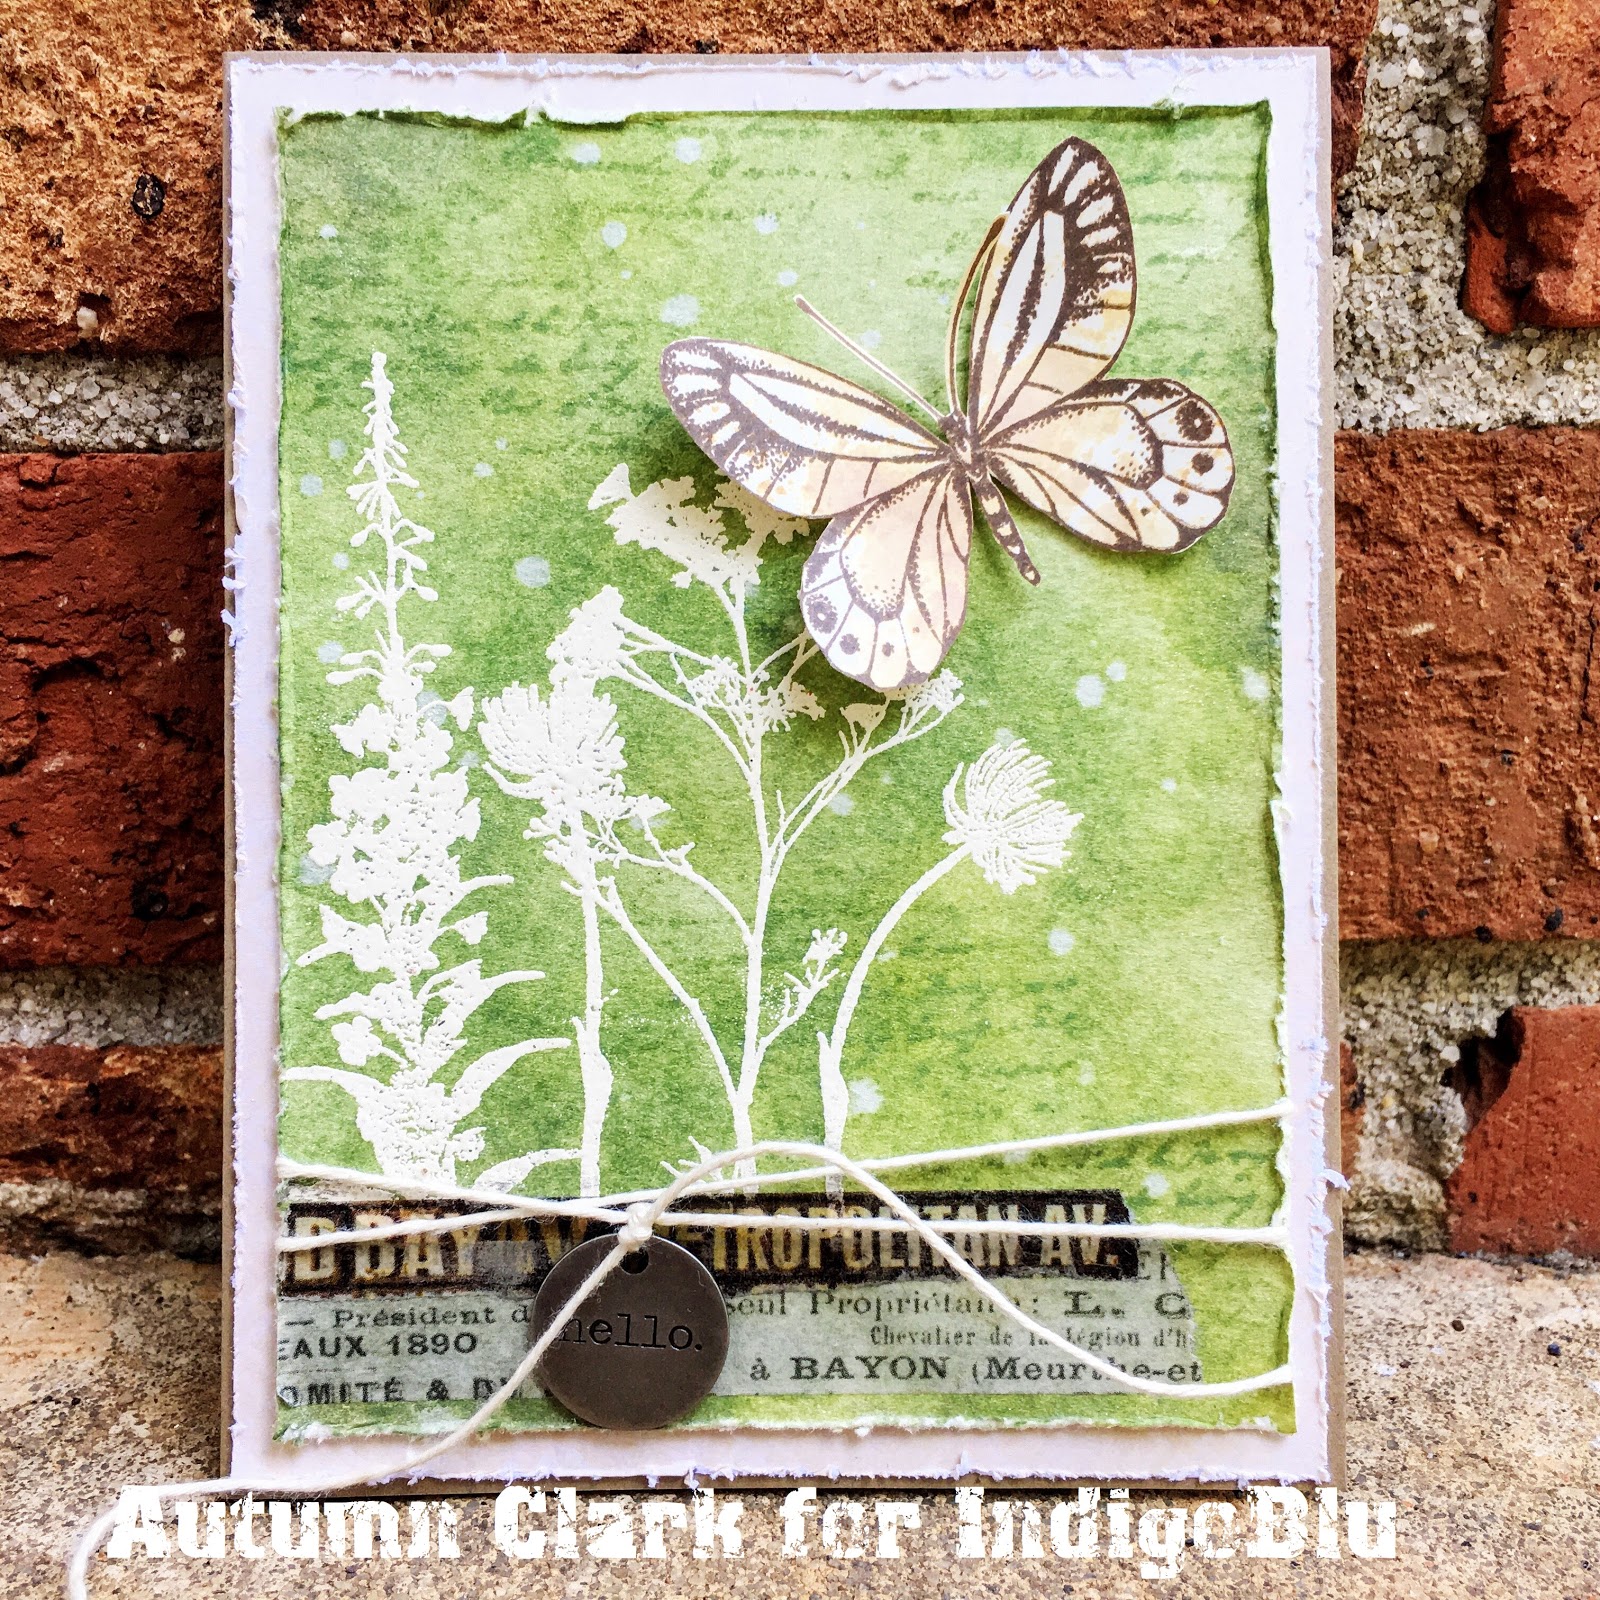
Distress Embossing Resist Wildflower Card


I'm sharing an inspirational post with my teamies on the IndigoBlu blog today.  Hop on over to see the other girl's beautiful projects.  For my card, I have featured our fabulous new Victorian Garden stamp set.


I embossed the greenery in white.  Note how I curved one of the images.  When you adhere to your acrylic block you can bend the stems of longer stamps.  I dipped my panel into a mix of Distress Inks.  I used washi tape along the bottom of my card.  I like to burnish my tape with a bone folder, then sand lightly with fine sandpaper to take the shine away.  I did a simple twine wrap and added one of Tim's new charms.


A few splashes of water and some subtle stamping with our new Collector's Edition French Script mini stamp finish off the inky background.  I curled the edges of my stamped butterfly and mounted with foam tape to add some dimension.  I hope you are inspired to get inky today!

Purchase your Victorian Garden Stamp Set HERE today!


I'm also sharing with:

You are invited to the Inlinkz link party!

Click here to enter

Jun 18, 2017

Blogiversary Winner and SSS Triangle Card for Dad


Happy father's day to everyone!  Dads rock and deserve so much recognition for stepping up and being real men.  Thanks to my DH for all he's done for me and my kiddos!  I made this birthday/Father's Day card to for the current SSS Flickr challenge, Birthdays.  I used Ranger's holographic embossing powder for a bit of shimmer and Blueprint Sketch, Pumice Stone and Black Distress Inks for my watercolor.

Find me on Flickr HERE!


I embossed the entire white panel behind my Tim Holtz alpha dies to tie in with the stamping.  To line the centers of the cutouts up, I inserted the letter for easy placement, then glued in the centers.  It is easy to pop the letters back out when the glue has dried.


Thanks to each and every one of you for the most amazing outpour of comments and answers to  my questions in my Blogiversary post.  The lucky winner is Niki of Pawsitively Creative!  Niki, please email me with your address and I will post your prize package. I hope everyone has a lovely week and I look forward to catching up with you now that we are home.


I'm also sharing my card with:

Popular Posts