Feb 12, 2018

Tim Holtz Illustrated Garden and Distress Oxide Cards


Happy Monday friends!  My precious friend Sara Emily sent me the sweetest, most amazing Valentine in the world this week!  Find her amazing card HERE.  <3  Inside she included these gorgeous stamped Tim Holtz botanical images for me to play with.  Thanks my friend!  I was in the mood to experiment more with Distress Oxides on Alcohol ink cardstock.  I had a good old time layering my puddles of ink onto these matte panels, then over stamped with the beautiful lattice stamp by Tim.  I decided against using the Distress Glaze like I did in THIS card, as the result was so soft and ethereal.


The matte finish cardstock gives such an amazing result with Oxides.  To get this look with the lattice stamp, I inked the stamp with Cracked Pistachio randomly, not covering the whole stamp, then went back over the uninked spaces with Faded Jeans.  I gave the stamp a hefty mist of water before making the impression.


I used the same colors of ink to watercolor the images and then fussy cut them and gave them a coat of DecoArt clear crackle paste.


I layered with one of Tim's ephemera cards and some die cut borders, then sponged the Small Talk sentiments with Frayed Burlap.  A simple twine bow gives the cards a bit of dimension.


I love the softness of these, but look forward to trying the same background with the Distress Glaze on top.  So many ideas, so little time...  :)


I'm sharing with:

Feb 8, 2018

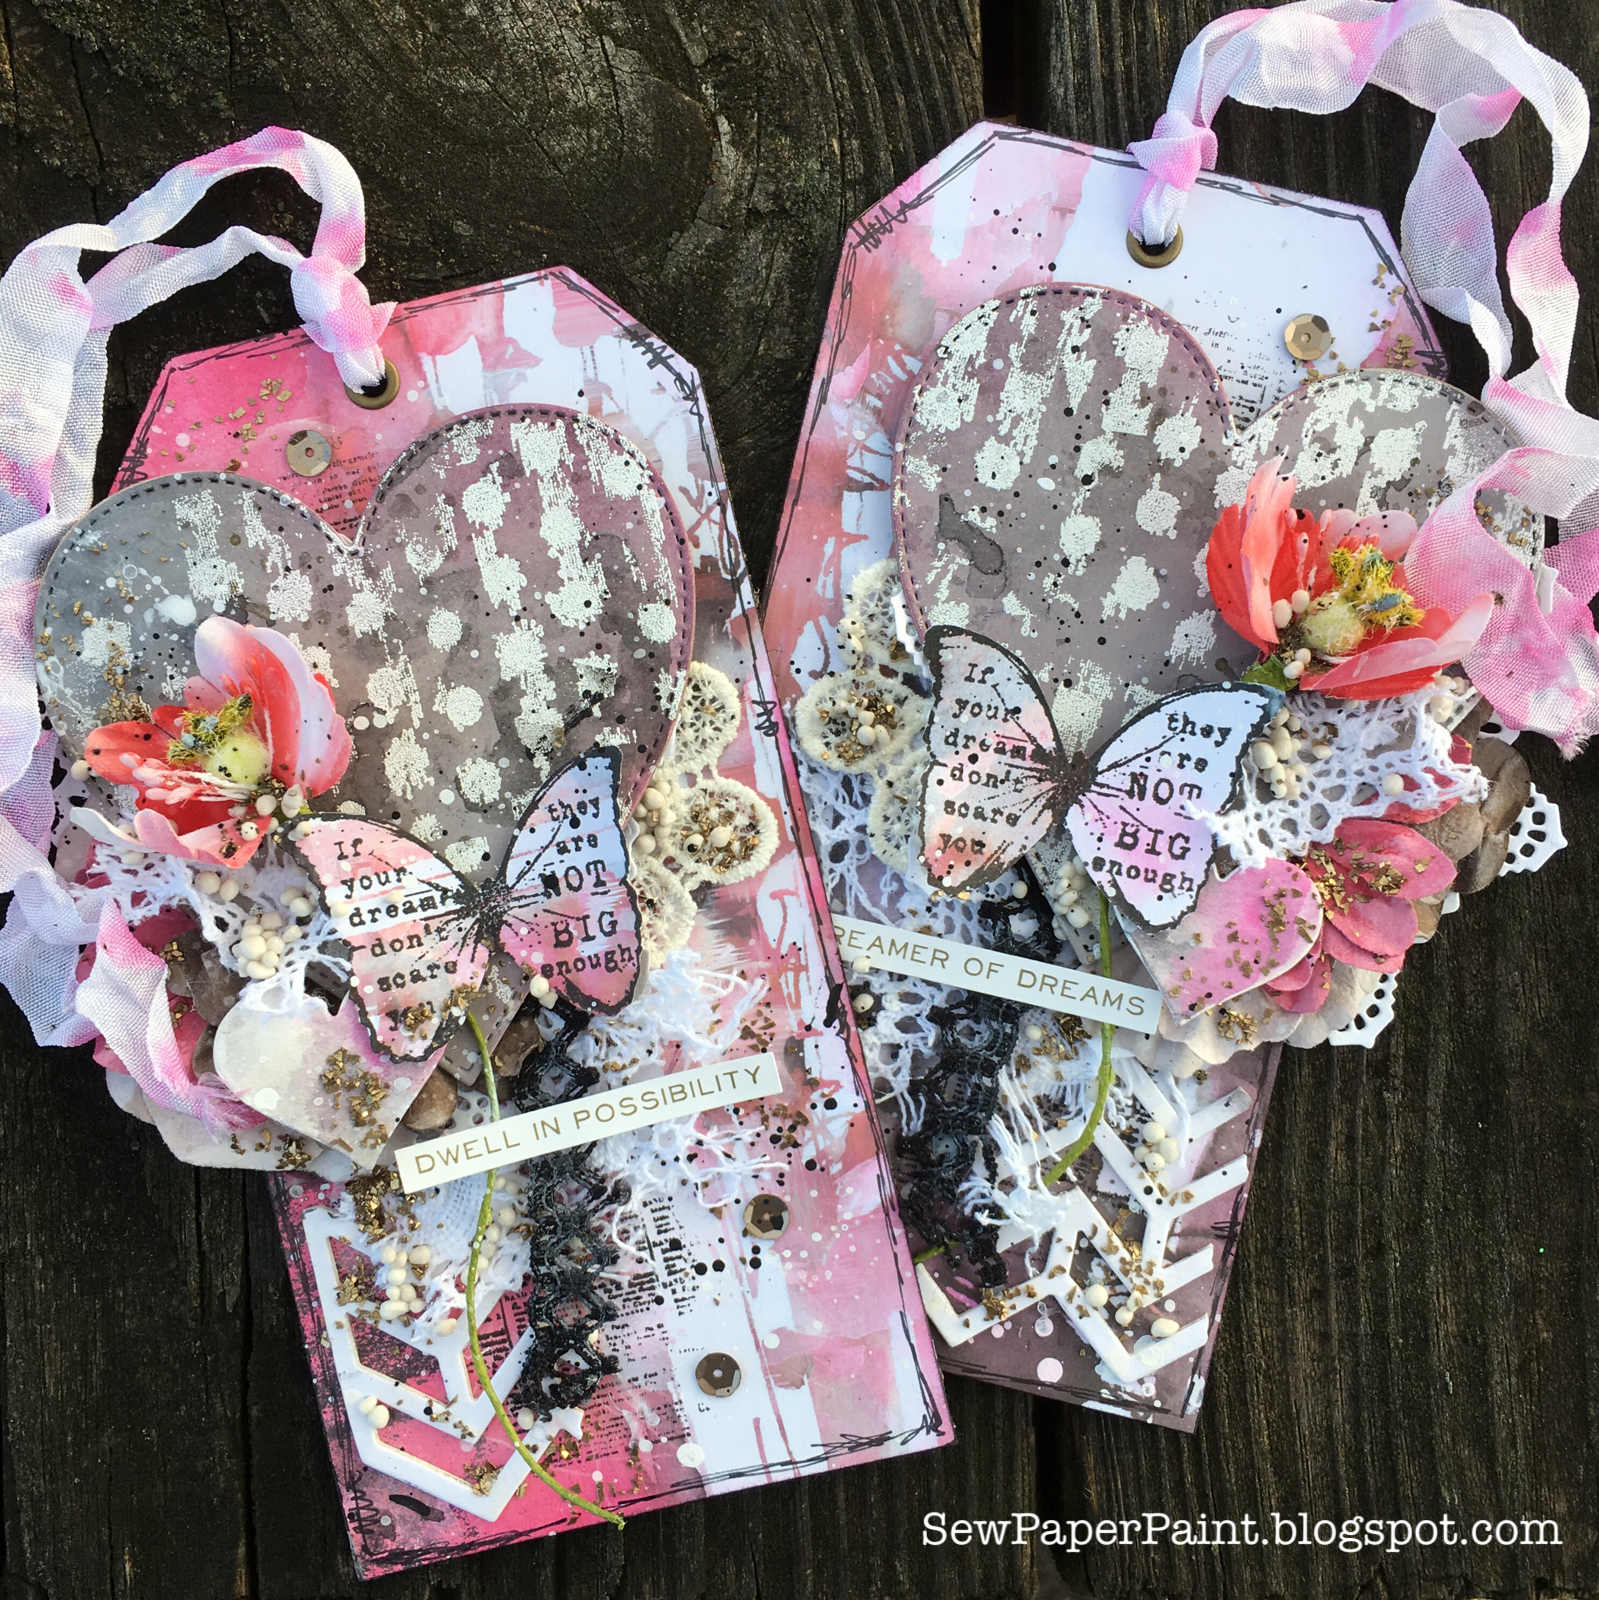
Prima Dream On Mixed Media Valentine Tags


My Valentine's craft-a-thon continues today with a set of mixed media Valentine tags made with the luscious new Dream On A4 paper pad by My Prima Planner.  I am addicted to these paper pads and am so happy they are releasing more for the planner line.  <3 


I didn't do any process photos this time because I had no idea what direction I was going and just played.  All of the stamps are by Finnabair for Prima.  I embossed my favorite texture stamp in white on a die cut heart from the pad, then dipped it in Black Soot Distress Ink and sponged with Picked Raspberry.  The heart die is by Tutti Designs, the chevron by Tim Holtz and the doily by Prima. 


I was super happy with the seam binding for this project.  I tapped PR onto my craft mat and spritzed with water, then spritzed my seam binding with water pretty heavily and scrunched it up and laid it in the ink, as to just pick up a little ink here and there. 


I hope you like these tags.  I'm excited to play with the other patterns in the pad next.  :)  Have a great day!


Made with love for these challenges:


You are invited to the Inlinkz link party!

Click here to enter

Feb 4, 2018

Handmade Valentine Cards for Simon Says Stamp Resist


Oh February!  I totally love you!  I absolutely love Valentine's Day and continued on making a few more cards yesterday.  I've always thought there was something magical about this holiday because it focuses on handmade cards and the sentiments behind them.  <3


I used the Simon Says Stamp Emma Background stamp and black embossing for my Distress Ink resist background.  I used Picked Raspberry and Abandoned Coral.  I used a Tutti Designs Stitched Heart die to cut out a window for my shaker.


Inside I filled it with a purchased mix of sequins and beads.  Behind that an embossed sentiment and a bit lighter resist.


I decided to turn the cutout from the top card into a card of its own.  This time I used Fired Brick to saturate the heart with ink, then did a very light dipping for the background, blotting away along the edges and giving it a flick of water to remove some ink, then a flick of black gesso to add some pattern to the background.  <3


I just love this little stamp and use it every year!  <3


For this last card, I had a pack of Echo Park paper I found for a steal and thought I would do a quickie, but honestly working with papers like this is harder for me than making my own inky papers.  Isn't that weird?  Anyway, I got the heart die on clearance too and wanted to make a card inspired by THIS card by Maggi Harding.


I embossed the sentiment I also got on clearance in white and used DI for the resist.  I layered a second cut of glitter stock over one of the hearts in the die.  I think it's a cute card, but let's just say I've put the pack of paper away for now!  ;0


I was so honored to receive a comment on yesterday's card posted HERE from cardmaker extraordinaire Kathy Schweinfurth saying she had chosen my card for a blog feature she runs called Top Picks.  Find Kathy's other picks HERE.  So much sweet inspiration!  What a great idea Kathy!


Thanks for visiting friends!

I'm sharing with:

Feb 3, 2018

Simon Says Stamp Valentine Card & Verve Stamps January Sketch


Hi friends!  Happy Saturday!  I'm enjoying some free time in the studio today and pulled together a quickie for the current Simon Says Stamp Flickr challenge.  The challenge this round is to create a Valentine.  I have had the idea for a while to use the Fractile Leaves set as the pattern inside of a heart die cut and finally gave that a whirl.  It worked perfectly with the smallest Tutti Designs Stitched Hearts die.  For my background I did an embossing resist with the SSS Abstract Triangles stamp, turned sideways to mimic the lines in my hearts.  I spritzed my embossed panel with water and then dipped the edges only into watery Picked Raspberry DI, letting the colors bleed inward.  I really liked this look!  :)


After a splash of black gesso, I added a few sequins, a Tim Holtz sentiment sticker and a bundle of silver thread.

I'm also sharing my Valentine with:


I shared this card on Instagram already so I wouldn't miss the deadline, but also wanted to blog my entry for the January Viva la Verve Sketches Challenge.  I just loved Julee's sketch and needed a sympathy card.


I tried Tim Holtz's new technique for using Distress Oxides on alcohol ink cardstock, then applying Distress Glaze with the blending tool.  I have to say, I liked the panel before adding the DG and it was also hard to stamp on, even with Archival ink.


The blue was completely lost and I got camouflage!  YIKES!


But I was committed and finished it up, using Tim's Stitched Rectangles for my matting.  I decided the lower layer needed something, so after matting I ran the entire thing through the sunburst EF - ha!  It actually looked good, so there.  I'm not giving up on this technique, just need to branch out of my monochromatic tenancies.  Wish me luck!!!

Feb 1, 2018

PaperArtsy Scrapcosy Nautical Fish Stamps Mini Album Tutorial


Hi friends!  Today is our sixth challenge at Mini Album Makers!  Woo hoo!  My blog baby is half a year old now.  Awe!  :)  We have an exciting giveaway going on, so do hop on over and check out the blog.  My fabulous design team has created the most beautiful array of albums for our February challenge.  I hope you will pay them a visit and leave them some comment love.


Our giveaway ends on Valentine's Day, so don't delay in joining in!  One lucky winner will receive a $25 giftcard to the Funkie Junkie Boutique!


I created a small album, perfect for stamped, collaged, mixed media pages.  I've filled my album with images from the new PaperArtsy E³ {Scrapcosy} collection, just released at Creativation.  These wonderful nautical themed sea stamps designed by Raquel of Scrapcosy are so much fun to play with!  Check with your local stockist for this release.


The album measures 5 3/4 x 4" and has a beautifully curved spine with a 1/4" page gap for all of your embellishments and layers.


To start, I cut 6 watercolor pages to 5 1/2 x 7 3/4 and scored at 3 3/4 and 4".  I then used my gelli printing plate and a beautiful array of PaperArtsy Fresco Finish Chalk Arylics {Blue Glass} {Inky Pool} {China} {Jade} and {Blue Oyster} beginning with the darkest color and working to the lightest color.  After these were printed, I dipped each panel into watery Distress Oxides in Cracked Pistachio and Vintage Photo.


Next, I glued the backs of the pages together to form my book.  Then I used three strips of Graffers tape to secure the edges.  This tape is similar to duct tape, but has a cloth weaving and is a matte finish.


I cut my cover boards to 5 3/4 x 3 7/8" and my spine to 5 3/4 x 3".  I scored the entire spine at every score mark on my scoreboard.  Then I glued one half inch of each side of the spine to the cover boards, using my mat as a guide.


Next, I cut a piece of vintage ticking fabric large enough to wrap around my covers.  I have learned from previous books that it is best to do any wet media before wrapping, as to not warp your cover boards.  So I sprinkled A Bit Jaded and In the Navy Infusions powders onto my fabric, then spritzed with water to move the color around and dried the panel before wrapping.


I applied glue to the top and bottom of my inside cover and wrapped the fabric nice and taught, then mitered the corners and wrapped from left to wright.  Note: I did not add any glue to the outside of the covers.  This way no glue will show on the outside of your book and what shows inside will be hidden when you assemble the pages.


The last step is to glue the pages in place.  Align the first page with a 1/8" margin inside the front cover, then repeat with the last page.  Note: the spine is not glued, only the first and last pages.  I collaged each page before assembly.  Here are the pages...


All of the stamps and stencils are by PaperArtsy and the circle rings are dies from our sponsor Seth Apter.  The tan geometric stamp is part of Seth's new release for PaperArtsy.


I hope you've enjoyed seeing these stamps in action.  This album was sooooo much fun to make!  In fact, I have already made a second one!  :)  Join me on the Mini Album Makers Challenge blog on Valentine's day for a second tutorial on using designer paper with this album, as I share a Tim Holtz Valentine album.  We would love for you to play along in our current challenge for a chance to win a $25 gift certificate to Lindy's Stamp Gang.  We have tons of tutorials on the blog and encourage you to use those in your entries.  Thanks for visiting, Autumn


Join our February Mini Album Makers challenge HERE!


Eclectica³ Scrapcosy Set 10 (ESC10)

Eclectica³ Scrapcosy Set 11 (ESC11)

Eclectica³ Scrapcosy Set 12 (ESC12)

PaperArtsy Stencil 093 (PS093)

To see my sneak peek ATC post on the PaperArtsy blog with these beautiful stamps click HERE.


To view the launch posts by Raquel click HERE and by Marissa click HERE.

I'm also sharing with:

Popular Posts