Jan 29, 2020

Tim Holtz Typewriter Stamp & Heartfelt Die Card


Oh what a lovely time of year!  Have you ever thought of what a blessing it is to have a long month in January, after such a crazy holiday season?  And this year February will be even longer with it being a leap year!  I am feeling so much better after having been sick since Christmas Day and am getting around to posting some projects I have been working on.  Today's card is a mixed media Tim Holtz Valentine with lots of background work and stamping fun. 


I have been very interested for some time in repeat stamping with my Stamp Platform.  Here I used Black Soot Distress Oxide for the first two impressions of Tim's Inventor 1 stamp set, misting the stamp lightly before pressing, then cleaned it and tried again with Fired Brick Distress Oxide, to see how the red would play with the black.  The result is subtle, but I love how it looks almost burnt into the paper. 


I used an craft knife to cut a slit and insert a stamped sentiment from Tim's Saying Stuff set and layered with a die from the Valentine Sidekick die set.  I wrapped some red thread and attached an Ideaology key.  I added more layers with dies cut from Tim's Heartfelt Bigz die, inked and embossed with Ultra Thick Gold EP.  It was really fun to let go and get messy with this one!  I hope you like it and are inspired to play today.  <3


I'm sharing with:

You are invited to the Inlinkz link party!
Click here to enter

Jan 27, 2020

AALL & Create Mixed Media Deer Stamp Tag


Hello and happy Monday.  For me it is still Sunday night because I have had such a LONG long weekend, being sick and taking my sweet Sydney to Atlanta for her Make-A-Wish.  It was great fun, but exhausting.  


I have a fun and heartfelt mixed media tag tutorial on the TopFlight Stamps blog today featuring this incredible deer stamp by AALL & Create.  I hope you will hop on over for the details and check out these incredible products linked below, all available at TopflightStamps.com.  Hugs, Autumn

PS.  A dream of a lifetime is coming true for me too, as I will be joining TopFlight Stamps at the demonstration table for the Stamp Scrap Art Tour in Columbia, SC on February 15-16.  I hope to see you there!


I'm sharing with:


Jan 24, 2020

PaperArtsy Floral Magnets and Free Printable Grocery List


Hello dear friends!  I am delighted to be sharing a fun post with you  today on the PaperArtsy blog featuring beautiful stamps by Kay Carley (EKC01 and EKC06) and Tracy Scott (ETC25).  I've upcycled some magnets and am sharing a little tutorial for you, so please hop on over.


I also have a free printable grocery list to share with you to make your magnet making even more rewarding.  I hope you will enjoy it.  Find it in my Google Docs HERE.


I'm also sharing with:

Jan 13, 2020

PaperArtsy Mini and Zinski Stamps Valentine Cards


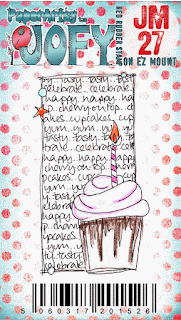
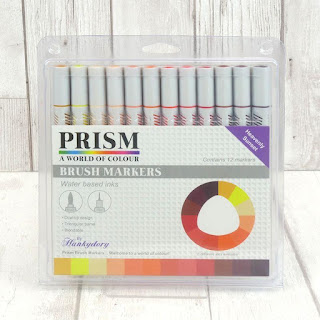
Hi friends!  I'm sharing my first post as Topflight Stamps Blog Design Team member today HERE.  This quirky set of cards were made featuring PaperArtsy Mini Stamps and beautiful Prism Ink Pads.
I hope you will stop by and let Donna know that you're happy to see me blogging for her.  I'm super excited and truly appreciate your support.  Hugs, Autumn

TopFlight Stamps in Chapen, SC is your home for hard to find international stamps and supplies.
Find these products and more at TopFlight Stamps today!

https://topflightstamps.com/?ref=sewpaperpaint

https://topflightstamps.com/?ref=sewpaperpaint

https://topflightstamps.com/?ref=sewpaperpaint

https://topflightstamps.com/?ref=sewpaperpaint

https://topflightstamps.com/?ref=sewpaperpaint

https://topflightstamps.com/?ref=sewpaperpaint

https://topflightstamps.com/?ref=sewpaperpaint

Jan 10, 2020

Tim Holtz Washed Out Dots & Hearts Valentine


My coworker gave me some amazing stationary that she could no longer use, so I had some fun doing stamped backgrounds with the panels.  I purchased the Dots & Circles stamp set simply because I love making backgrounds.  I did some layers with Fired Brick and Gathered Twigs Distress Inks.  I sprayed the stamp heavily with water and even did second and third imprints to get fainter and fainter panels. 


I added tissue tape and stamped Tim's Ornate Trims around the perimeter of the panel.   The focal image comes from Tim's Motivation 3 stamp set.  I stamped it onto some clean up inky paper and added white highlights with a uniball pen.  A very simple, but perfectly mailable card that pops!  I hope the recipient will be inspired.


Make sure to check out my other Tim Holtz Valentine projects:

http://sewpaperpaint.blogspot.com/2020/01/tim-holtz-mixed-media-enameled-hearts-valentine-card.html

http://sewpaperpaint.blogspot.com/2020/01/free-printable-valentine-affirmation-book-tutorial.html

http://sewpaperpaint.blogspot.com/2018/02/tim-holtz-valentine-mini-album-tutorial.html

http://sewpaperpaint.blogspot.com/2018/01/tim-holtz-victorian-lady-and-embossed-frame-valentine.html

http://sewpaperpaint.blogspot.com/2017/01/tim-holtz-mixed-media-framed-valentine.html

https://sewpaperpaint.blogspot.com/2019/01/tim-holtz-faceted-heart-chapter-1-rusty-tag.html


I'm sharing with:
Country View Crafts: Love

You are invited to the Inlinkz link party!
Click here to enter

Jan 7, 2020

Tim Holtz Mixed Media Enameled Hearts Card


I have been having so much fun lately just playing around with techniques, making backgrounds, focal elements, etc.  All with no end goal, except to just play.  If you follow me on Instagram, you might have seen my Toilet Paper Moulding Video HERE (@sewpaperpaint).  I will be sharing a full tutorial/experimentation on that process here on the blog soon.  But first, let me show you these fun enameled hearts I made from simple stamping & embossing...


This project comes from some very old Tim Holtz stamps.  I used his SIXTH set of stamps here!  It's called From the Heart and is still available from Stampers Anonymous.  For reference, he now has 391 sets.  This set belongs to my friend @carolinasweetlee.  I stamped the heart four times in black Archival ink onto watercolor paper.  I sponged each heart with Distress Ink in the colors shown. 


Then I picked out some texty style stamps and stamped each one in various colors.  I used Newsprint & Type and Ledger Script


I used Ranger's Emboss It Dabber to coat the cutout hearts generously.  I dipped each heart in Ultra Thick Embossing Powder (aka UTEE).  I have tried using a Versamark pad for this and the thick powder won't stick to it as well.   I embossed my hearts with a heat tool, then while it was very hot, I dipped it in the powder again, and repeated for each heart so it was coated with EP four times.  You need to work on a glass mat or craft mat for this so it won't stick.  (PS. an old credit card will scrap EP off your glass mat beautifully.) 


When my hearts were all cooled, I took a sharpie/black permanent marker and went over the very edge of the cut to make sure there was no white  paper showing on the edge.  This gives an illusion of depth too. 


For my background panels I had a lot of fun with my Stamp Platform and another oldie but goodie stamp set, Slight Alterations CSM060, which belongs to my dear friend Madelyn.  I spritzed each layer of stamping heavily with water and let the panels bleed and also blotted here and there to get these washed out effects.  For this card I used another stamp in the set and overstamped with brown, then sponged the edges of my card brown too.  I just wanted you to see all of the variations lined up.  :)


For this card, I layered one of my hearts over a partially embossed Ornate Frame die and one of my background panels.  I added some of Tim's tissue tape to my background for contrast. The embossed XO is from one of Tim's alphabet sets. 


I went around the perimeter of the panel with a glue stick and applied Ranger's Foil Transfer sheets to the glue, burnishing with a bone folder until the foil released.  I love how it works with the shine of the enamel heart.  I added a few vintage buttons Carol gave me for my birthday.  <3   I hope this card has inspired you to play with some new techniques for your Valentine makes!  Make sure to follow or subscribe, as I have oodles more Valentines to share with you soon.  Hugs, Autumn


I'm also sharing with:

You are invited to the Inlinkz link party!
Click here to enter

Jan 1, 2020

Free Printable Valentine Affirmation Book Tutorial


Happy New Year!  It's time for a fresh new challenge at Mini Album Makers Challenge and I don't know about you, but these days I am searching for quick and easy projects to make.  So the thought came to me to share a free printable with you all to make your Valentine's Day crafting fun and fast.  Of course, my little books are in my favorite Tim Holtz layered/mixed media style.  But you can adapt them anyway you see fit.  The finished books will be four and a quarter inches high by two and three quarters inches wide (4 1/4 x 2 3/4").


You can find the free download HERE in my Google Docs.  (Terms of use: This download is offered free for personal use only.  Please credit SewPaperPaint.blogspot.com for use.  Not to be sold or used for classes without express permission.)  Print it onto medium weight cardstock, then cut at 4 1/4" on the 8 1/2" side.  (The top will have white space for binding.)  Then cut each section into 2 3/4" pieces for a total of eight little affirmation sheets.


To make your cover you can either use two sided paper or layer your patterned paper over solid cardstock, like I've done.  Cut a sheet of 8.5 x 11" cardstock into three long strips.  2 13/16 x  8 13/16".  Score at 4 5/16" and 4 1/2".  Burnish the folds well.  If you are layering patterned paper over the cardstock, cut your two covers to 4 1/2 x 2 3/4".  Group your pages within your finished covers and punch holes with a Crop-a-dile.  Bind with ribbon, twine, eyelets, rings, etc.


I always advise to make projects like this in bulk.  It is just as easy to cut three covers and three sets of pages at once, then decorate all three covers, then bind them (assembly line style) as it is to make one.  So go for gold and make a few for those dear to your heart.  Please share a link in the comments so I can see what you've done.


Make sure to check out my last Tim Holtz Valentine mini album tutorial post HERE.


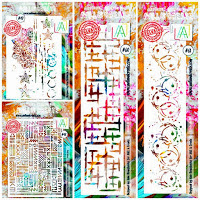
And join us in this month's challenge at Mini Album Makers, whether it is your own book idea or your take on this one.  Our DT member Anne Redfern has generously offered an AALL & Create Stencil Prize Pack to one lucky winner, so come on and play!

https://www.aallandcreate.com/

https://www.aallandcreate.com/

https://minialbummakers.blogspot.com/2020/01/january-mini-album-tutorials-and.html

You are invited to the Inlinkz link party!
Click here to enter

Popular Posts