Jan 9, 2017

Altered Scrabble Board Mixed Media Collage for Simon Says Stamp


Welcome to my week 2 post for my guest stint at Simon Says Stamp Monday Challenge.  This week's challenge theme is Be Square.  I chose my favorite square substrate from my tutorial HERE on making a handmade book from an old Scrabble board game.


I am enjoying working alongside of the talented team at the Monday Challenge so much!  Thanks again for the offer.  Please check out the other designers blogs for more inspiration.


First I gessoed the printed tile side of my Scrabble board section.  Next, I used Distress Inks and Lindy's Stamp Gang sprays to add some color.  I stamped Tim's hexagon stamps randomly with various Archival inks.  I lightly coated a smaller square of corrugated board with gesso, then colored it with sprays and my blue Distress Crayon.  I laid it onto the other board and used my black Distress Crayon to give it an outline or shadow.


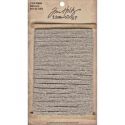
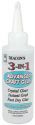
I layered a found relative with some basket filler over the cardboard, tucking in some bundled string, linen ribbon, and die cut doilies.  I use Beacon 3-in-1 adhesive for these types of projects.  Here you see a small section of tissue tape added over the background.


I tucked a snipet of an old library card from my friend Mimi in there for fun, thanks Mimi!  The book title was The Snow Princess.  The silver medallion is by Finnabair for Prima.  The gold snowflake is part of a costume jewelry necklace that broke off.  I found it later on my art room floor (shocker!) and thought it would now become a neat piece of ephemera.


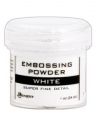
I based my collage around this verse, which I cling to, "And hope does not put us to shame, because God’s love has been poured out into our hearts through the Holy Spirit, who has been given to us."  Romans 5:5 (NIV)  My "hope" plaque is a variation on Brenda's awesome antique enameled number plates found HERE.  I used Tim's Celebration die set.  Next time I would cut out the word before embossing, because some of the EP flaked off - but let's just say that adds to the vintage look.  ;0


I decided to add some sparkle for contrast to tie in with the charm.  I added a couple of brass star brads and flecks of gold Color Bloom spray.  I mixed glitter with Mod Podge and brushed it randomly around the panel.  A final addition of the stamped stitching from the patchwork stamp set and some white gesso splatters completed the project.  I hope it is an inspiration to you!


Join in this week's challenge for a chance to win a $50 Simon Says Stamp gift voucher!


Jan 5, 2017

Junk Journal Embossing Techniques Tutorial


We have a new challenge at Stamps & Stencils today.  Our amazing hostess Ruth has chosen the theme Swirls, Whirls and Flourishes.  She says, "It may be chilly January but this months challenge doesn't have to be anything to do with winter, this month I'd like you to usher in the New Year by creating any mixed media piece you like as long as somewhere you include a swirl or a whirl or a flourish and some stamping or stenciling, of course!"

I've recently fallen in love with embossing again.  When I opened my goodie box from Darkroom Door for my guest design post and saw this fabulous Fancy Flourish Stamp that Rachel has included I about flipped my lid!  Oh my gosh, is this thing every beautiful!!!  And flourish stamps are always just up my alley.  I decided I should just take some time to play.


I went with a trusty favorite color combo and embossed the flourish stamp repeatedly on the gessoed front cover of my cardboard junk journal.  I just randomly applied the lightest color (green) to the wet Versamark ink and tapped off the excess, then completely covered the page with my darkest color (blue) for full coverage.


Next, I had a swirly good time spraying a variety of Lindy's Stamp Gang sprays onto my panel.


I cleaned up my ink mess with a sheet of manila card.  I embossed the Butterfly Eclectic Stamp onto this piece and fussy cut.


Next, I used an Xacto knife to cut a curved slit down the middle of my page.  I peeled the top layer of the cardboard back on both sides to reveal the corrugated section.  I adhered Art Stones by Prima randomly, then covered with torn cheesecloth while the adhesive was still wet.


I placed the butterflies over the cracks.


Then I wrote the sentiment on a scrap and stapled it to the cover with my tiny attacher.  The middle is bumped up for dimension and a bundle of thread tucked underneath.


I just love these two breaking free, very symbolic and perfect for a new year.  I hope you've been inspired to do some multi-color embossing of your own today.  Thanks again to Darkroom Door for supplying me with tha bomb GD pack.  :)


I'm also sharing with:

Jan 2, 2017

Mixed Media Boho Wall Hanging for Simon Says Stamp


I am filled with joy and overwhelmed with excitement to be the January *2017* Simon Says Stamp Monday Challenge guest designer.  Thank you so much SSS for the invite and the amazing inspiration that has filled my inbox on a regular basis!  


Our theme this week is Start Afresh and we are asked to use something fresh out of the packaging.  This week's feature is on the fabulous Carabelle Studio stamp company.  It just so happens that I have an amazing new Carabelle Studio stencil that had never seen the light of day.


I created a base by tracing a plastic container lid onto two sheets of thick chipboard.  I glued them together and sanded the edges lightly.  I still wanted something thicker and it occurred to me that I could glue the chipboard directly to the container lid and use the rim to attach my dangles.

Now, I know what you're thinking...  I can't believe it's not butter!  Well, this is upcycled butter tub lid is definitely better than butter!  It's mixed media snowy goodness, with so many fewer calories!  I hope you'll give this concept a try, it's a great substrate.


I gessoed the panel and glued some twine around in a circle.  I used the Trame Tissue et Chiffres Stencil and texture past to add some texture.


Next I used a variety of Distress Inks to color the panel.  I gave it a spritz of Perfect Pearls spray to add some shimmer, then adhered glitter and sequins randomly.  I colored a few circles with the same inks, stamping the middle panel with the snowflakes from the Woodland Scribbles stamp set.  The background was a little too dark, so I sponged it with gesso.  I highlighted the perimeter with my grey Distress Crayon.


I embossed the alphabet stamps in gold on the top panel and layered with cheese cloth and many cutouts from the Paper Snowflakes die set.


I sprayed a piece of white Substrate sheet with the same Perfect Pearls spray, then stamped my Carabelle Studio wings, first in gold, then in cobblestone.   They are slightly offset, giving a great 3D effect.  The substrate cuts very easily and is super durable.  I love it!!!


Here you can see the thickness I achieved with the layered chipboard and container lid.  The snowflakes are tucked between each circle layer for dimension.


Finally, I used Tim's tiny attacher to staple my trims in place.  I only punched holes for the thin string, and used an awl for that.  I added a mix of vintage pom pom trim, seam binding, Distress dyed cotton yarn (thanks Bonnie for this amazing idea!), and Tim's crocheted trim.  It's not really a dream catcher, but a melody to the Maker of Dreams and a reminder of His great love...  <3


As always Simon Says Stamp will be giving away $50 voucher to shop at the fabulous Simon Says Stamp Store to one lucky winner.  I hope you are inspired to join the fun!  Happy New Year!


Popular Posts