Aug 25, 2022

Vintage Style Junk Journal Diary Video


Hi friends!  I'm happy to share a new junk journal with you today, one that I worked on since last November and finally finished for my dear friend Barbara.  This journal was made with an old Reader's Digest cover and an added cloth spine.  It features four signatures of handmade and vintage paper and a few sheets of double sided scrapbook paper. 

I added lots of free printables, many of which you can find on my Pinterest printable board HERE.  I added vintage ephemera and some crocheted lace along the edge.  I'm sharing a flip through on my YouTube channel HERE.  I'm celebrating hitting the 500 subscribers mark this week and I hope you will subscribe to see more videos in the future.


My fabric spine turned out way too thick and I talk about how I worked with that in the video.  I hope it gives you some ideas.

I used as much "junk" as possible, including this linens label and an old notebook page from my mom's mixed tape notebook from the 80's.  Ha! 

This page has a waxed paper bread package sewn on to make a pocket.  Fun!

And here I've stamped onto a huge teabag.

My friend loves to visit the Biltmore Estate in North Carolina, so I added some fancy castle flaps for her to tuck some memory tickets and ephemera beneath. 

 
The page above has a cool mini bag from my friend Teresa when I went to Texas and the page below has a handmade envelope from my other friend Theresa.  Love that cheetah print!
 

There are tons more pages and you can see them all in the video.  I hope this has inspired you to persevere in making your own journal, no matter how large the spine!  Ha ha.  Hugs, Autumn


Aug 17, 2022

Sweet 'N Sassy Stamps Autumn Birds, Leaves & Flowers


Hello friends!  I'm back to share my second batch of cards for my August Sweet 'N Sassy Stamps guest designer stint.  Good news, I'll be back in September with a new round of cards!  Yay!  I hope you're enjoying seeing these beautiful faith themed stamps in action and are getting some card ideas for your own future creativity.  I was really in the mood to get inky!  So my first card features a watery Distress Ink background, which I overstamped with the Texture Tiles 4 Plaid on the diagonal, then splashing with some water to grunge it up a little.  I finished with some fussy cut inky pieces from the gorgeous Autumn Splendor stamp set.  I adore this stamp, especially because it features sentiments designed by my dear friend and former owner of Verve Stamps, Julee Tilman.  I couldn't wait to get these sentiments into my stamp collection!


I couldn't help making all of my cards in a fall theme.  This card could easily be CASEd for different seasons.  I colored and fussy cut the birdie from the Singing Praises stamp set and layered with the gorgeous Psalm strip.  I stamped the Blooming Anemones in the background and watercolored the entire panel, finishing by sponging the edges darker.  I used my leftover inks to splash the panel for interest.  

My Grandmother and I always recited the 91st Psalm while lying in bed at night.  It was her very favorite and, as a result, is mine.  I love that this stamp is designed to be standard card width! 

For my final card this month, again I used the Texture Tiles 4 stamp set on an inky background.  I repeatedly stamped the Long Stem Silhouettes over the plaid background.  I stamped another and cut it with the coordinating die, which I layered over a strip of music paper and some wrapped twine. 

I partially stamped the sentiment from the Hymn Word Art set onto an inky oval. This card is quite unlike my last cards made with these gorgeous florals, where I used pastels and hung the stems upside down to mimic dried flowers!  But it's amazing that they are so versatile and will work with every season and a multitude of sentiments.  I hope you're inspired today and will check out this unique stamp company.  Thank you Sweet 'N Sassy Stamps for this privilege!

 
See all of my Sweet 'N Sassy Card Posts HERE!


Aug 4, 2022

Sweet 'n Sassy Stamps Faith Art Cardmaking


Hi dear friends!  I'm ever so happy to be a guest designer this month for Sweet 'n Sassy Stamps!  You can find the cards I shared last year as guest designer HERE.  I've been itching to play again.  


My first card trio features the gorgeous Long Stem Silhouettes Bundle.  This stamp and die set feature three gorgeous flower bunches.  I decided to use them like dried flowers.  I stamped my backgrounds with the flowers, then layered on a cut out version over over them.  I folded a paper doily over the top to add to the cottage feel.  

I splashed lots of watery ink and sponged the edges of each panel for interest, then stamped the scripture from the Singing Praises stamp set.  I thought it was perfect for hanging flowers because we all feel a little wilted at times and can trust in God to give us strength for each day.  I made three cards because it's good to have encouragement cards on hand, but doing three colorways made it more fun for me (who dislikes repetition). 


I decided to make another encouragement card and use the Long Stem Silhouette stamps in a different way.  I used a circle punch and torn paper to make masks for this inky scene.  I used the flowers along the bottom for foliage and stamped the eagle from the Woodland Scene Silhouettes stamp and a different scripture stamp from the Singing Praises set.  For the clouds, I used a water brush to lift some of the ink.  The highlights are from Posca paint pens. 


Next I had a little chalkboard fun with the INCREDIBLE Hymn Word Art stamp set.  This set has been on top of my wish list for ages.  I embossed in white on black CS and used a piece of chalk to create the chalkboard effect.  For my background, I  made an inky panel with Picked Raspberry Distress Ink and stamped flowers from the Succulents set, even fussy cutting one as a focal element.  I layered with the Hearts & Stars Scallop Border Die cut pieces for contrast.  I look forward to sharing even more cards with you this month.  I hope these have been an encouragement.  Hugs, Autumn

Visit the Sweet 'N Sassy Stamps shop today!


Jul 22, 2022

New Darkroom Door Collage Sheets & Stencils


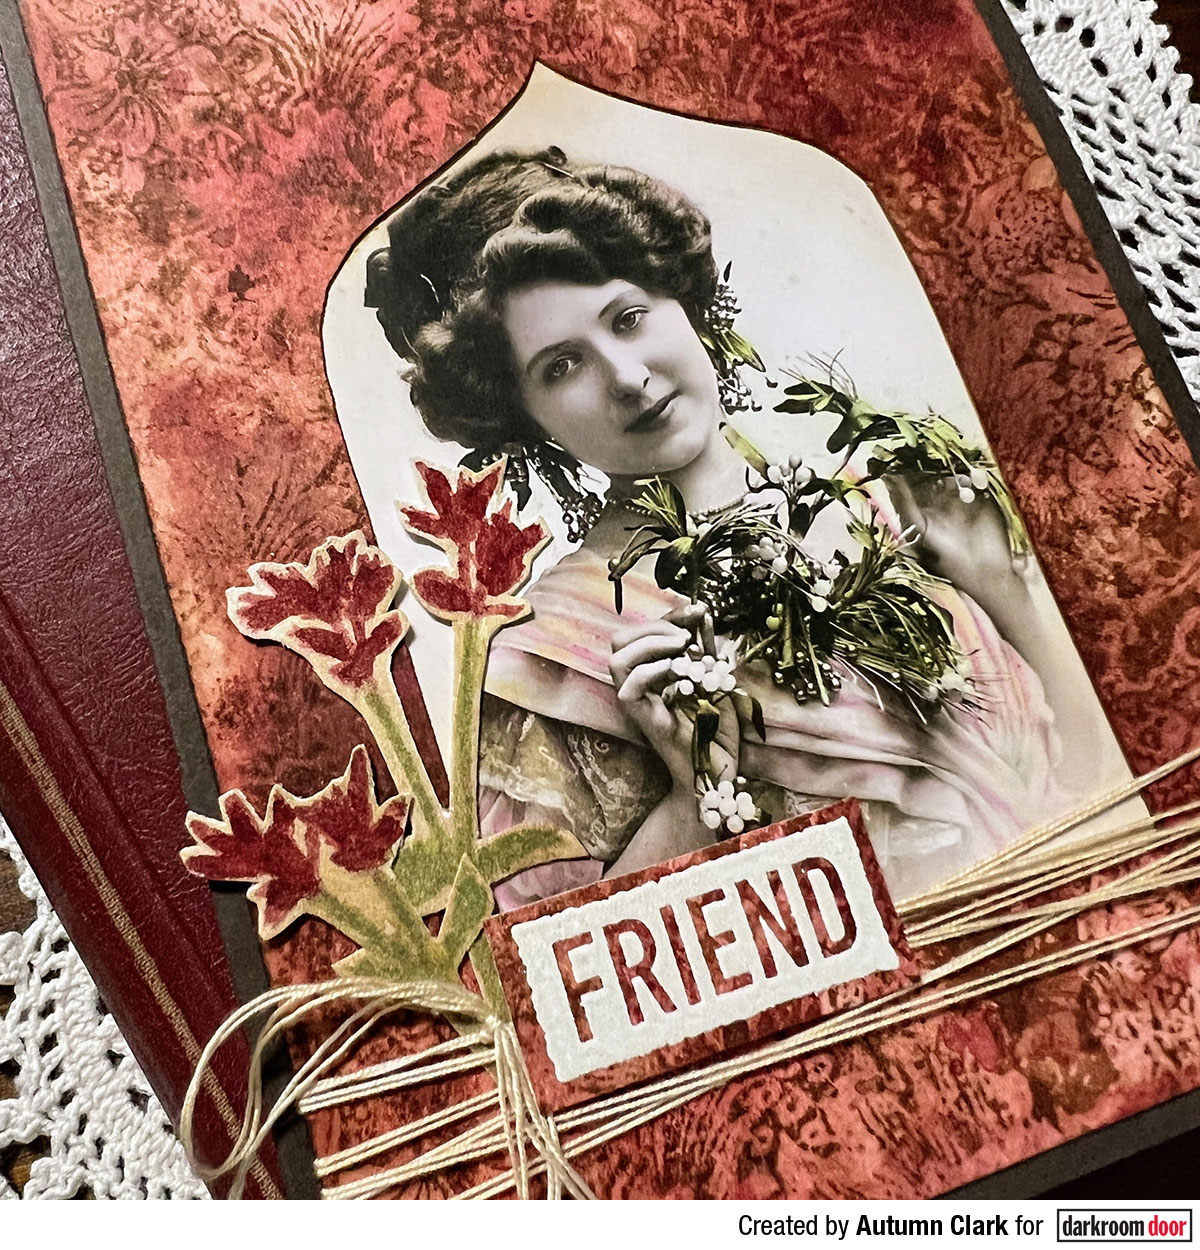
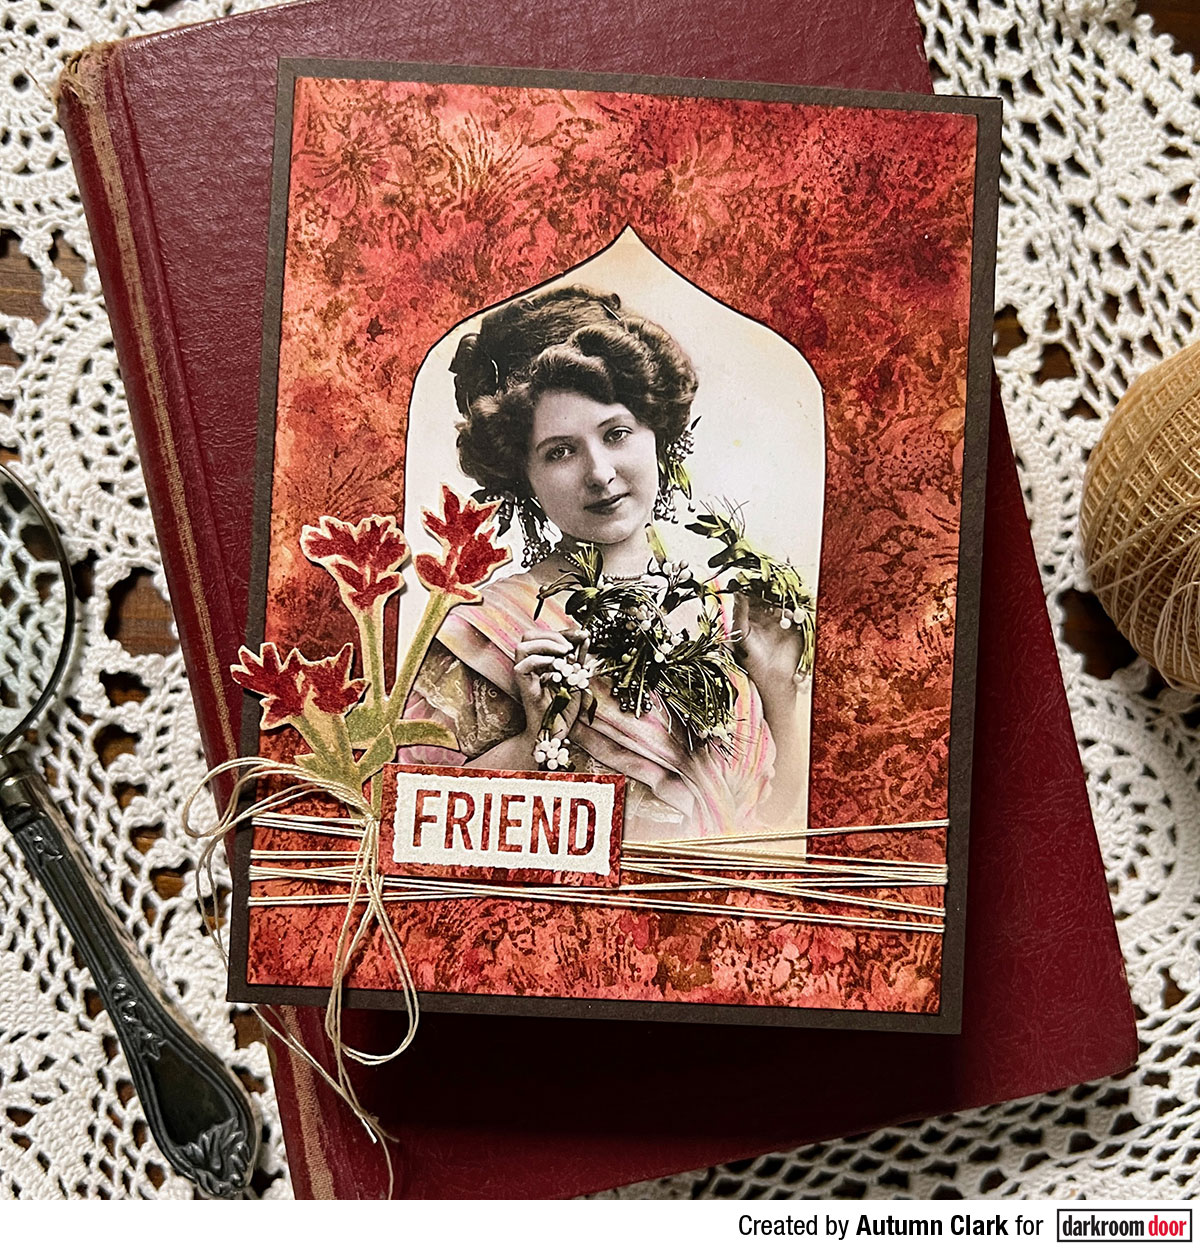
Hi friends!  I'm excited to share some new projects with you today featuring the Darkroom Door new small stencil and collage sheet release.  These new stencils work beautifully with the Darkroom Door quote stamps and I know I'll be using them a lot more in the future.  My first card incorporates the new Ogee Arch small stencil.  I made an inky background with Distress Inks in Aged Mahogany and Gathered Twigs, then repeatedly stamped the Flower Garden texture stamp over that.  I then used the stencil to cut out a window and adhered one of the Elegant Ladies collage sheet images behind it.  I stamped the flowers from the Friendship Flowers stamp set and fussy cut them.  I used Vintage Pearl embossing powder by Ranger with the You Are Everything stamp set for the "friend" sentiment. 


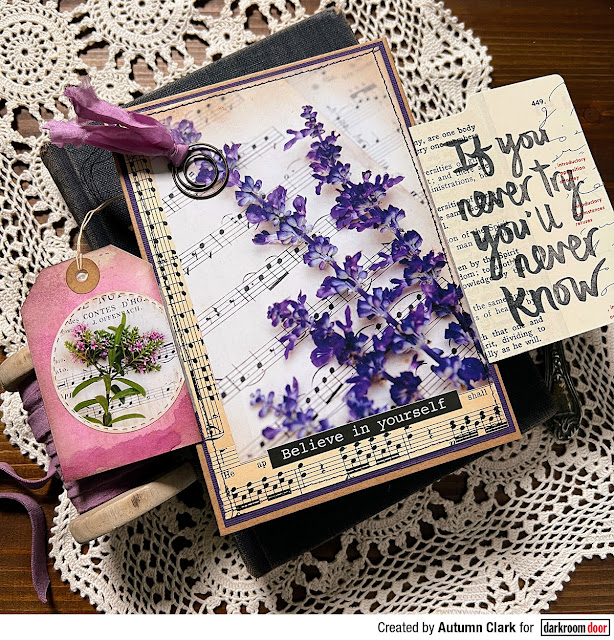
My next card will be featured on my collage account on Instagram, @letterpaperpen, where I share all of my collages and bullet journal pages.  I hope you'll follow me there!  For this card I used several of the images from the Botanical Notes collage sheet and made some flaps to be able to highlight the images both as a collage and separately.  I added some vintage book and music pages and stamped the "Try" stamp over it to coordinate with a sentiment sticker at the bottom. 


I couldn't wait to incorporate the collage sheets into my bullet journal!  There are some great circular designs that are easy to punch out.  I used them to highlight each day of the week.  I stamped the Damask texture stamp in pink around my pages.  Then I used the Seven Days eclectic stamp, stamped onto tissue paper so I could easily adhere them onto my page, allowing that pink pattern to still show through.  I added in a label from the Lots of Labels stamp set to break up the design a bit.  And, as always, finished this collage page with a postage cancellation from the Global Postmarks stamp set.  I'm looking forward to incorporating the other colors of flowers from the Botanical Notes collage sheet into my bullet journal pages!  There are six pages of collage elements in pinks, purples, reds and yellows, so so pretty!


My next card shows how beautifully the new stencils work with the quote stamps.  Here I used the center of the Round Arch stencil set as a mask and sponged the new Uncharted Mariner Distress Ink all around my panel.  Then I splashed water and diluted gesso onto the panel to grunge it up.  I heat set it and then used the outer stencil to mask off my blue sponge work and sprayed Antique Linen Distress Ink Spray inside the center.  Once that was dried, I outlined the round arch with an embossing pen and gold embossed.  The embossing stuck to my sponge work a little and rather than wipe it off, I heat set it for a cool "mottled gold" effect.  Then I put the arch back to mask off the center and stamped the Spanish Tiles background stamp in Uncharted Mariner.  I stamped the Dreams quote stamp in the middle and finished with a gold button from my stash.  This may sound complicated, but it was a very simple and fun card to make and I love the contrast of the gold and blue! 


I was enjoying playing with ink and took it a step further to create this funky galaxy background with Picked Raspberry and Mermaid Lagoon Distress Inks.  I added lots of splashes of water, more Distress Inks and gesso then heat thoroughly, as I did not want the white embossing powder to stick to my background like the gold did in my last card.  I used my WV Stay-tion magnets for all of my stencil work and it worked a charm.  I pressed embossing ink through the Round Arch Stripes small stencil and embossed in white.  I added a sentiment from the Birthday Greetings stamp set, then embossed some stars from the Sketchy Stars eclectic stamp onto more Raspberry inky paper and fussy cut a few of them to layer onto the panel, along with some sequins and gemstones.  I really love the contrast of this card and the fun colorway! 


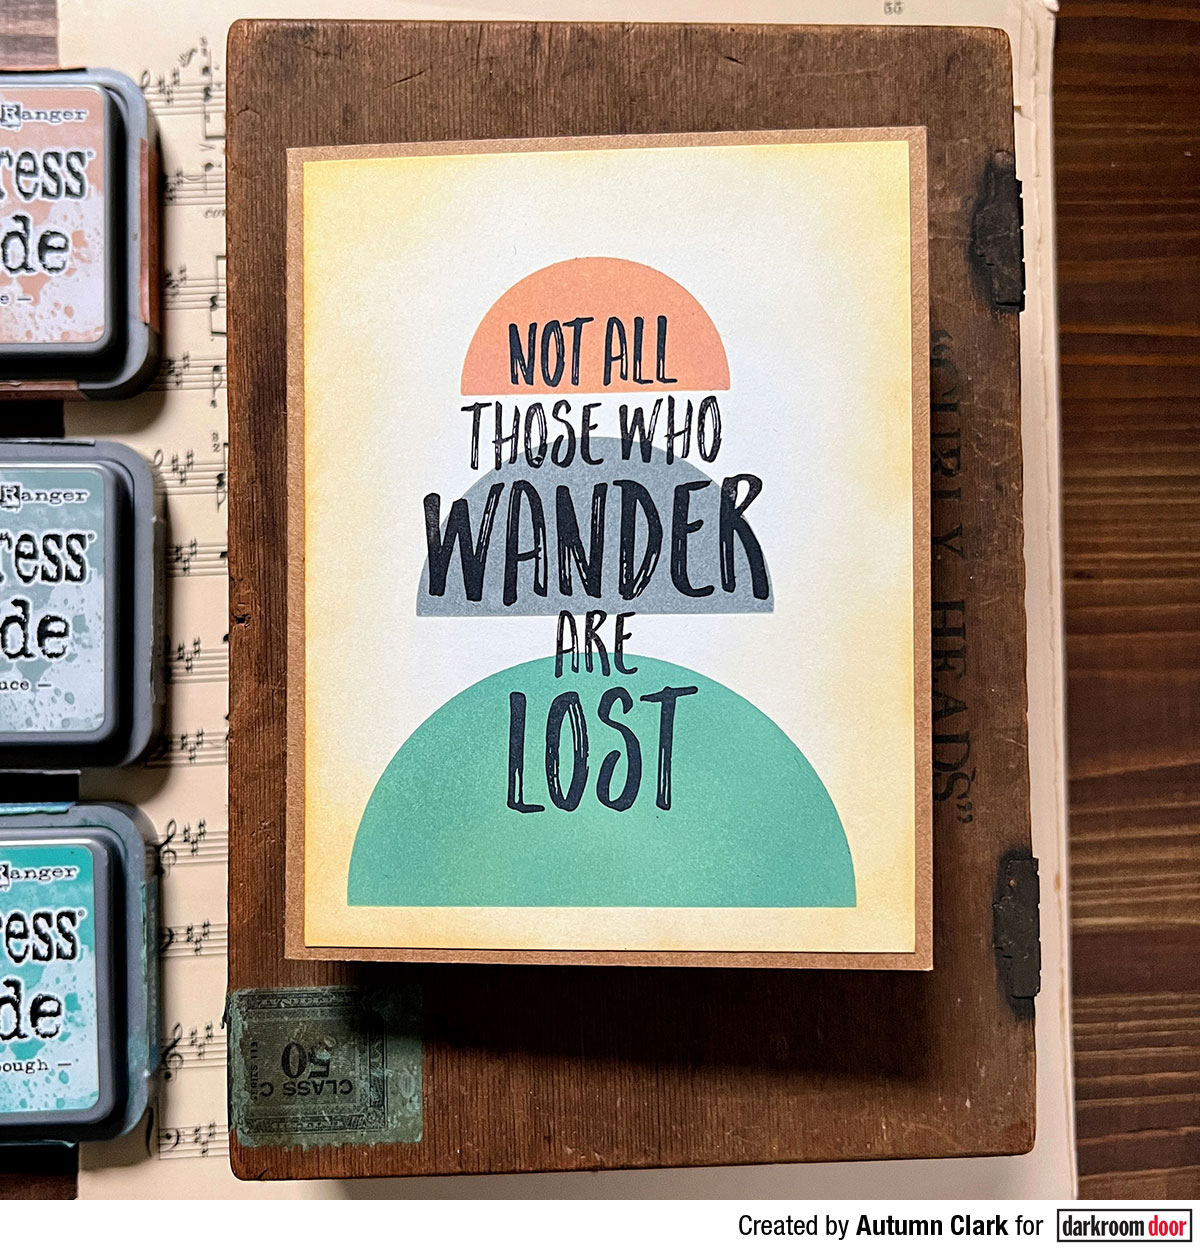
My final card is more of a CAS style, but really reminds me of the current trends in home decor.  I sponged a panel lightly around the edges with Antique Linen DI, then sponged Distress Oxide in Tea Dye, Iced Spruce and Evergreen Bough through the Semicircles small stencil.  I simply stamped the Wander quote stamp over that and mounted onto a kraft card.  I think it's a retro/modern look and I wish I had a tshirt like it!  Ha ha! 

I hope these projects have inspired you today and you'll take a look at the entire new small stencil collection and beautiful collage sheets from Darkroom Door.  Big hugs, Autumn


Popular Posts