Aug 30, 2018
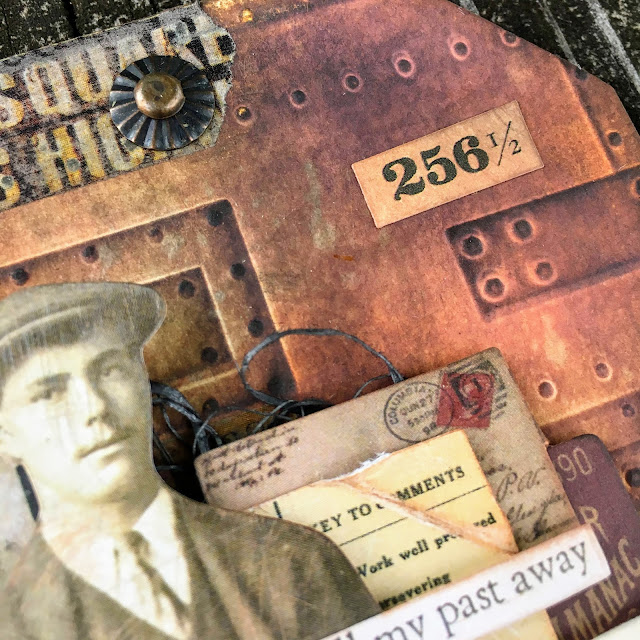
Tim Holtz 3D Embossing Steampunk Masculine Tag
Hi friends! Today is a 5th Friday and we celebrate at A Vintage Journey with Tag Friday. Hop on over and see what my uber talented teamies have created for your inspiration. We would love for you to share a tag you've been working on this month.
I had a play with my friend @carolinasweetlee's new Tim Holtz 3D Embossing Folders and we made a number of backgrounds with different techniques. I adhered two portions of my backgrounds made with the Foundry and Mechanics folders to a chipboard tag. These were both done by simply sponging Distress Inks onto the panels. I added various strips of Tim's tissue tape and sanded it with a nail file to remove the sheen.
I embossed a Gadget Gears 2 die with Seth Apter Chunky Rust Baked Texture and tucked it beneath my collage.
I used one of Tim's Fluted Fasteners as my tag topper.
My collage elements are all from an older pack of Tim's Snippets Ephemera. The sentiment is from the Clippings sticker set.
I dyed my sisal fibers with Black Soot. The Paper Doll image was sanded lightly and sponged with Vintage Photo DI. I hope you'll hop on over to A Vintage Journey for more tag inspiration and make sure to share a tag in our link up.
Aug 21, 2018
Bright and Cheery Tim Holtz Distress Oxide Cards
Hey friends! I don't know what's come over me lately, but I've taken a little sidestep from my typical grungy makes and done some bright and cheery cards. One of my sweet Instagram followers commented that she never used Distress Inks because she associated them with dark/distress and prefers brighter colors. To that I replied, I certainly understand where her thoughts are based, but the colors are pure and it's all in the way you layer them. So I posted THIS shaker card and THIS atypical masculine card as examples. I've taken that a few steps further with three cheery designs today...
I used Fossilized Amber and Blueprint Sketch Distress Oxides to create my inky panels for this card. I stamped an image from the Tim Holtz Sideshow set and the Theories set. The small text is from Tim's Simple Sayings set. The "happy" die is from the new Shadow Script #2 dies I'm so crazy over.
I truly love how Distress Oxide stamping looks! I always give my image a fine mist with water before making the impression.
I went a little crazy with the stitching, but love the fun edge it gives to these designs.
My second card features another image from the Sideshow stamp set. I used Blueprint Sketch DOX for the background and on the foreground panel added a tiny bit of Antique Linen DOX.
Again borrowing Madelyn's Simple Sayings for this sentiment, layered over a string bundle. The xx (kisses) marks come from one of Tim's On The Edge dies. I cut the bottom of my stamped panel with the scallop border from the Stitched Ovals die.
To add interest to the background, I cut bubbles from the Mixed Media die set and did some wonky stitching. I added one tiny torn strip of black dotty washi tape to balance the design.
My final card features white embossing of the gears in the Dapper stamp set. I used the above mentioned inks with the addition of Cracked Pistachio DOX.
I embossed the gentleman from the Dapper set in black for the tag and added a sentiment combo of Simple Sayings and a Shadow Script 2 die.
This cool set belongs to my friend Bonnie and I was so excited to use it for the first time! I finished my card with a bit of tissue tape, stitching and splashed gesso/water. I know not all of you have gone to the dark side like me - ha ha ha, but I truly hope you'll give Distress Inks and Oxides a chance. I have hundreds of pads and these are the ones I ALWAYS use. In fact, they just sit on my tabletop because I have to access them easily for everything I make. Now go on and get inky my friends!
Aug 15, 2018
Seth Apter Baked Texture PaperArtsy Journal Pages
Hello my friends! I'm thrilled beyond words to be sharing a post on the PaperArtsy blog today for the current topic, Baked Textures. These latest pages turned out exactly as I had hoped and I couldn't be happier. I hope you enjoy them too and will hop on over for a closer look.
Some favorite details... I've used PaperArtsy {Ink & the Dog} Collection (Gentleman Plate 1) and (Letters Plate 4) along with PaperArtsy Eclectica {Seth Apter} Collection (ESA08) along with many beautiful Fresco Chalk Acrylic Paints. I used Seth's fabulous Chunky Rust and Ancient Amber Baked Texture embossing powders.
If you missed the previous pages, click on the photo to see those posts.
Aug 11, 2018
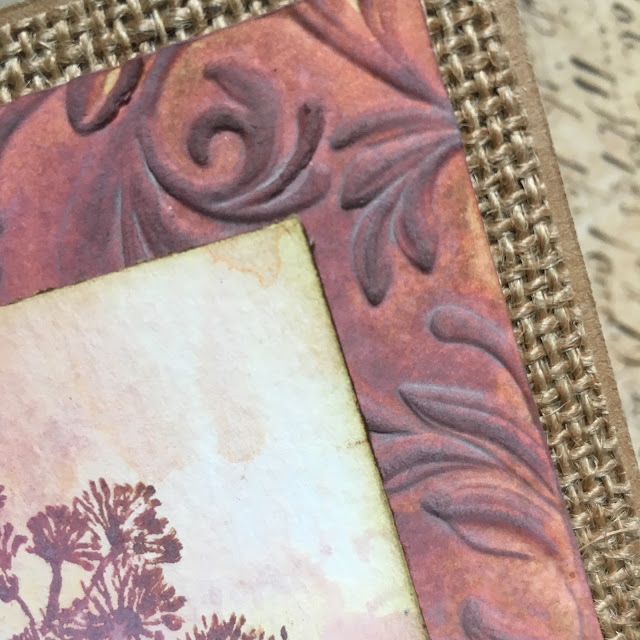
Tim Holtz Farmhouse Card with DIY Cotton Stems
Farmhouse style is all the rage right now and I've been wanting to design some cards along that theme/color palette for some time. I was experimenting with the new Tim Holtz 3D Lumber Texture Fade and achieved that perfectly chipped paint look, so I built built a little "farmhouse style" card around it, complete with a DIY cotton stem! :)
For the background, first I embossed a piece of watercolor paper. I spritzed my paper lightly to help it mold in the embossing folder. I scraped DecoArt Crackle Paste all over the embossed panel and let it air dry. Then I went back over the panel with Distress Crayons in Gathered Twigs and Iced Spruce. I wasn't very pleased with the result, so I scraped off some of the crackle and then gave it a wash of Distress Ink in Vintage Photo.
I spent some time coloring a few images from Tim's Illustrated Garden stamp set and left the flowers of this one white and colored the background with Frayed Burlap. I used Vintage Photo and Peeled Paint all with a Water Brush. I sponged a couple of sprigs from the Funky Florals 3 die set.
Again with the Shadow Script #3 set, this time three layers! :)
Now onto those tiny little cotton stems! I'm bursting with joy over them! I die cut small flowers from the FF#3 set using kraft paper. I inked the kraft paper with a bath of Walnut Stain Distress Ink, then scrunched the petals up while they were still wet. I had purchased a package of small cotton balls from the Dollar Tree. I pulled away a tiny section of cotton and balled it up, then glued in each of the stems. I was inspired by THIS pin, but wanted to make tiny stems that would work well with cards. If you'd like to see more of my Dollar Store craft ideas, please click HERE.
This card is very special to me, because it reminds me of my Grandmother. She was one of 13 children and grew up picking cotton. She was the most amazing woman and lived through many trials, including the Great Depression. She worked hard all of her life to provide for our family and instilled so many wonderful ethics in her children and grandchildren. Most of all, she was passionate about her faith in Christ and reminded me all of my life that I had been given to God as a child and belonged to Him, what a comfort!
I hope you're inspired by this sweet idea and will give it a try on your own. Have a blessed day, Autumn
You are invited to the Inlinkz link party!
Click here to enterAug 9, 2018
Distress Oxide 3D Botanical and Shadow Script Cards
As promised, I'm back with more projects I made from our girls weekend at the lake. This pair of cards features the Tim Holtz 3D Botanical Texture Fade, which I inked with Distress Oxides.
I tried something new and mixed my Oxides with water in a pool on my kraft mat, then brushed them on like a wash. I really loved how the oxidization settled in the ridges of the 3D folder. For this one I used my most favorite color, Antique Mahogany with layers of Vintage Photo and Antique Linen.
You truly don't understand the magic of 3D embossing until you see it in person. I'm totally in love with this folder!!! I layered with an inky panel I stamped an image from the Illustrated Garden stamp set, also in Aged Mahogany. I layered with dies from the Shadow Script #2 set and wrapped the panel with twine.
For my second card I followed the same process only switched to Evergreen Bough Distress Oxide, Iced Spruce and Antique Linen.
I've been nervous about using multiple Distress Oxide inks on the same stamp, but found that I had no contamination when going from light to dark, as I did with this image from Illustrated Garden.
I layered with a book page and omitted the burlap paper this time. Thanks so much to my friend Bonnie for sharing these stamps with me. I adore them! I hope you're inspired to get inky! Have an awesome day, Autumn
Aug 7, 2018
Tim Holtz Paper Cut Bird with 3D Botanical Card
Hello and happy August! How quickly are the seasons changing and months passing this year! I find it time to turn my thoughts toward fall themed cards with richer, earthier colors. I had another play with the new Tim Holtz 3D Botanical Texture Fade. This time I used Peacock Feathers Distress Ink and Distress Oxide, then dabbed my panel with my Versamark and embossed Copper EP randomly. I was going for a rich patina effect.
I rummaged through my products during several sittings and finally decided upon the Paper Cut Bird die as my focal image. I sanded an entire sheet of gold Metallic Kraft Core and cut my bird, then a frame from the Stitched Rectangles set and a base panel. I rubbed a teal glaze over the base to tint it so I would have enough contrast. I absolutely LOVE this bird die cut out and framed this way and will be revisiting this idea in the future.
I finished with some purchased florals and a beautiful Metallic Quotations sticker. It was hard to photograph, but I hope you can imagine the luster of the metallic embossing and papers. Thanks for visiting and have a blessed day, Autumn
You are invited to the Inlinkz link party!
Click here to enter
Subscribe to:
Comments (Atom)
Popular Posts
-
I am absolutely busting with joy today! I've had the great privilege to work with new die cuts by Karen Burniston and images by D...
-
I trust that you are having a lovely October day. I am full speed ahead into Christmas crafting, with inspiration from the 12 Tags of Ch...
-
Somehow I found time to play with Tim's August 2016 tag. I am trying to get in the fall mood, but still thinking summer. So I mixed...


