Sep 29, 2018

Tim Holtz Pumpkin Patch Thanksgiving Fall Card


Today I'm sharing a compilation card of oldie but goodie Tim Holtz products for this pumpkin patch design.  I find that I've had to be quite creative with coming up with sentiment ideas since I didn't have any fall quotes or dies.  This time I reached for the Shadow Script #2 die and paired it with a tiny stamped banner using $1 bin alphabets.


I shared the 1 minute video below on Instagram (@sewpaperpaint) to show how easy it is to ink up a huge batch of leaves for fall cardmaking.  I used these leaves as the base for my arrangement, then layered with a twig cut from the Fall Foliage leaves set, a crackled Scroll painted with Peeled Paint Distress Paint, a handmade flower from the Tattered Florals die and some sisal fibers.  I shared a tutorial on making flowers HERE if you're interested.


My background was stamped with Tim's (Mesh &) Linen stamp.  I inked it with several colors and repeat stamped it until I was happy.  I spritzed it with water to let it blend a little and help the colors pop.  


The Pumpkin Bigz die was embossed with the Woodgrain Texture Fade and sponged with Vintage Photo.  I added a leaf from the Funky Foliage dies and a loopy bakers twine bow.  I hope you're inspired to play with your goodies and mostly to be thankful today for our many blessings.  So what are you thankful for today?  I'd love to hear from you in the comments.  Hugs, Autumn

Check out my custom curated product guide in the Inlinkz  collection by clicking below:

You are invited to the Inlinkz link party!
Click here to enter

Sep 27, 2018

Tim Holtz Natures Wonder Autumn Leaves Card


Please don't tire of autumn themed cards y'all!  I'm in my element...  LOL!  I'm skipping the Funky Foliage today and am sharing a stamped card design featuring the FAN-TAS-TICO new Nature's Wonder stamp set by Tim Holtz.  Oh how I love this beautiful set!!!


I put a bunch of the stamps onto an XL stamping block and inked them with Rusty Hinge, then Vintage Photo, then Peeled Paint Distress Ink pads, giving them a slight mist of water before making the impression.  (If you had mini pads they would work great here.)  I took this process pic so you could see the backgrounds in entirety.  I actually stamped one large sheet, then cut it in half.  I colored around the leaves using my water brush and Antique Linen and Frayed Burlap.  Then I went back over the leaves with my water brush to blend the colors.  I used the Stitched Ovals to cut another panel and inked it with the same neutrals, then cut the center from my green mat to use to back this piece.  This is a great cardstock saving trick!  :)


I used the 1" Alpha Numeric dies to cut the letters for "autumn", then sponged them with Rusty Hinge.   I used a $1 bin stamp set to complete the sentiment.  I have to say, I've never been one to color much but am loving working with my water brush and Distress Inks.  Making this background was super relaxing and enjoyable, and not too tedious.  I hope you'll give it a try! 


You are invited to the Inlinkz link party!
Click here to enter

Sep 25, 2018

Tim Holtz Funky Foliage Fall Woodland Card


Hi friends!  I'm back today with another card featuring the new Tim Holtz Funky Foliage die set. I built a little forest scene with the Birch Trees die.  I added some crackle paste to the die, then dipped it in a super watery bath of Antique Linen and Frayed Burlap Distress Inks, using the leftover ink to paint the details on the trees. 


I used Distress Core'dinations cardstock to die cut my forest foliage and sponged some of the pieces with Vintage Photo. 


I totally adore these little mushrooms!  I left the card sitting for a while and finally decided on my sentiment.  I stamped this phrase from the Nature's Wonder stamp set onto a TH die cut from the Labels set.  I faintly stamped the (Lattice &) Flourish image in Antique Linen Distress Oxide, then set eyelets to wrap the sentiment around my panel with Tim's jute fibers.


Thanks for joining me today and I hope your fall season is off to a great start!  Hugs, Autumn


Check out my custom curated product guide in the Inlinkz  collection by clicking below:
You are invited to the Inlinkz link party!
Click here to enter

Sep 22, 2018

Tim Holtz Forest Foliage Mushrooms Fall Card


Happy first day of autumn friends!  Wow, I can hardly believe this year has flown by so quickly!  But today my most favorite season begins, and I am overwhelmed with gratitude.


Today's card features the adorable new Tim Holtz die cut set, Funky Foliage.  I spent about an hour and fifteen minutes cutting and assembling the pieces below. 


Thankfully, I was able to get three cards from this stash!  :)  So that's about 25 minutes per card.  I cut them from Tim's Distress Core'dinations cardstock, which I sanded with Tim's gripper sanding block before cutting.  I sponged some of the pieces lightly with Vintage Photo. 


My friend Carol and I made a stash of these corrugated crackle backgrounds.  We scraped a thin layer of crackle paste onto the peeled cardboard surfaces and let them air dry.   Then we went back in and inked the tops.  I sponged on Vintage Photo and Rusty Hinge.


I am so excited to have a Bigz XL alphabet die finally!  I chose the Storybook die because it's such a cool font!  I cut one set from thin chipboard and embossed it with Pumpkin powder from the Powder Keg.  Sadly, I don't think they are still in business.  I cut a second set from black chipboard and glued them together for dimension/shadowing. 


I stamped "happy" from Tim's Great Outdoors Stamp Set onto paper I had inked and stamped with Tim's Linen stamp set.  The background was inked with Antique Linen Dixtress Oxide and Frayed Burlap Distress Ink and then stamped with Tim's Mesh Stamp Set in Antique Linen DOX. 


I played around with my pieces until I created "happy little bundles".  :)  This totally makes me smile!  I hope you're smiling too and wish you a beautiful fall season.  Hugs, Autumn


You are invited to the Inlinkz link party!
Click here to enter

Sep 19, 2018

Eileen Hull Wrap Journal for PaperArtsy


Hello friends!  I'm honored today to share a post on the PaperArtsy blog for the current topic, Reinkers.  What a crazy fun subject to explore!  The designers are overflowing with inspiration so make sure to scroll through each post. 


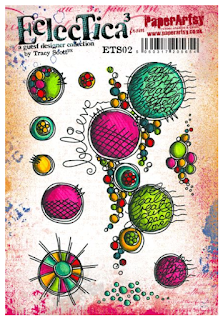
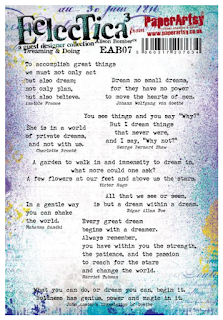
I'm sharing how I made this fun background for my Eileen Hull Wrap Journal.  I've used the fabulous PaperArtsy Eclectica {Tracy Scott} Collection (ETS02) along with a sentiment from the {Alison Bomber} Collection (EAB07).  The butterfly is from Hot Pick 1506.  I hope you'll join me on the PaperArtsy blog today!


https://shop.paperartsy.co.uk/eclectica-tracy-scott-02-6661-p.asp

https://shop.paperartsy.co.uk/eclectica-alison-bomber-set-07-7515-p.asp


https://shop.paperartsy.co.uk/hot-pick-1506-5678-p.asp
http://shrsl.com/1335y 
I'm sharing with:

You are invited to the Inlinkz link party!

Click here to enter

Sep 15, 2018

Vintage Tim Holtz Dressform Inventor 3 Stamped Card


Hi friends!  I'm back today with another two-toned stamped plaid background card.  In case you missed the tutorial for this plaid background, click HERE.  For this plaid I wanted to go feminine and chose to dip my panel in a bath of Frayed Burlap Distress Ink, then stamped in Worn Lipstick and Crushed Olive.  A little trick I used to make the colors less intense was to lightly lay a baby wipe over the inked and spritzed stamp before making my imprint with my Stamp Platform. This took up just enough ink to make a lighter and less even impression. 


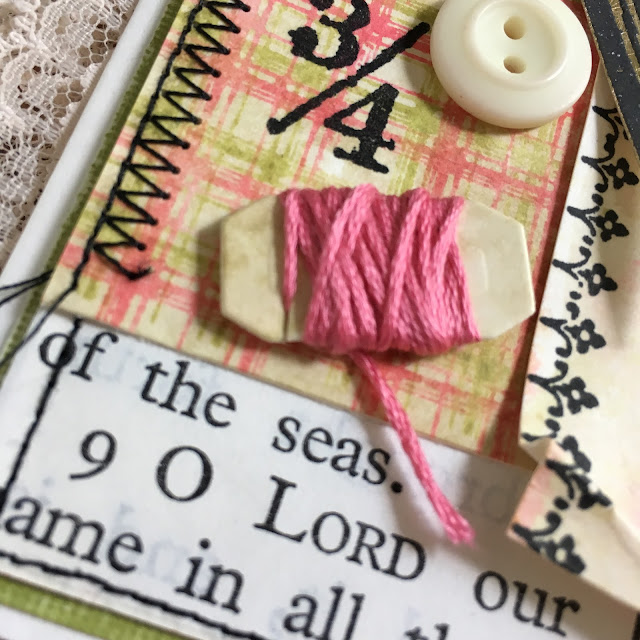
I stamped and watercolored the dressform image from the Tim Holtz Inventor 3 stamp set.  I stamped the scissors from the same set onto sanded gold Metallic Kraft Core and embossed in black.  I adhered some old buttons and used my sewing machine to stitch the many layers.


I made a tiny thread holder with Tim's Labels die set and stamped 3/4 from his Merchant stamp set.


I stamped the border of my main panel with the beautiful Ornate Trims stamp set, a gift from my crafty BFF Sara Emily.  She accidentally ordered two and was so kind to send me this set I've been wanting for ages!  Thank you my friend!  I couldn't wait to ink it up!  :)


As a final detail, I added inked Tim's Floral Texture Fade with Shabby Shutters and ran it through my machine.  I tucked in one of Tim's new 3D Impresslits, Scallop, which I sponged with Worn Lipstick and Vintage Photo.  I had so much fun making this card and hope you like it! 

Sep 13, 2018

Wendy Vecchi Two-Toned Plaid Background Fall Card


 Hello friends!  I'm popping in for a quick post to share my first fall card of the season with you. 


I was craving some plaid paper for my fall cards and decided to try a technique for two-toned stamping with my stamp platform.   I chose a plaid stamp by Wendy Vecchi and used Wild Honey and Rusty Hinge Distress Inks with Frayed Burlap for the dipping.  I layered with Tim's Wildflowers 2 dies, Fall Foliage dies, Tim’s flower punch and Pondering Words Thin to complete the project.  I shared this one minute process video on my Instagram feed and Tim's FB Group.  Check it out below! 


Here's my first collection of plaid backgrounds.  I will say that if you want to use completely opposite colors you should dip in your "aging bath" first then dry and stamp your colors, like I did on the Rusty Hinge and Crushed Olive sample on the right.  I hope you enjoy this technique and your fall season is off to a great start.

You are invited to the Inlinkz link party!
Click here to enter

Sep 1, 2018

Blog Hop for Mini Album Makers Blogaversary!


Hello friends and happy September!  Today we begin a new challenge at Mini Album Makers.  This very special challenge marks our first Blogaversary!  We are so excited to have shared the last year with each of you! To celebrate our Blogaversary, we've organized a blog hop this month.  We're giving away a $25 gift certificate to Blitsy.com to one lucky reader whose name will be chosen at random from all of the comments on the Design Team blogs.  In addition, Lindy's Stamp Gang will give a $25 gift certificate to one lucky participant in our challenge.


This month I'm stepping off of my beaten path and away from my grungy, vintage norm.  I've been itching to get back into art journaling with paints and doodles and decided to make a cardboard junk journal to help me get started.  I had seen a tutorial for this type of book years ago and do not know where, but remember that they used cardboard and water activated packing tape to join the pages.


I decided to use this roll of athletic tape I picked up from the Dollar Tree.  Make sure to check out my other Dollar Store Paper Craft projects HERE.  I cut my pieces of double-ply cardboard down to 5x7".  You will need an even number of pages no matter what size.  I used eight and my book is 2 1/4" thick but this will vary depending on the number of pages you use and the thickness of your cardboard.  I butted the long ends of two pieces of cardboard together and joined them together with the tape.


Once I had two sets of pages joined and folded, I butted the sets together and joined them with more tape.


Once I had four sets of pages, I butted them and joined them with even more tape.


Now with this super sticky tape you will need something to cover the spine to adhere to the sticky exposed parts.  I tried using more tape as shown above but changed my mind and used sticky back canvas instead.  I had some that was black with a white dotty pattern, but you could use Ranger's plain sticky back canvas and paint it if you like.


Now the whole beauty of this book is that the pages are super heavy to withstand wet mediums and the pages open flat because of the binding method.  I chose the 5x7" size because I could open the book pages and fit the entire spread onto my 8x10" gelli plate.  Happy day!  See how beautifully the tape accepts the paint print!


Here's my book being printed.  Notice how easily the pages open and lay flat for printing.  If you have a smaller gelli plate, you could do mono prints by laying your book down and using the gelli plate to "stamp" your backgrounds on top of it.


Here's a better shot of the improved spine.  I added some vintage neon pink trim to wrap my spine and concealed the edges beneath a smaller layer of cardboard for my cover.  My doodling was done with a LePen permanent marker.  I love this pen because it's not shiny like a Sharpie.  I used some $1 alphabet stamps and the Tim Holtz Storybook Bigz XL alphabet die to cut the word "joy."  Blitsy has a great deal on Tim's Bigz XL dies, so make sure to check those out HERE.


I made these journal pages three years ago when I was into art journaling more.  Since today's book is a work in progress, I thought I would share them again so you would get an idea of how I will fill my cardboard junk journal.  (Click to enlarge.)


That's all for me!  Again, make sure to visit each of the following blogs and leave a comment for your chance to win a $25 gift certificate to Blitsy.com.  Please share a comment with a link if you create your own journal following this tutorial.  :)

Nancy Wethington - Art-From-The-Heart
Jennie Atkinson - Live the Dream
Anne Redfern - RedAnne
Maria Lillepruun - Magic Attic Design
Alison Bomber - Words and Pictures 
Autumn Clark - SewPaperPaint <<< That's me!  You are here.  :)
You are invited to the Inlinkz link party!
Click here to enter

Popular Posts