Sep 4, 2015

Stampin Up with Cardabilities Sketch 130

card 1
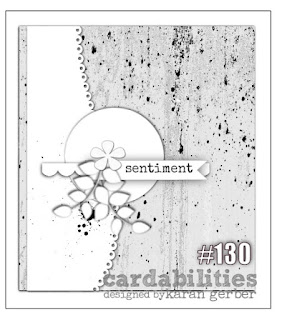
My mom and I made these pink cards on our stamping weekend, modeled by the Cardabilities Sketch #130.  These are my new Stampin' Up! stamps.  That Thank You stamp is AMAZING!!!
sketch
This was the view out the front door at my mom's.  Grandma's rose bush, so pretty and inspiring for these pink cards...  Oh how we wished she could see them! 
roses
 I used the SU! doily and pink Chalk ink.  The paper is by MAMBI I believe.
card 2
 We were able to get four cards out of the background sheet, two a piece.  :)
cards 3
 I'm linking up to Cardabilities for Sketch #130 HERE.  Thank you for the visit!


Sep 3, 2015

Fall DIY Paper Flower Embellishments

flowers 1
I truly contemplated if I would post these because the photographs didn't turn out well, but I really wanted to share these DIY paper flower embellishment techniques with you.  They are super quick and easy to make.
flowers 2
I started by cutting some rusty or barn red cardstock with my Brenda Walton flower die.  This wasn't the color I was going for, I wanted more of an orange, so I decided to add some gold paint to orange it up.  I brushed a watery mix over the flowers, then decided to splatter them in hopes that it would look more natural.
flowers 3
The splatter detail is my favorite part of this batch of flowers.  
flowers 4
For this flower I curled my leaves upward using this blue mouse pad and the rounded end of my Uniball ink pen, after it was spritzed with water.  I then used a thin paintbrush to curl the edges.  I wanted a natural look, so I cut a circle of some DIY Tattered and Dyed Ribbon that I posted HERE.  I also cut some leaf shapes and distressed the edges of them.  I could not find a center for these flowers and it was driving me nuts, so I went out in our yard and cut a small branch off of our maple tree and then cut it into little wedges with my jewelry cutters.  I glued them over the ribbon circle.  I really like how it turned out, but it was hard to glue.  I ended up using Aileen's Tacky Glue and holding it for about a minute until it set.
flowers 5
For these I scrunched each petal up and then curled with jewelry pliers.
flowers 6
After the petals were fully dried, I glued three layers together and the curls kept their shape.  I added some wadded up Prima flowers to the center.
flowers 7
For this flower I stamped dots and then pinched a crease in each petal and twisted the crease with my jewelry pliers.  When they dry the shape keeps.
flowers 8
For this one I scrunched the petals and did not use the pliers.  I added a tighter scrunched center with the smaller flower in this die, as opposed to the green Prima flowers in the other one.  I cut some of the green Prima petals apart and used them as little leaves here.
flowers 10
I made these little string bundles to use as the centers of the next flower.  It is about eight 1 1/2" strings tied together with another longer string.
flowers 11
I used the long tails to pull it through the circle in the middle of these flowers.
flowers 12
You can see the tails on the bottom and the strings fluffing at the top.  I cut these from book paper and dipped in a watery mixture of Distress Ink to get the color.  I shaped them with the pen and pad.
flowers 13
Here are all of my rusty fall flowers together.  Later I ended up taking the button off and adding a pretty DIY Button Brad, posted HERE.  Below is an image of my last flower making tutorial posted, which I have added to my sidebar linking to that post.  I just love my watercolor app!

flowers 14

Free Printable Mason Jar Card

card 1
 I printed THIS image of an empty mason jar sketch for this week's Retro Sketches challenge and made this end of summer card.
card 2
 Not too long ago I found this love stamp at the second hand store for fifty cents!  It has flowers and the word love above the rubber, but I didn't ink them.  I decided to use this stamp to fill my jar, after all what's better than a jar of real love!  I chose this wood-grain paper by Basic Grey for the background and matted onto a kraft card.
card 3
 I inked the jar with Peacock Feathers Distress Ink.  The strips of patterned paper are by Authentique.  The butterfly is by Recollections.  I wasn't sure about adding the dots, but this sketch was so darn cute I had to copy it to a tee.
sketch
card 4
I finished with some Dymo label tape and a strip of punched paper.  I'm linking up to Retro Sketches for Challenge #179 HERE, just in the nick of time.  Please forgive these awful photos, I am doing this late at night and have terrible lighting in my studio...  :(  Thanks for looking!

Sep 2, 2015

DIY Smash Book Journal for Fall


Years ago I sold handmade DIY Smash book journals on Etsy.  I had the best time making these and just had to revisit!!!  I love using my scraps of paper and ephemera to fill these amazing books.  I wanted a special gratitude journal to use for fall, since it is the season of reflection and Thanksgiving.  This is what I came up with.  It has just that perfect amount of golden yellow for the Frilly and Funkie Challenge, a touch of gold.


I make my Smash books with old book covers and this herringbone printed Reader's Digest was screaming at me to be made into a journal.  I always use two rings for binding because it is easier to turn the pages with two rings as opposed to three rings.


I layered a Making Memories frame over a stamped leaf by Stampers Anonymous for Tim Holtz.  I stamped it on Kraft and sponged it for the color.  I stamped the pretty typewriter font stamp in permanent black and painted the letters on with acrylic paint.  I layered in there a hymnal strip that reminds me that all good and perfect things come from God.  I sponged it a little along the edge.


The frame was glued after I cut an actual hole for a window in the cover.  I did this carefully with an Xacto.  I sanded the rough edges and made a frame from washi tape so the inside would be pretty.


I added more stamping and some prefab labels and stickers.  The bird is an image from Graphics Fairy, but I don't have the link.  The girl is one that I made after taking Christy Tomlinson's She Art class.  I made tons of magnets with her as the focal point for a swap.  I photocopied that and cut it down so I could use her again in my book.  Something I really want to do more of!!!


I added the fruit of the spirit stamp along the bottom and made her some wings from a SU! leaf stamp.


 A bit of vintage lace makes her cozy in her new home!


These books are so much fun to create.  I hope you'll be inspired to enjoy a season of thankfulness and to create something to express it.


Gotta love that birdie...


So much to be thankful for, especially freedom from the bondage of sin in Christ Jesus.


Many, many pages to complete, but that is the point!  I can't wait to play in this journal some more and will share along the way.  I'm linking to Frilly and Funkie for their Touch of Gold Challenge HERE and to SSS Work it Wednesday for their Fall Challenge HERE.

Sep 1, 2015

Fall Stamped Card with Maple Leaf

 Today I'm sharing another card from my stamp weekend with my mother.  We used this gorgeous maple leaf stamp by Inkadinkado.  We inked it with SU! Really Rust, then lightly tapped Rusty Hinge Distress Ink over one edge, and Fossilized Amber Distress Ink over the other edge of the leaf to create this graded color.
The script stamp is by Hero Arts.  We sponged the panel and tore it along the bottom.  Then we layered over some distressed K&Co. paper. This was such an simple card to make, but I love it in all its autumnal colorfulness.
I'm adding this to the SSS Work it Wednesday Fall Challenge HERE.

Popular Posts