Jan 18, 2019

Tim Holtz Faceted Heart Chapter 1 Rusty Tag


Hi friends!  I've missed sharing with you so much!  Though I'm not back to my art yet, I'm happy to have some projects to share that I made a good while back for the Tim Holtz Sizzix Chapter 1 Facebook Live release.  You can find Tim's fun video, filled to the brim with inspiration for these new dies HERE.  I had the chance to use the new Faceted Heart die.  It's SO SO COOL!  I was afraid it would be hard to glue together like some other dies I've used, but it was a breeze.  I decided to go for a grungy rusted heart and made this tag.


I cut the Faceted Heart die from watercolor paper, then sponged it with lots of Distress Inks and Oxides until I was happy with the color.  I added some of Tim's Tiny Fasteners before assembling, then went back over the shape with a few splashes of water and sponged along the folds.


I created an inky background and stamped Tim's text stamp, then embossed gears from the Gearhead die set with a variety of Distress and regular embossing powders.


I layered Quote Chips over a stamped Ticket Booth image, cut with the matching Sizzix Ticket Booth framelet.  I added a strip of embossed Mechanics 3D from Metallic Kraft Core, then punched and added my grommets and a dangle of some of Tim's Ideaology findings.


I sang this song while making this tag.  I am reminded that no matter how rusty, pieced together and rigid my heart may be that I am loved and cherished and held in the arms of a mighty God.  I pray that His truth and light will shine through all that I do.  Sending you big hugs today, Autumn


You are invited to the Inlinkz link party!
Click here to enter

Jan 1, 2019

Tim Holtz Snowflakes Winter Mini Album Tutorial


Hello friends and happy New Year!  I've taken quite the long break from my art this month for very good reason, but I had a stretch of free time and wanted to make this winter album for our New Year's challenge at Mini Album Makers.  Our sponsor this month, Gypsy Soul Laser Cuts, is offering a great prize bundle to the lucky winner, so come play along!


It's taken me a while to find the words to share with you, but on December 4 our youngest daughter Sydney (that's her on the right) was diagnosed with Acute Lymphoblastic Leukemia.  We have spent 16 days this December at the hospital and completed four rounds of chemo.  We have every confidence that Sydney will be cancer free, though the next two years will be quite the struggle.  We truly appreciate your prayers, as this is her senior year of high school and having to pull out of classes and basketball has been really hard.  But she has strong faith, great spirit and is a fighter!  <3


This idea popped in my head and I just went with it, and am happy with the results.  I wanted to make some "Polaroid" style pages to fill with my sweet girl's photos.  Her birthday is in January and I thought it would be a thoughtful gift.


I cut four panels from leftover Christmas packaging, aka cardboard and gessoed them with really thick coats.  While the gesso was wet on one side I laid cheesecloth into the wet gesso and brushed over it to secure.  On the reverse, dried gessoed panels I applied Dusty Concord and Tumbled Glass Distress Oxide directly to the panels (DTP) and spritzed with water to move the color around.  I blended with my finger where necessary.


I used the Tim Holtz Rosettes layering stencil with DecoArt Snow-Tex and the Holiday Knit stencil with BoBunny Glitter Paste over my four inside panels.


I used a combination of Tim's Shadow Script dies for the sentiments over my "Polaroid" panels.  I cut them to 3x4" from white card and used Tim's 2 1/2" Stitched Square die to cut out the center.  I added foam tape on the sides and bottom so I could easily slide the photos inside.


I used a combination of Tim's snowflake dies: Iced Flake and Stacked Snowflakes.  The glitter paper was from a gift bag my other daughter gave me for Christmas.  I love those sentimental details... <3


On the cover I layered lots of snowflakes from the glitter paper and Metallic Kraft Core.  I glued Tim's Flurry #2 snowflake, which I stained with Dusty Concord DOX along the edges.  I stained seam binding with Tumbled Glass DI and made a loopy bow.  The beautiful charms are from The Funky Junkie Boutique.  Thank you Linda!


Over that beautiful Flurry #2, I added a metallic Christmas Small Talk sentiment.  Here's a shot of the reverse panels with that beautifully stained cheesecloth.  For this side, I mixed my ink with water and brushed it on.  I tied the panels together, making sure the strings went out when the book was accordion folded.  I used cotton yarn, then glued tiny pom poms to the ends of some of the strings.


I hope you've had fun seeing this project and will pay the Mini Album Makers blog a visit to see our Design Team's beautiful creations for this challenge.  Though my posts may be few and far between for a while, I love and appreciate each of you wonderful friends I've made through blogging and will try to catch up with your beautiful work when I can (wifi permitting!  ;0)  Huge hugs, Autumn

You are invited to the Inlinkz link party!
Click here to enter

Dec 3, 2018

Tim Holtz Tea Time and Coffee Blueprints Cards


Hello friends!  Today I'm sharing a couple more cards I made for the fall/winter Coffee Lovers Blog Hop.  I had a great time using the Tim Holtz Coffee Blueprints Minis again and this time decided to go for a chalkboard effect. 


I carefully arranged the images in a row on a large acrylic block then stamped and embossed them in white.  To create the chalky effect, I used Picket Fence Distress Ink and a blending tool, then also tapped the pad direct to paper.  I layered over the Christmas Paper Stash.


I chose a simple embellishment of the poinsettia from the Funky Festive dies, layered over a bed of Juniper Punched greens I inked with Evergreen Bough Distress Ink.  A simple, but bold design.


For my next card I used Tim's Tea Time Bigz die.  I cut three of the same tea cup from Mixed Media cardstock.  To smooth out the cut marks on the cup I used in reverse, I sandwiched the cup and two pieces of thin chipboard and ran through my Big Shot.  I sponged the top one with Frayed Burlap, the middle with Fired Bruck, and the bottom with Peeled Paint.  I stamped images from Tim's Ornate (& Lace), (Stripes &) Holiday Type and Mini Swirly Snowflakes stamp sets. 


I stacked them together like so, then layered onto a trifold card.  For the background I used the (Nordic &) Plaid stamp.


I added another Funky Festive poisettia, layered with more Juniper Punched greens.


For the inside I was tickled to use Tim's new Cut Out Script alphabet dies to make my own custom coffee sentiment!  :)  Fa la latte!  I layered it over a Stitched Rectangle panel so there would be room to write inside.  The inside music is from Tim's Music (& Advert) stamp set.


See all of my coffee cards HERE!

I'm sharing with:

You are invited to the Inlinkz link party!

Click here to enter

Dec 2, 2018

Tim Holtz Fresh Brewed Christmas Coffee Card


Hi friends!  I'm totally enjoying myself crafting just for fun for the Coffee Lovers Blog Hop.  Today I worked on this green/plaid design.  There were several mishaps along the way, but I tried to salvage the card as best as I could because I really loved the end design.  I used the Tim Holtz Fresh Brewed Bigz die, this time sponging with Vintage Photo and Walnut Stain.  I splashed with water and lifted the droplets, then went overboard with the white gesso splatters and smeared part of the cup.  I had already glued everything together, so I tried to wipe it away...  :(  I ended up smearing the plaid in doing so and had to make a patch.  Seriously, that called for another cuppa coffee!  ;}


I love the yummy effect of this frozen latte!  I used Tim's Plaid (& Nordic) background stamp and Black Soot Distress Oxide for the background.


For the sentiment I used Tim's Shadow Script Christmas die over a strip of paper stamped with the Flurry (& Pine) stamp set.  For my floral spray I used the Juniper punch again and berries from the Funky Festive dies.  As a final touch I added a sentiment from the Occasions Small Talk stickers.


And here's a card I shared on Instagram yesterday.  My compututer's acting up so I won't go into details, but find that post HERE.


See all of my coffee cards HERE!

I'm sharing with:

Simon Says Stamp: Gift It (These are for coffee gift cards)

You are invited to the Inlinkz link party!

Click here to enter

Dec 1, 2018

Tim Holtz Watercolor Trees and Baroque Frame Hack


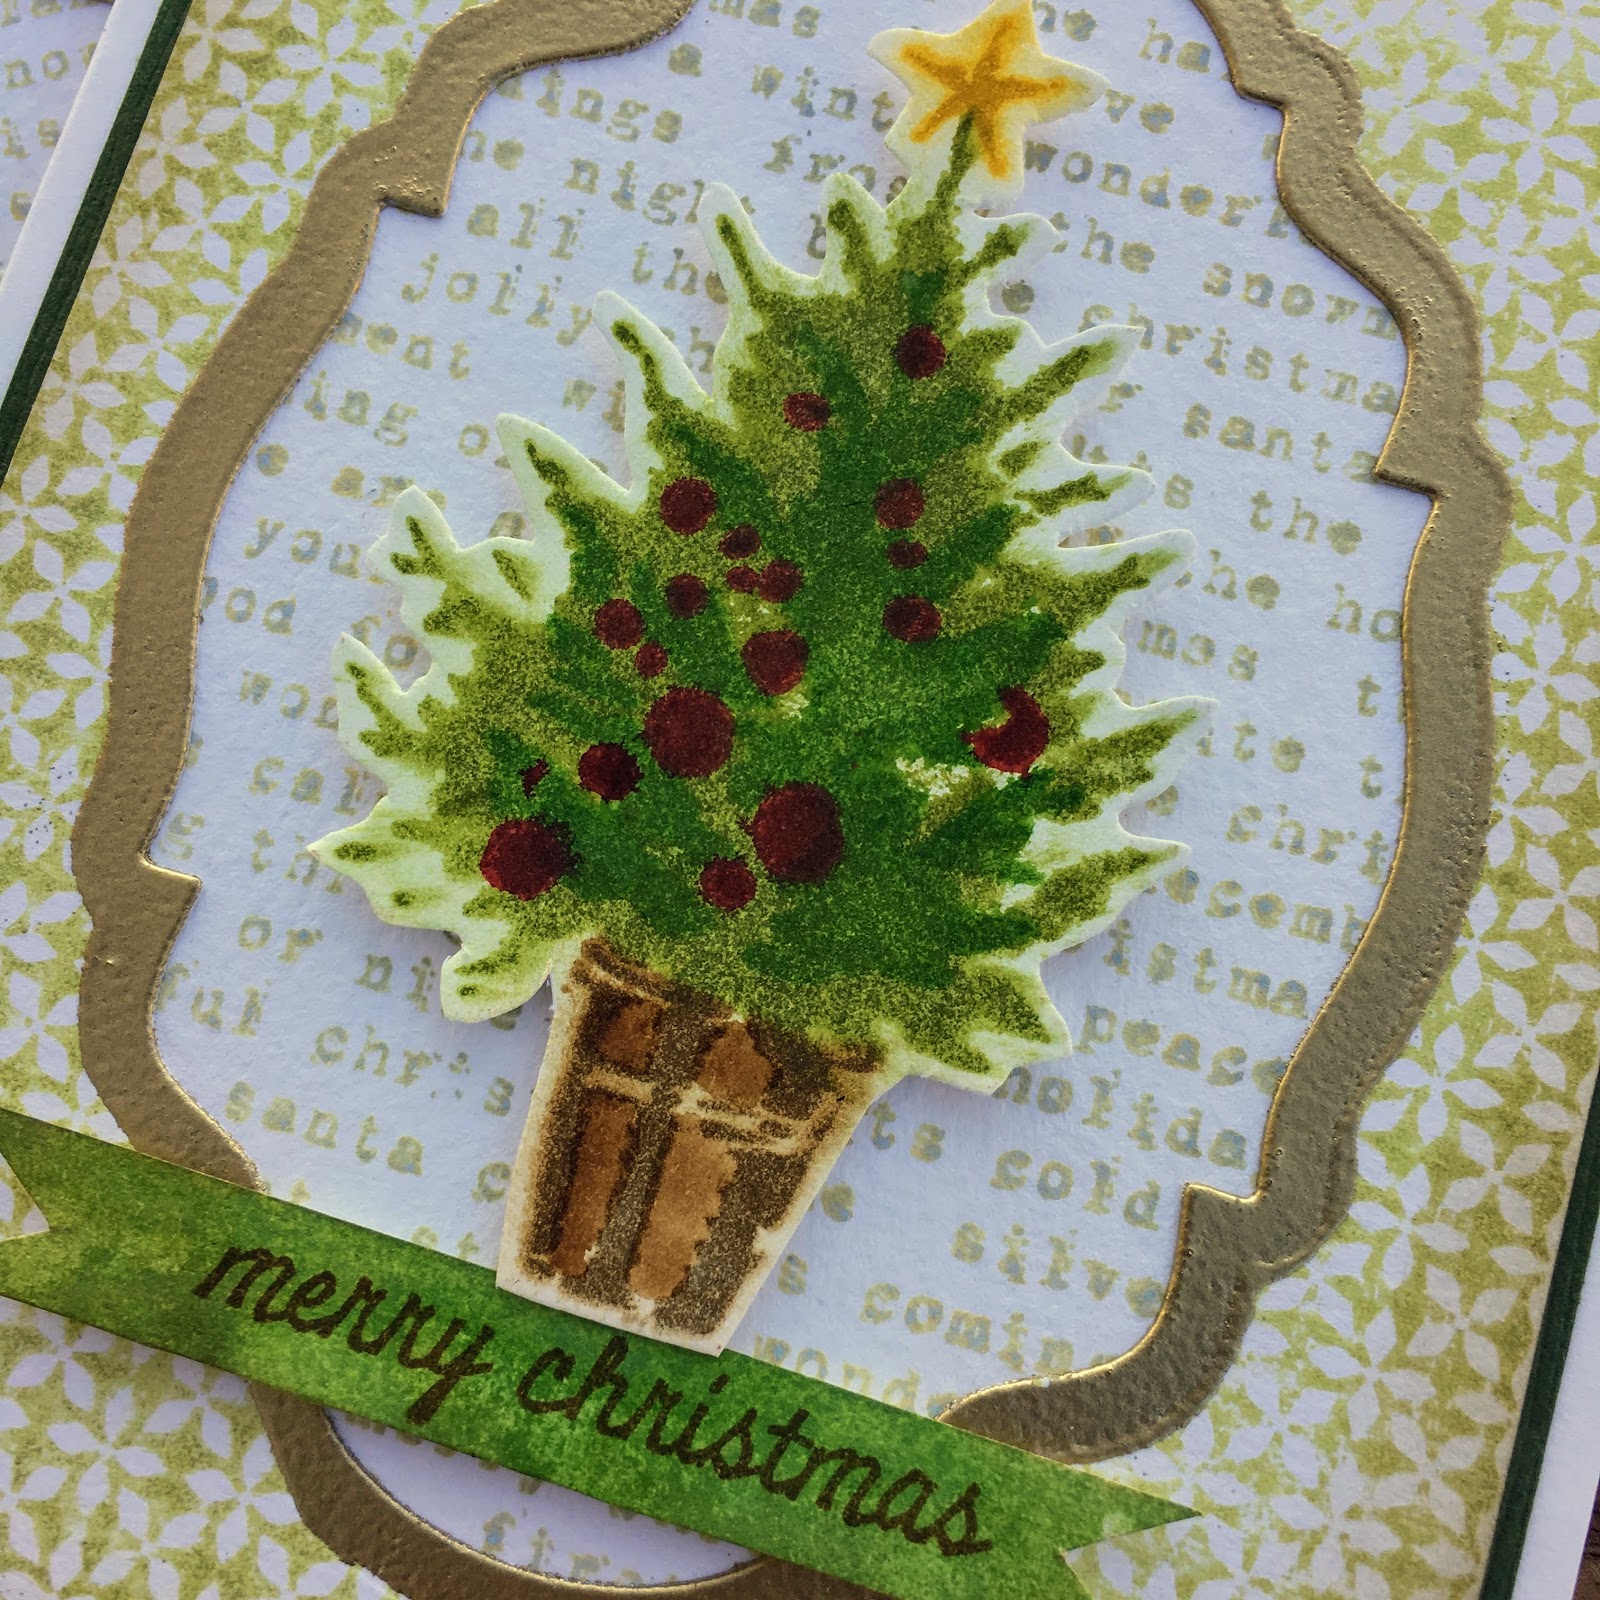
Happy December friends!  If you were hoping for a Mini Album Makers Challenge post, please remember we are taking a break and have extended our challenge through the end of the year.  Find out more HERE.  I'm spending my time making some Christmas cards.  Today I'm sharing a batch featuring the Tim Holtz Watercolor Trees stamp set.  Oh how I love this set!  I wanted it so badly last year and am happy to get to finally have a play...


I stamped my four trees using Tim's Stamp Platform and Distress Inks.  I fussy cut each one, then worked on my background panels.  I used the (Plaid &) Nordic background stamp and Shabby Shutters DI.  I used the Stacked Baroque die to cut out the inside portion.  I dipped those in more Shabby Shutters, but decided to save them for another project.  Now, I wanted a frame for my Baroque opening, but the next size of die was much too large for my small cards.  In the past, I have traced the perimeter of the die used for the opening onto cardstock and cut it out, but I didn't want to hand cut four pieces like this...  What to do?  I decided to trace the die onto foam and cut out to make a stamp.  The permieter of the die is just larger than the cut out shape.  I did not cut the center of the foam stamp out so that the shape wouldn't warp.  Then I used the Ranger Embossing Dabber along the edge of the stamp.  I used the recessed marks around the opening as a guide to stamp, then embossed in Princess Gold. 


{Insert happy dance!}  I just love how this turned out!  I chose to make a background panel from the (Stripes &) Holiday Type background for the opening, this time using Old Paper Distress Oxide to get a little more color variation.  I sponged the main panel's edges with Frayed Burlap.


I picked a sentiment from the Watercolor Trees set and stamped onto mop up inky paper, then cut it into a pennant banner.


More super simple, mailable Christmas cards for my boxed card mission.  These were such a joy to make.  I have more stamped trees using the tall, skinny tree and can't wait to use them for cards too. 


Don't forget to check out my card box tutorial HERE.  Thanks so much and have a lovely day, Autumn

http://sewpaperpaint.blogspot.com/2018/10/boxed-gift-cards-tutorial-free-printable-template.html

I'm sharing with:
Simon Says Stamp: Gift It (Gift boxes of cards)
Simon Says Stamp: Anything Goes
You are invited to the Inlinkz link party!
Click here to enter

Popular Posts