I am truly thrilled to share this tutorial on DIY paper flowers with you. The best part of this tutorial
is that you can use things you already have on hand for these techniques! You can purchase loads of fancy flower making products, but there are many things already in your home that can easily create the same effects. To start you need some simple flower shapes cut from scrap printed cardstock. I used the Tattered Florals die for most of these, but you could easily cut out flowers freehand if you don't have a die cutting machine. The starburst in the middle is a McGill punch, and would also be pretty easy to cut by hand.
Mist the cut flowers with water on both sides as you begin to shape your petals. I used the rounded end of my Uniball ink pen over a firm, but thick mouse pad and pushed into each petal to create this curved upward effect. Use a wooden skewer or thin paintbrush handle to curl the center petals as desired. Let each layer dry. They will harden as they dry and the shape will remain. Glue the stacks together with Aleene's tacky glue. I put my glue upside down in a heavy drinking glass so the glue would come out easily and quickly. After your glue has set you can either add pearl bling or a brad to the center of your flower.
These are made with a Brenda Walton Sizzex die using the DIY Gessoed Flower Tutorial I posted HERE. I found out that you don't have to use the gesso and paint or ink over the flowers. They will harden just from the water and crinkling. I like the variation created on these without having used the gesso. I particularly like scrunching up the center layers a lot so that the brad doesn't show. Then you can use really cheap brads and they don't even have to match.
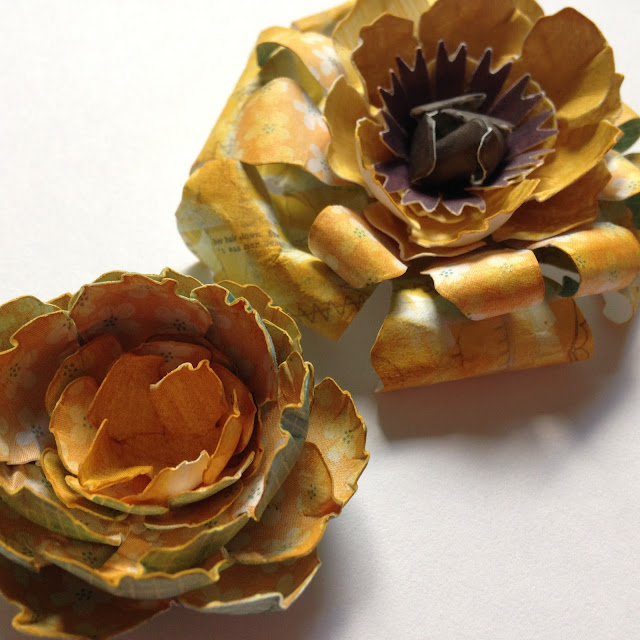
This big brown flower is my favorite, the solid kraft flower my second fav! To create the layers in the big brown flower, I curled the petals of the die with the skinny petals down. It really created great dimension! The leaf is another Tim Holtz set, all leaves. The kraft flower has 7 layers of the same sized flower, with each layer curled up more and more. The center is almost completely closed. I curled them tightly and glued them in place.
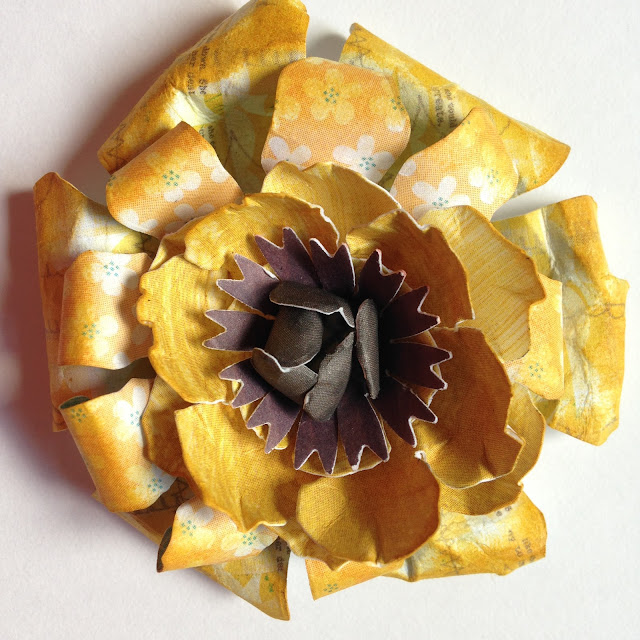
This big yellow flower has two layers of the skinny petal die curled under. The brown center is one small flower curled in heavily using the paintbrush rolling method. I sponge my flowers with ink after they have dried. I think this gives greater variation of color. I like the lighter areas. Here I used Fossilized Amber Distress Ink.
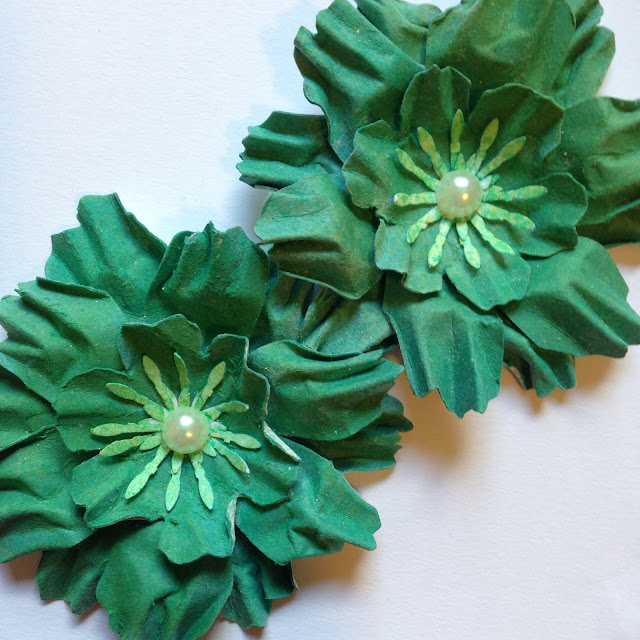
These green flowers were created by spritzing my cardstock heavily with water, and then accordion folding each petal. I used a Stampin' Up snowflake punch, which my good friend Carol gave me because she had 2, for the center. Thanks Carol! I punched two snowflakes and cut the sides off where it V'ed out. Then layered them together to make the "starburst." Lastly I spritzed with ink.
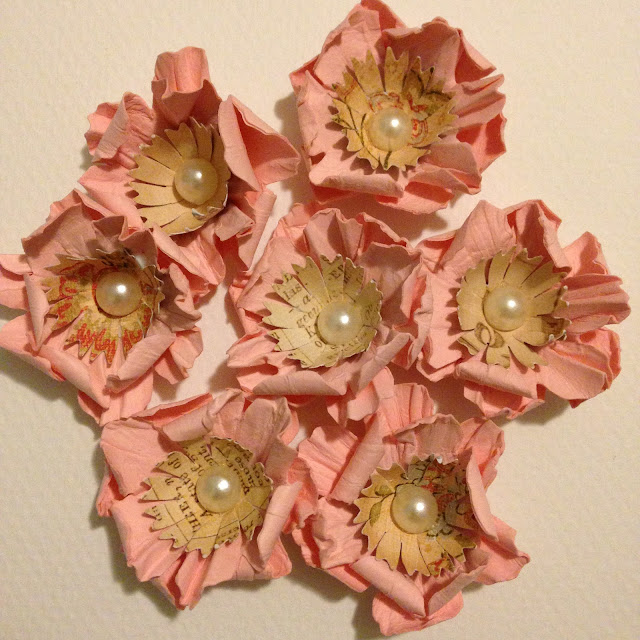
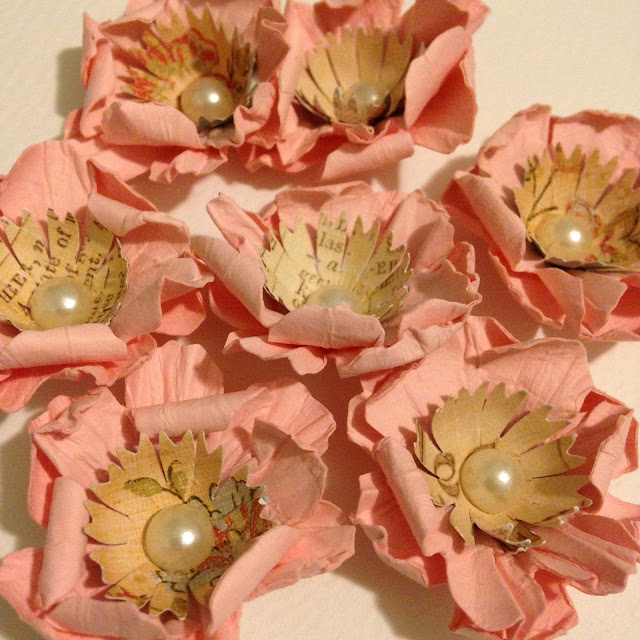
The last set of flowers was made putting a paintbrush in the center then scrunching all of the side petals around the brush, which looks like a closed umbrella. I opened and closed the petals three times to create all the nice wrinkles. Then I curled up random edges of the petals for dimension. These flowers only have two layers of the big flower and the center starburst. They look much more dimensional though. I recommend making this style of flower if you have very little of a particular patterned paper and want to coordinate it with your project.
As I create my projects, I can spritz or sponge different colors of ink onto the flowers so they coordinate perfectly. The pink flowers could easily be turned red or purple. One last trick I will share with you is on adhering the flowers to your projects. If you use the pearl bling stickers, do attach them with Glue Dots permanent glue "boogers." You know, that gummy stuff that advertisers use to send you things in the mail like a key stuck to a postcard saying, "You could win a new car!" Yes use that stuff! They sell it by the roll at Joann's. It is perfect for attaching your embellishments inside the flower and for attaching the flower to your project. I cut my 1/2" circles into 1/4ths for attaching the pearls. One package of this goes a long way, especially if you cut it down to size. And it is much easier to use than a glue gun.
Now pardon this rather long post, but this flower tutorial is my gift to YOU and the lovely ladies over at Freshly Made Sketches to celebrate their 200th Post!!! WOO HOO! I've also made this card for the celebration using one of my newly made DIY paper flowers!
I just couldn't resist adding this beautiful sentiment from Word Art Wednesday in there too!
Summer is sadly winding down and I want to squeeze in as much sun as possible. This yellow card of hope sure helps! I inked the sentiment with Fossilized Amber Distress Ink. Man, I sure do love that color! Don't forget to follow my Embellishment Pinterest board HERE.




6 comments:
Wow you are a flowers specialist for sure! They are gorgeous! Love your beautiful card! Thanks for joining our 200th sketch celebration at Freshly Made Sketches!
This post is a true gift! I'm planning to come back later and really spend time looking at those flowers! Gorgeous card and I love your scripture quote. Thanks for joining our celebration at FMS!
Your paper flowers are all so beautiful! I find them hard to make and I enjoyed the tutorial. I love your pretty card!
Oh, Autumn, your flowers are gorgeous, and you've really made mass producing them! How wonderful so they are ready to be added to a card. I love this one and love the beautiful DP and great verse from Romans! The added twine is perfect! Stunning, my friend! You've been a busy gal!! Hugs!
Wow! These are gorgeous blooms!! How beautiful they look on your card!
Thanks for sharing!
Rosi x
Great tips and wonderful examples ... you always do such super work ....
Post a Comment