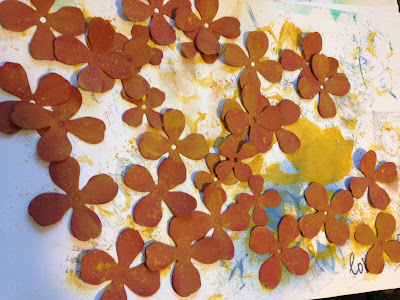
I truly contemplated if I would post these because the photographs didn't turn out well, but I really wanted to share these DIY paper flower embellishment techniques with you. They are super quick and easy to make.
I started by cutting some rusty or barn red cardstock with my Brenda Walton flower die. This wasn't the color I was going for, I wanted more of an orange, so I decided to add some gold paint to orange it up. I brushed a watery mix over the flowers, then decided to splatter them in hopes that it would look more natural.
The splatter detail is my favorite part of this batch of flowers.
For this flower I curled my leaves upward using this blue mouse pad and the rounded end of my Uniball ink pen, after it was spritzed with water. I then used a thin paintbrush to curl the edges. I wanted a natural look, so I cut a circle of some DIY Tattered and Dyed Ribbon that I posted HERE. I also cut some leaf shapes and distressed the edges of them. I could not find a center for these flowers and it was driving me nuts, so I went out in our yard and cut a small branch off of our maple tree and then cut it into little wedges with my jewelry cutters. I glued them over the ribbon circle. I really like how it turned out, but it was hard to glue. I ended up using Aileen's Tacky Glue and holding it for about a minute until it set. For these I scrunched each petal up and then curled with jewelry pliers.
After the petals were fully dried, I glued three layers together and the curls kept their shape. I added some wadded up Prima flowers to the center.
For this flower I stamped dots and then pinched a crease in each petal and twisted the crease with my jewelry pliers. When they dry the shape keeps.
For this one I scrunched the petals and did not use the pliers. I added a tighter scrunched center with the smaller flower in this die, as opposed to the green Prima flowers in the other one. I cut some of the green Prima petals apart and used them as little leaves here.
I made these little string bundles to use as the centers of the next flower. It is about eight 1 1/2" strings tied together with another longer string.I used the long tails to pull it through the circle in the middle of these flowers.
You can see the tails on the bottom and the strings fluffing at the top. I cut these from book paper and dipped in a watery mixture of Distress Ink to get the color. I shaped them with the pen and pad.
Here are all of my rusty fall flowers together. Later I ended up taking the button off and adding a pretty DIY Button Brad, posted HERE. Below is an image of my last flower making tutorial posted, which I have added to my sidebar linking to that post. I just love my watercolor app!


2 comments:
Great tutorial, thank you! Love your idea for the string stamens, brilliant! Deb xo
Great flower tutorial! Thanks so much for sharing!
Post a Comment