Feb 7, 2023

Studio Light Moon Flower Grunge Galaxy Ticket Slimline Card


Hi friends!  I have slowly been collecting some older Studio Light products, especially the Grunge Cutting Dies.  I just love the elongated shape.  I picked up the Slimline Envelope Cutting Dies (SL-GR-CD27) so I could make coordinating envelopes for all of these uniquely sized cards - win win!  For today's card, I used the Grunge Slimline Ticket Cutting Dies (SL-GR-CD26) to cut my focal panel from Bristol.  

I used the OUT OF THIS WORLD! Moon Flower NR. 137 If Kisses Were Stars (SL-MFL-137) stamp to emboss the panel in white.  This stamp is HUGE and is such an amazing background.  I literally wish I could make a dozen different cards with it because it's just so cool and compelling to me.  I dipped the embossed panel into watery Distress Inks in Chipped Sapphire, Blueprint Sketch, Peacock Feathers and Black Soot for a dark and moody galaxy background.  I gave the panel lots of flecks of leftover inks once it was dry.  

I then stamped the Moon Flower NR. 134 Strophocactus Wittii stamp (SL-MFL-134) on another piece of Bristol and loosely watercolored around the flower, adding just a tiny bit of color to the actual image.  This let me fussy cut more widely the delicate image.  I added some fringe and cheesecloth and splashes of silver mica spray, then some fussy cut moons from the background stamp set.  I'll share a video on Instagram @sewpaperpaint if you'd like to see the details.  xx, Autumn


Feb 2, 2023

Studio Light Steampunk Dreams Grunge Slimline Cards


Hi everyone!  I'm happy to share a couple of cards with you today that I had a wonderful time creating.  After making my Zig Zag Tag Book with the Steampunk Dreams DIY Block (SL-ES-DCB37) by Studio Light, I could not stop myself from creating more!  If you missed the post, find my first grungy creation HERE.

There are hundreds of cutouts just waiting to be collaged in this one paper pad and I was happy to oblige!  I have recently purchased some of the older slimline Grunge dies by Studio Light and was anxious to give them a try.  I used the Card Shapes Film Grunge Cutting Dies (SL-GR-CD198) to cut the awesome background edge and focal paper from the pad for both cards.


I am really crazy over the birds and cages included in the pad, but wanted to use the hat and "steam airship" as the focus for this slimline card.  


I tried to create two completely different colorways so you could see how versatile the elements are.  


For my second card, I added a bundle of sisal fibers.  I gave both finished cards splashes of watery gesso and a sentiment sticker.  


I really hope these cards have inspired you today!  Make sure to check out all three of the new DIY Blocks, and visit my post HERE with the Romantic Forest DIY Block.  I just know you'll love these pads as much as I do!  xx, Autumn


NEW from Studio Light!


Jan 28, 2023

Studio Light Steampunk Dreams DIY Block Tag Book


Hi everyone!  I'm back with another Mix It Up Mini Zig Zag Journal (ABM-MUC-CD417) by Art by Marlene for Studio Light, which I used HERE in a totally different way.  Yes, it was very bright and very cheery and I've done a 360 by using dark, grungy colors and images this time, LOL!  I'll let you decide which book is best, but I love using products in totally varied ways and getting the most out of my supplies.  And I love BOTH of these little books.  It's also been super fun to get back into making mini books again.  You can see all of my mini albums HERE.  


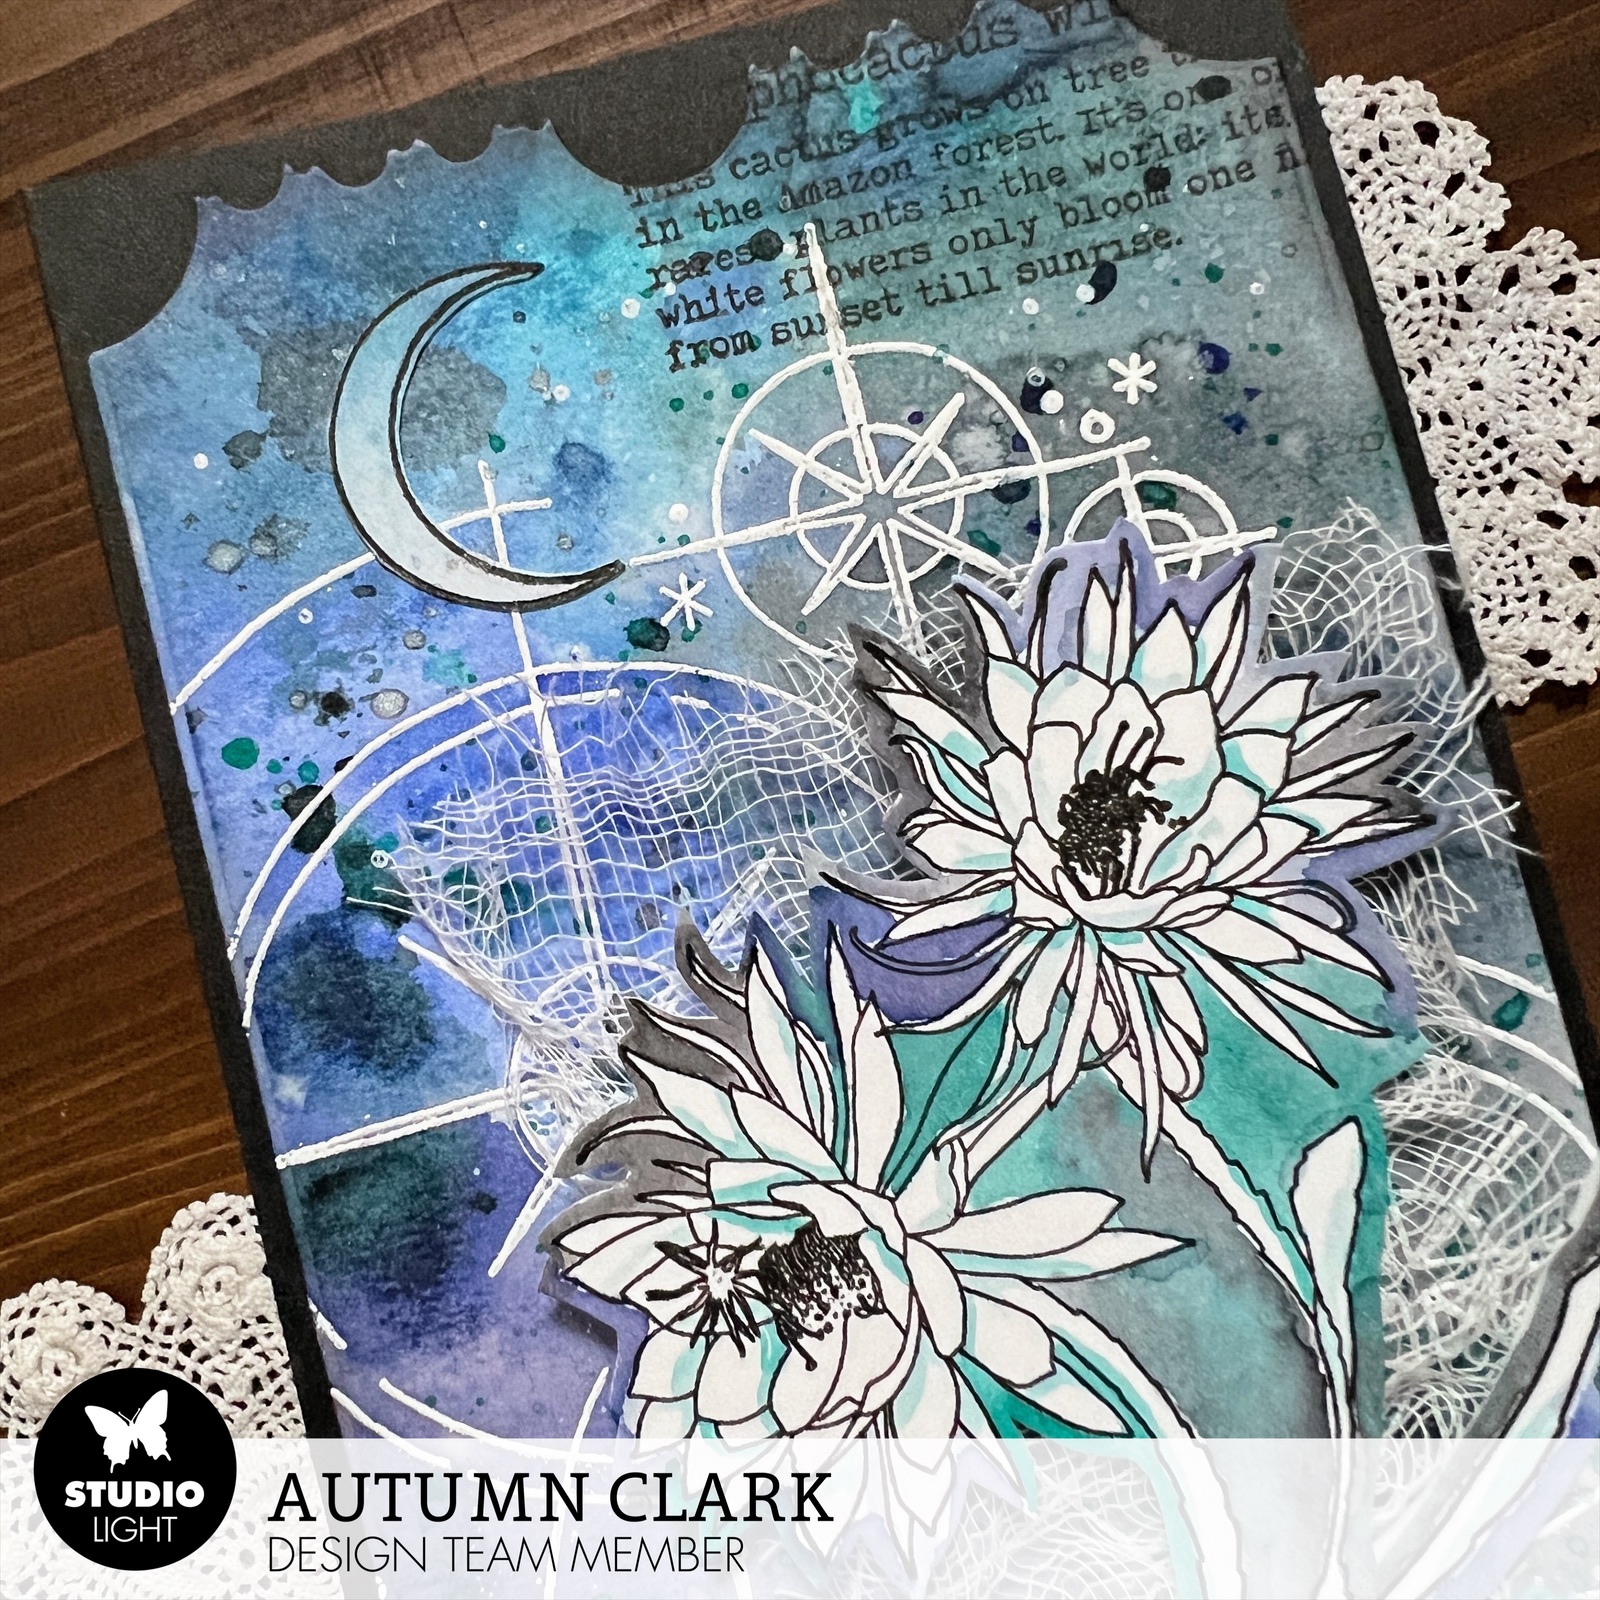
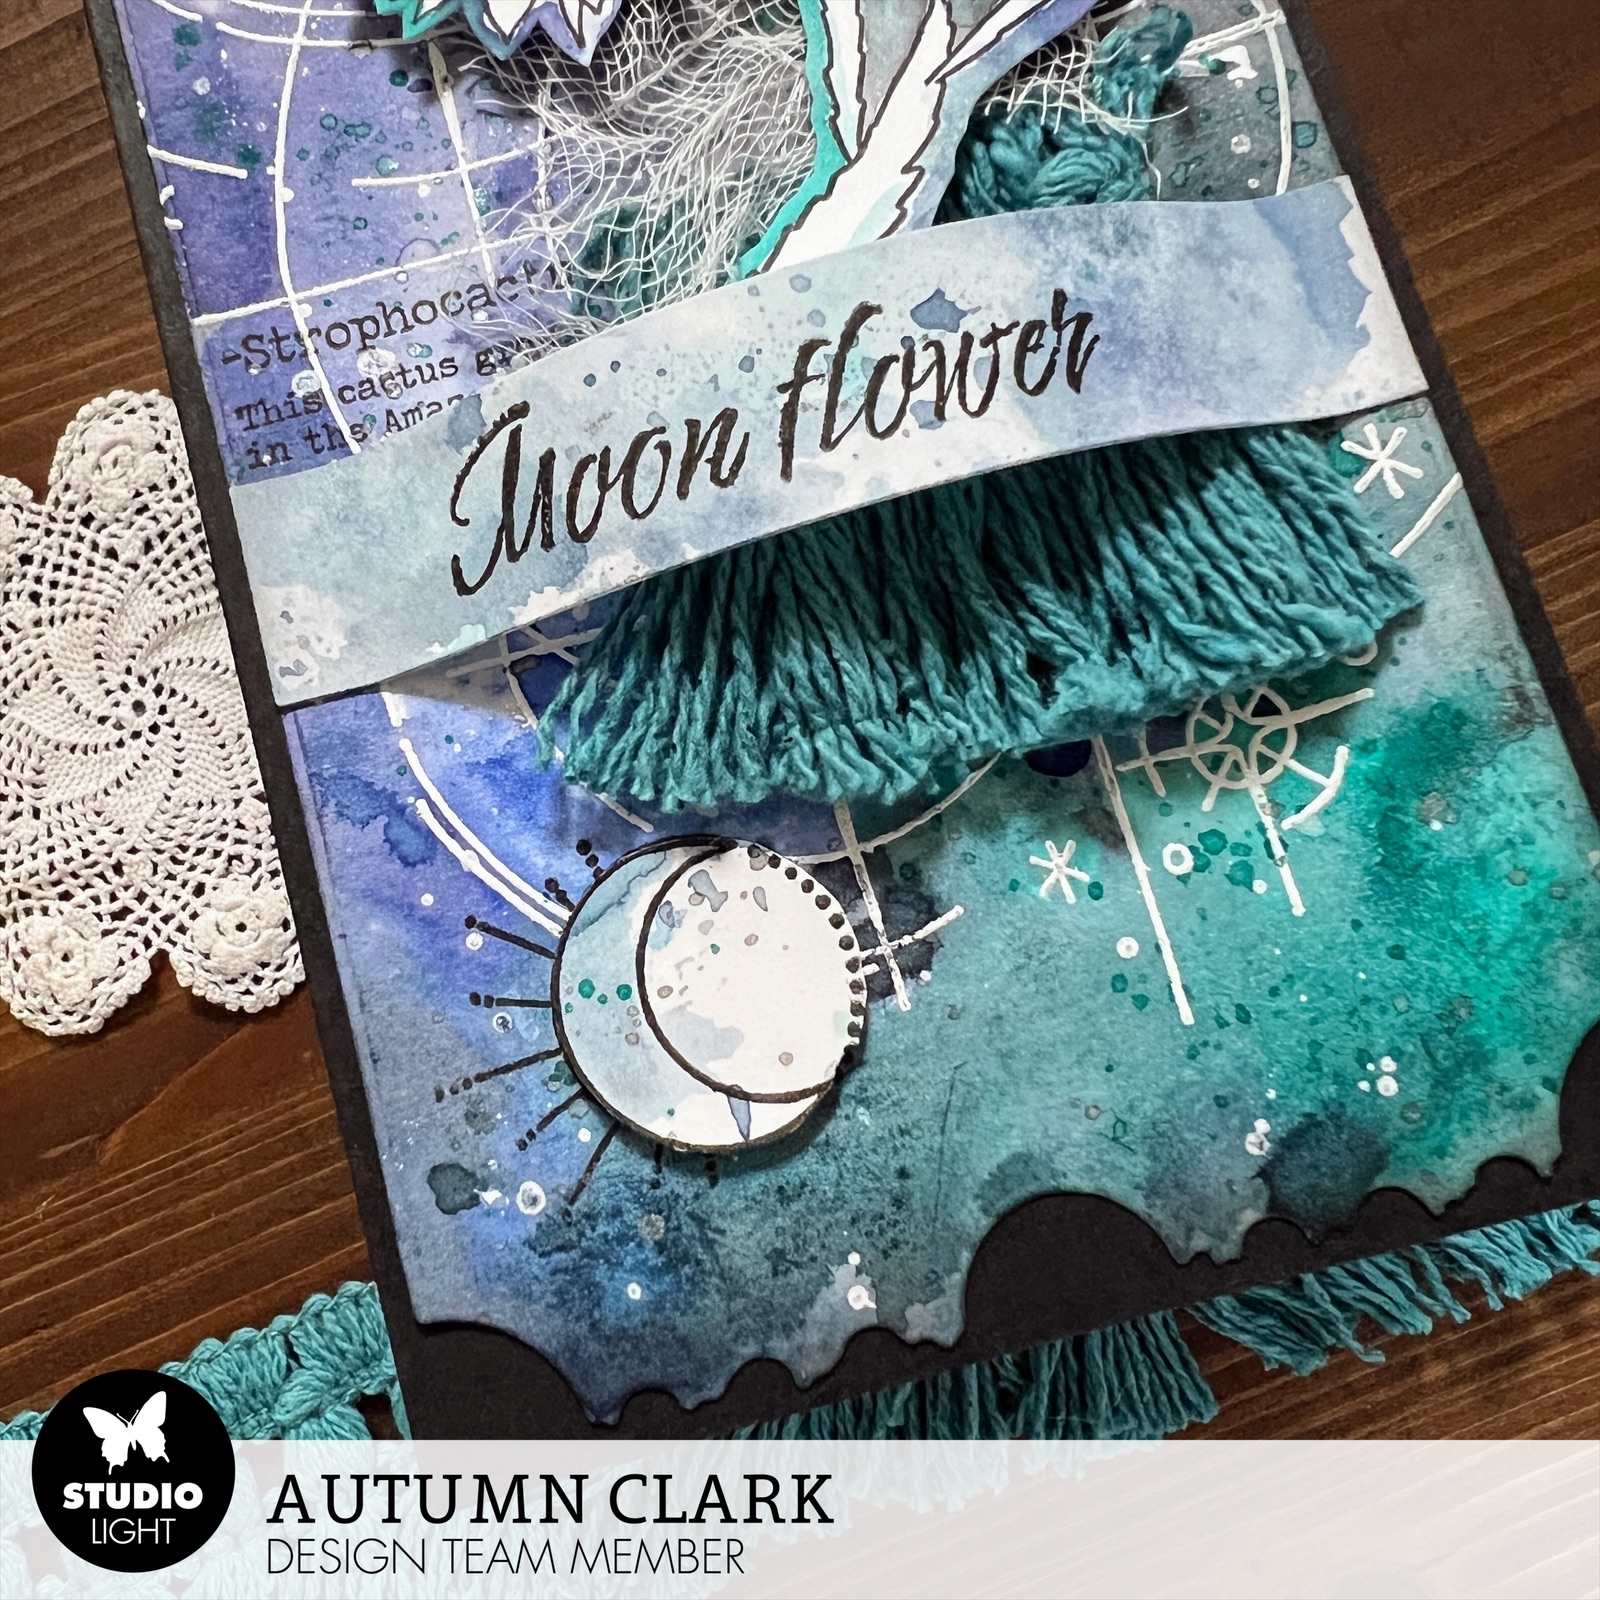
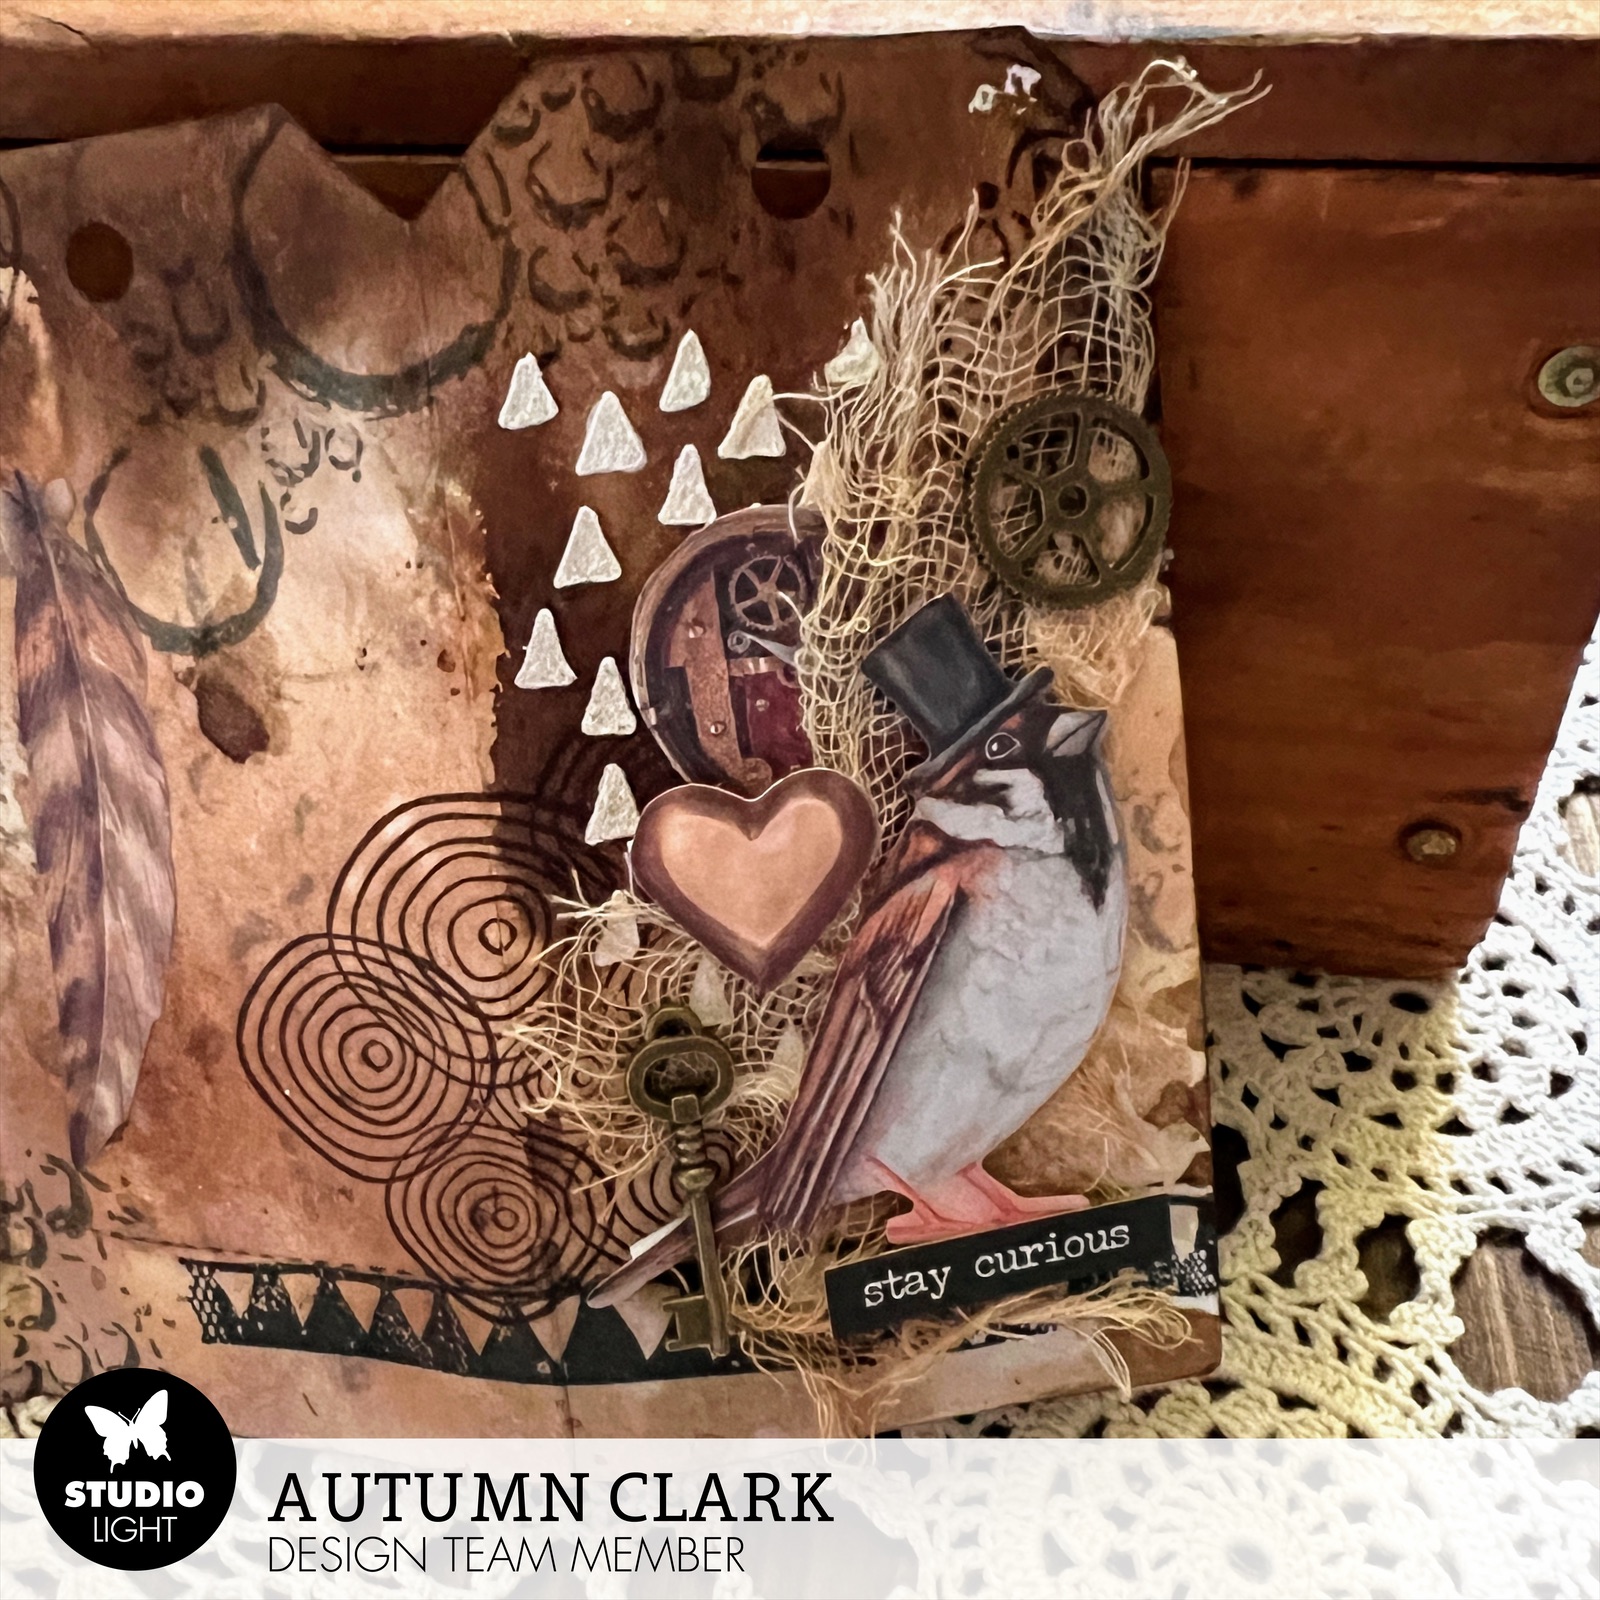
My inspiration for this book came from the new Steampunk Dreams DIY Block (SL-ES-DCB37) by Studio Light.  I shared my projects using the Romantic Forest DIY Block HERE if you missed it.  As I said, there are 12 pages of precut images (two of six designs) that you can simply punch out and use with no fussy cutting involved!  (I did cut off the tiny two or three perforations on each element, but that's it.)  There are also 20 sheets of double sided paper in the block (10x2).  The Steampunk Dreams images are SO COOL!  I only used a few elements and have zillions left for another project.


I used a combination of Distress Inks in Vintage Photo, Walnut Stain, Ground Espresso and Hickory Smoke with a spritz of water and dipped my die cut tag book (cut from Bristol) into the inks, spraying with water to let the colors flow together.  I stamped loads of Grunge Elements stamps using stamp sets SL-GR-STAMP33 and STAMPSL450.  


I used Studio Light texture paste through portions of Stencil/Mask SL-GR-MASK18 for even more texture.  


I did some white embossing as well.  For the cover, I layered several of the DIY Block cutouts over some dyed cheese cloth and adhered a key and cog from my stash.  


For the rest of my book, I just adhered elements here and there for a collage look.  


It was great fun and very relaxing.  I hope you've enjoyed this project and will check out the new DIY Blocks and Grunge stamps by Studio Light.  And if you haven't snagged your Zig Zag Tag Book die cut set, you need to grab it fast because they are selling out quickly.  Big hugs, Autumn


Jan 21, 2023

Studio Light Romantic Forest DIY Block Cards


Hi friends!  I'm really excited today to share with you a new to me product, the DIY Blocks by Studio Light.  I received my first and immediately fell in love!  There are 12 pages of precut images (two of six designs) that you can simply punch out and use with no fussy cutting involved!  (I did cut off the tiny two or three perforations on each element, but that's it.)  There are also 20 sheets of double sided paper in the block (10x2).  This DIY Block is called Romantic Forest (SL-ES-DCB38) and is filled with elegant, natural elements.  


For my first card I layered the gorgeous tree canopy over the wooden door to give the feel of a Hobbit hole.  It was such fun!  I added a stack of cakes and champagne for "elevenses," as we know Hobbits love to eat!  ;0


My next card was made on my anniversary.  I took some of the lighter paper with the lanterns hanging down and embossed a Grunge collection Magnolia stamp (SL-GR-STAMP38) in white along the edge and bottom, then added some glimmer mist spray which I allowed to bleed upward.  I used the same spray to color the gorgeous new Blooming Flowers cutting dies from the Blooming Butterflies collection (SL-BB-CD485).  I inked a leaf from the sister die set, Fresh as a Daisy (SL-BB-CD483) to go with it.  I used my flower curling tools to create the shapes and adhered them with Studio Light tacky glue, finishing with a SL adhesive pearl.  


I layered many of the cutout elements together to create this wedding day scene and especially love the contrast the embossing added.  


My final card is for those journalers and readers (me!) lol!  I carefully arranged this little library in the forest scene, or perhaps it's a library filled with beautiful potted plants - you choose!  


I hope these cards give you a sense of what the new DIY Blocks by Studio Light are like.  There are limitless possibilities of arranging these collage elements and I do hope you'll grab a Block and play on your own.  xx, Autumn

Fabulous Studio Light Products:


Jan 19, 2023

Studio Light Valentine Heart Stamps Cards


Hello lovelies!  I'm sharing a new group of cards I made with gorgeous stamps and papers by Studio Light.  For my first card, I used the Candy Jar stamp (BL-ES-STAMP351).  I colored the image with the new Studio Light brush markers and fussy cut the jar.


I used the Card Passe Partout Rectangle cutting dies (SL-ES-CD447) to cut the layers.  The center panel comes from the gorgeous Love Ultimate Scrap Collection (SL-USC-PS18).  I added a folded doily, some loopy twine and a stamped sentiment from the Bubbly stamp set (BL-ES-STAMP356).  I was so pleased with the colors on this card!  I finished with some Studio Light adhesive pearls.  


I wanted to use the stamp in a completely different way, so I did some colored pencil work using my Prismacolors on kraft.  For these layers, I used the Card Passe Partout Square cutting dies (SL-ES-CD446).  I used the same sentiment stamp and added some white highlights with a Uniball.  It's been ages since I used my colored pencils and I really enjoyed it, though I'm a little rusty...  :)


My next card features the gorgeous new Flying Hearts stamp (BL-ES-STAMP349).  Again, I used the new Studio Light brush markers to color and layered with the Card Passe Partout Rectangle cutting dies (SL-ES-CD447) and the Love Ultimate Scrap Collection (SL-USC-PS18).


I went in a shabby chic direction with my final card and focused on using the imagery in the Love Ultimate Scrap Collection.  I cut my elements using the Slim Passe Partout Oval cutting dies (SL-ES-CD445).  Isn't the cage a beautiful image?!  


I embossed the "love" sentiment from the Bubbly stamp set (BL-ES-STAMP356) onto a black strip to add contrast and added some of Studio Light's adhesive pearls, along with a torn piece of paper doily, of which I made a crunched ribbon.  I hope you've enjoyed these cards today and are inspired to create some Valentine cards of your own.  xx, Autumn


Studio Light Products Used:


Popular Posts