Sep 29, 2015

Flowers and Sparkles Stamped Watercolor Background Paper Card

card 1
I was going to show you the lavender background in this 4 set series, but couldn't get away from these lovely peachy pinks.  Unlike last week's card HERE, I embossed the floral design in Florida Sunset WOW! Embossing Powders.  Rather than brushing on a watercolor wash, here I dipped my paper into a watery puddle of Dried Marigold, Tattered Rose, and Scattered Straw Distress Inks.
card 2
The pattern is the same, but the result is quite different.  I was playing around with ideas for the focal image and decided to watercolor the stamp and cut it out to layer over the card, but it didn't turn out like I wanted.  Later, I decided to cut the different flowers out and make one big flower embellishment with them, curling the petals like I did in my paper flower tutorial HERE.  I just happened to have a brad that was exactly the color of the Florida Sunset EP - awesome!  So I used it for the center.
flowers
Here's a shot of the components of the flower.
flower 2
And all of them glued together.
closeup
My theme this week was sparkle and look how this EP shines!  I even added some gelli roll ink highlights to the sentiment to make it shine too.
card 4
I had grunge the card up a bit, you know me!  So I distressed the edges and sponged the sentiment.  I hope you'll come back next Tuesday to see the third paper in this series.  I'm linking up to the Tuesday Night Bloghop at Unity HERE, to Crafty Cardmakers & More for challenge #148, Make it Sparkle HERE, and to SSS Wednesday for their No Designer Paper Challenge HERE.  Thanks for looking!

Sep 28, 2015

Autumn Blessings Fall Gift Card Holder Card

card 1

 Still having the best time playing with THIS freebie from Julee of Poetic Artistry, owner of Verve stamps.  This time I used the week 4 Viva la Verve sketch for my design.

sketch

card 2

I used the sweet little cups to replace the arrows in the design.  I colored them with Antique Linen and Peeled Paint Distress Inks and a water brush.  I decided to use Julee's idea and make another gift card holder.

card 3

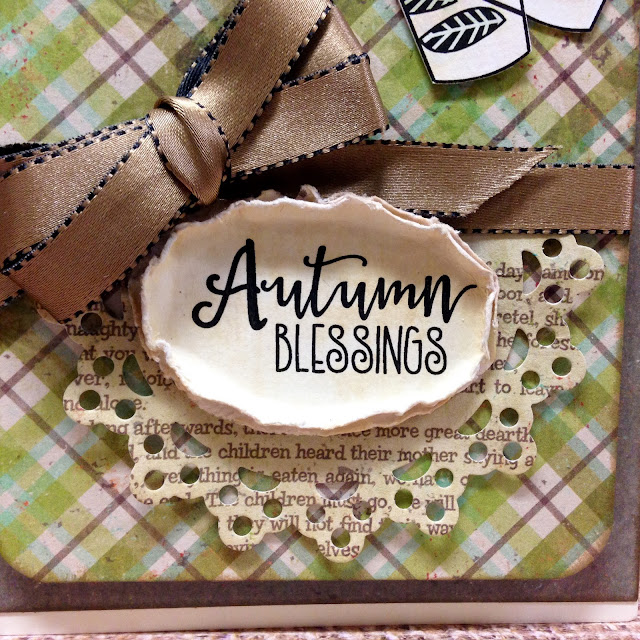
 I didn't have an oval die, so I stuck the printed text onto an oval sticker and then dipped it into an inky puddle of Antique Linen.  I decided to distress the edges since the cutting wasn't nice and neat like it would be with a die.  When I did, the adhesive separated a bit, but it was a happy accident because I got this cool ruffled layered look along the edge.  :)  I decided to layer over a doily since the sticker wasn't really big enough to fill in the design.

card 4

I'm having so much fun playing along with the Coffee Lovers Fall 2015 Bloghop.  Thanks to Julee's sweet freebie, I can participate more!  Hurry and get your download!  I'm linking up to the Coffee Lovers Hop HERE and to VLV for Week 4 HERE and to Craft-Dee BowZ for their September Anything Goes with a Bow challenge HERE and to Classy Cards 'n Such for their Feeling Fallish challenge HERE.  Make sure to share some comment love with Julee for her generosity!

Coffeelovershop

You are invited to the Inlinkz link party!

Click here to enter

Sep 27, 2015

Fall Coffee Lovers Gift Card Holder Card

card 1

 I was so tickled that Julee of the blog Poetic Artistry, designer of Verve Stamps, shared THIS awesome free printable for the Coffee Lovers Fall 2015 Bloghop.  These are the most darling little cups and beautiful sentiments - THANKS JULEE!

card 2

 I made an inky puddle of Distress Inks in Cracked Pistachio and Peacock Feathers and dipped the sentiment into it.  I colored the cups with my new waterpen (YAY!) and Creamy Caramel and Really Rust SU! inks.  I cut the doily (MFT) down some so I could tuck a gift card inside.

card 3

 These little cups are the cutest things!!!

card 4

 I added a triple bow from sheer rust organza ribbon.  Hope you are enjoying the hop and will hurry and get your images downloaded before the freebie expires.

card 5

I'm linking to the Coffee Lovers Fall 2015 Bloghop HERE and Verve Stamps: Inspiration Challenge, Autumn Lovelies HERE and to Friday Mashup for their Pumpkins & Die Cuts challenge HERE and to Really Reasonable Ribbon for their Orange You Glad it's Autumn Ribbon challenge HERE.

Coffeelovershop

You are invited to the Inlinkz link party!

Click here to enter

Sep 25, 2015

Coffee Lovers Fall Blog Hop Shabby Tea Party Invitation

card 1

My shabby and vintage inspired tea party invitation with layers of antique style patterned paper and vintage trim/flowers for the Coffee Loving Cardmakers Fall Blog Hop.

card 2

 I brushed some gesso along the edge of the base layer to soften it and blend with the white gauzy flower and crocheted trim.

card 3

I stamped the images, by Stampington, in Chestnut Memories ink onto various patterned paper.  I have received several comments lately on how I stamp onto patterned paper.  I have always done this, but was just tickled that it was inspiring to my readers.  :)

I always chose the least busy pattern in a collection and use it for stamping, then it coordinates with the other papers and doesn't seem stark in contrast.  I rarely ever color in my images (lazy, lack of expensive markers) and feel that the slight patterns give the stamped images the same quality as those that are colored (easy).

card 4

I made several in this design to give myself a reason to hostess a tea party.  The kitchen is painted afresh (greige) and I am ready to use some of my vintage dishes that did not go with my yellow kitchen.  :)  Thanks for stopping by, what a fun hop along.  Be sure to visit the Coffee Lovers Fall Blog Hop HERE and join in on all the fun.

Fall Hop

You are invited to the Inlinkz link party!

Click here to enter

Sep 24, 2015

Hand Stamped Patterned Floral Paper Card

card 1
 I have been having a ball making my own hand stamped patterned paper this week, as I shared HERE.  I really wanted to break out my Unity stamps and see what I could come up with because I'm super excited about the new Unity blog hop each week on Tuesday night.  I'm so glad that this week's hop was delayed because I  just finished my card and the party just started!
card 2
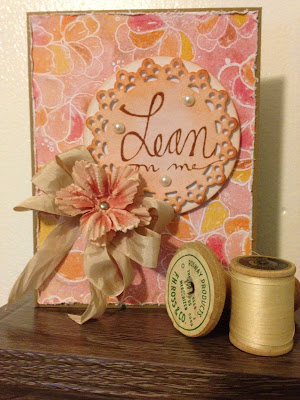
 I finished Pam Garrison's class, Creative Sketchbook, this week and it helped inspire my process while creating this background paper.  I stamped the flower from the Lean on Me set repeatedly in Versamark ink and embossed it in white.  Then I did a wash of different shades of watercolor, pink, brown, and some yellow.  It was pretty, but I decided to treat the petals as more of a pattern and less of a "flower" and began to color them in with colored pencils randomly.  This was so much fun!!!  I made a lavender paper in a similar design that I will share with you next week maybe.  All in all I made four different backgrounds and look forward to using them.  I used my new MFT doily die and gave it a wash of pink watercolor and sponged the edges in Adirondack Ginger and stamped the sentiment in Memories Chestnut.  I added some pearls, seam binding, and a Prima flower for tops.
card 3
I love this mix of funky, feminine and sketchy!  Weird, huh?!  I'm linking up to the Unity hop HERE and to Simon Says Stamp Wednesday for their No Designer Paper challenge HERE.  Hope you enjoyed seeing this card.  <3

DIY Patterned Paper Distressed Floral Card

card 1
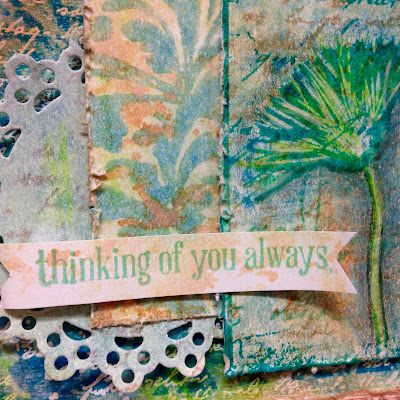
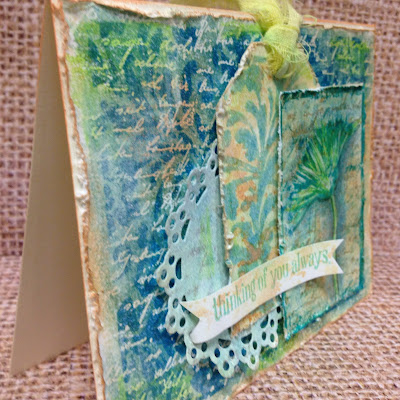
I really had fun making my own designer paper as I shared with you in THIS post.  Honestly, I just want to sit in  my art room for the next ten days straight and do this over and over again in different color schemes and with new stamps and varied materials.  It was FUN!!!  I haven't received this kind of artistic thrill in a while, so yay!  But much to my surprise, the challenge this week at Simon Says Stamp Wednesday is No Designer Paper.  I mean how ironic?!  So I decided last night to play with some of my pieces and make a card.
card 3
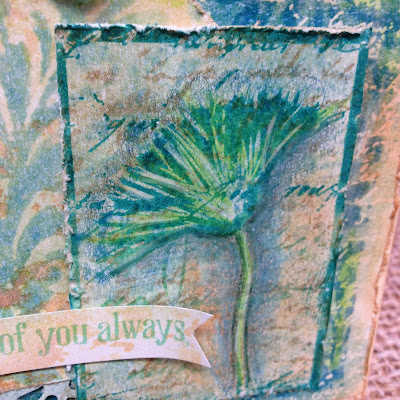
 One of my bestest friends is traveling to England for FOUR LONG MONTHS and I am going to be visiting her next week, so I wanted to make her a super altered, grungy card.  I pulled out this Christine Adolph stamp by Stampington & Co. and put it to work, stamping in Peacock Feathers Distress Ink and shading with colored pencils.
card 3
 This Unity sentiment stamp was perfect, exactly how I feel about my sweet friend.  The doily is a new die from MFT and I am so very happy to have won it.  :)  :)  :)  I applied some white Distress paint over it to tone down the color and add variation.
card 4
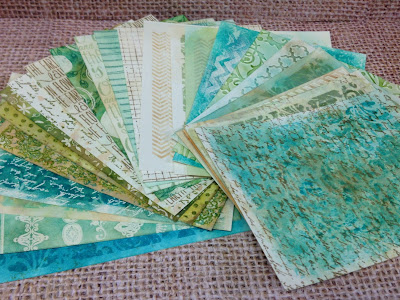
I finished this card in 10 minutes at midnight last night, after staying up late for a family movie night.  It was so easy to use the papers I premade intentionally coordinating.  I added some DIY tattered and torn ribbon (tutorial HERE) for the MMCC optional element.
paper lineup
I'm linking up to SSS for the No Designer Paper challenge HERE and to the Mixed Media Card Challenge for their Friendship challenge HERE.  
MMCC SSS

Sep 22, 2015

Making Patterned Background Paper With Stamps

paper 1

When Simon Says Use a Stamp, what do I say?  USE THEM ALL!  I've used so many stamps to make this collection of patterned background paper and couldn't be happier!

stamps

Well, I started by picking 4 stamps and cutting one 8 1/2 x 11" piece of heavy cardstock into four sections.

paper 2

I decided I would make a collection of green paper and change my cards up a bit, since I've been in an aqua phase for weeks.  I dug out my Distress  Embossing Powders and coordinating inks and went to work.  I embossed three designs in Peeled Paint EP and one in clear.  

background 2

You know the story, I got so into my project I forgot to take pics in between the stages, but basically I sponged layers of inks and made inky puddles to dip my papers into.  I love this one with clear EP.  The light spots came from dripping water with my fingers onto the inky background.

background 3

As you might have noticed from the top picture, this design didn't stamp fully.  I embossed it anyway, then decided to overstamp it in Peacock Feathers and see if I could get a continuous design and it worked.  I just love these two colors together!

background 4

I decided every good collection of papers needed a light sheet, so I tried to go easy on the inking here and just dipped into a very watery batch of Antique Linen.  I love this piece!

background 5

For the dots I added some Squeezed Lemonade to try and add a little color variation.  THEN...  I cut another sheet of paper into 4ths (and another, and another, and another, and another............)

background 6

I should have started this story with, "This one evening I went and got a latte and determined to stay up late having fun in my art room."  Because that is the bottom line.  I was so excited with the way these were turning out that I broke out a second set of colors (teal - NOT aqua - ok, maybe aqua!  What can I say?!) and went to town experimenting with different stamps and methods.  Above I used the off stamp from the stamp used below and spritzed it with water to get a really pale design.  I sponged that with more ink, spritzed it with water, then overstamped with Frayed Burlap.  

background

For this one I embossed in white first then used the stamp over it in Peacock Feathers and then sponged heavily in Peacock Feathers.  It's a nice "solid" design, with a bit of white for interest.

background 7

This was one of my favorites too, I took a collection of border stamps and lined them up on my clear block and stamped them all as one in clear EP.  Then sponged softly.

background 8

Another offstamp of the stamp below, spritzed with water.  I put the stamped card into a puddle of Vintage Photo and the colors ran together so beautifully.  This one didn't photograph so well, but is so pretty in person.

background 10

I could go on and on, but this last background was made similarly to the above with the white script, but on this one I spritzed the piece with Mister Hueys and the white mist seemed to make it look like velvet.  When the few larger white splatters dried they made the most beautiful "drawing" of the ink below.  SO much fun!

papers

All in all, I ended up with 26 backgrounds!  Some were made with embossing folders, but I won't show you every single piece.  I look forward to sharing my finished cards with you and using every tiny scrap for die cuts and embellishments.  I'm linking up to Simon Says Stamp Monday for the Use a Stamp Challenge HERE.  A special shoutout to Tammy Tutterow for sharing her genius in creating such lovely backgrounds and inspiring me to play.  <3

Sep 21, 2015

Verve Stamps September Week 3 Distressed Card

card 1
Today is my 100th post!  I am so thankful to everyone who has shown me support and offered encouragement over the past few months with starting my blog.  I read and treasure each and every comment!
 sketch
Here's my September Week 3 Viva la Verve stamps card using the Happy Place set - with lots of distressing.  
card 2
I embossed the flowers with Wow! embossing powder and sponged them lightly with evergreen Adirondack ink.
card 3
 I distressed every element on this card to show the beautiful 2-sided paper back.  I added the little strip across the bottom because I felt like it just needed something extra.
card 4
I realize that I have made a BUNCH of cards in this color combo lately and am going to try and switch gears.  I am struggling to find the right papers and none of my local stores carry anything I like anymore.  But I have to tell you, these colors do make me happy!  I'm linking up to VLV for September week 3 HERE and to Simon Says Stamp for STAMPtember Use a Stamp Challenge HERE.  Have a wonderful day!

Popular Posts