

Hiya sweeties! Today we begin a new challenge at Frilly & Funkie and our hostess Suzz has chosen the theme "The Year of....." She says, "Welcome to a brand new year! I am not very good at New Year Resolutions but I do like to think about what I want to focus on in the New Year. To help me do this, I pick a word that is my word for the year and try to use that word to keep me focused on what is important. The challenge to you is to pick a word that will be your inspiration for 2018. Create a vintage or shabby chic project that includes your word of 2018. The word can be part of a sentiment, phrase or stand alone on your project as long as it is featured somewhere in your art."

Now, I had already revealed my "one little word" for 2018 to you in THIS post where I recapped my blog milestones for 2017. I couldn't very well cheat and make up an easier to portray word! There was no going back! Ha ha ha! I thought long and hard about how the word "savor" could be applied and decided to transform an Eileen Hull travelers journal into a fixed page birthday organizer / monthly agenda. I hope to savor my friends and family more this year and do better at sending cards. Sadly, I really stink at that part. But my goal for 2018 is to do better and show my love and appreciation more.

My finished notebook has six pages, all stamped with this very old Autumn Leaves stamp set, which my friend Carol was giving away and I

I'm sure you have a set of numbers/alphabets you could use if you want to replicate the idea.

I started with a 6x6" pad of Prima Marketing Zella Teal designer paper and did a patchwork collage onto the covers of my die cut journal. I used DecoArt Decou-Page, which worked brillaintly. Then I applied washi tape (using a glue stick for extra strength) to the spine sections. I later covered this up, but wasn't sure at this point how much would show...

On the inside covers I gessoed each side, then added strips of tissue tape, scraping more gesso over the top (a little trick from Emma Williams). I covered the score marks of the spine with more tissue tape to strengthen the fold.

I had a good old time messying up the inside covers with tinted crackle paste, Color Bloom and Glimmer Mist sprays, Distress Crayons, and texture stamping.

I made a second spine, wrapped in paper from the Prima Rose Quartz collection. My idea was to adhere the two sections of the die cut spine to this one. If you decide to make this project, cut your spine to 8.75 x 1.25 NOT 1.5 like I did. You will see why further down. This is my prototpye, so I learned as I went...

I really wanted a mega tassel to hang from my cover, so I took my sweet daughter's advice and made my own with 100% cotton yarn, which I dyed with Peacock Feathers Distress Ink. HERE is a pin I found most helpful. I adhered it through an eyelet with Red Line Tape.

I applied Red Line tape to both of the spine sections on both front and back cover and adhered to my new spine.
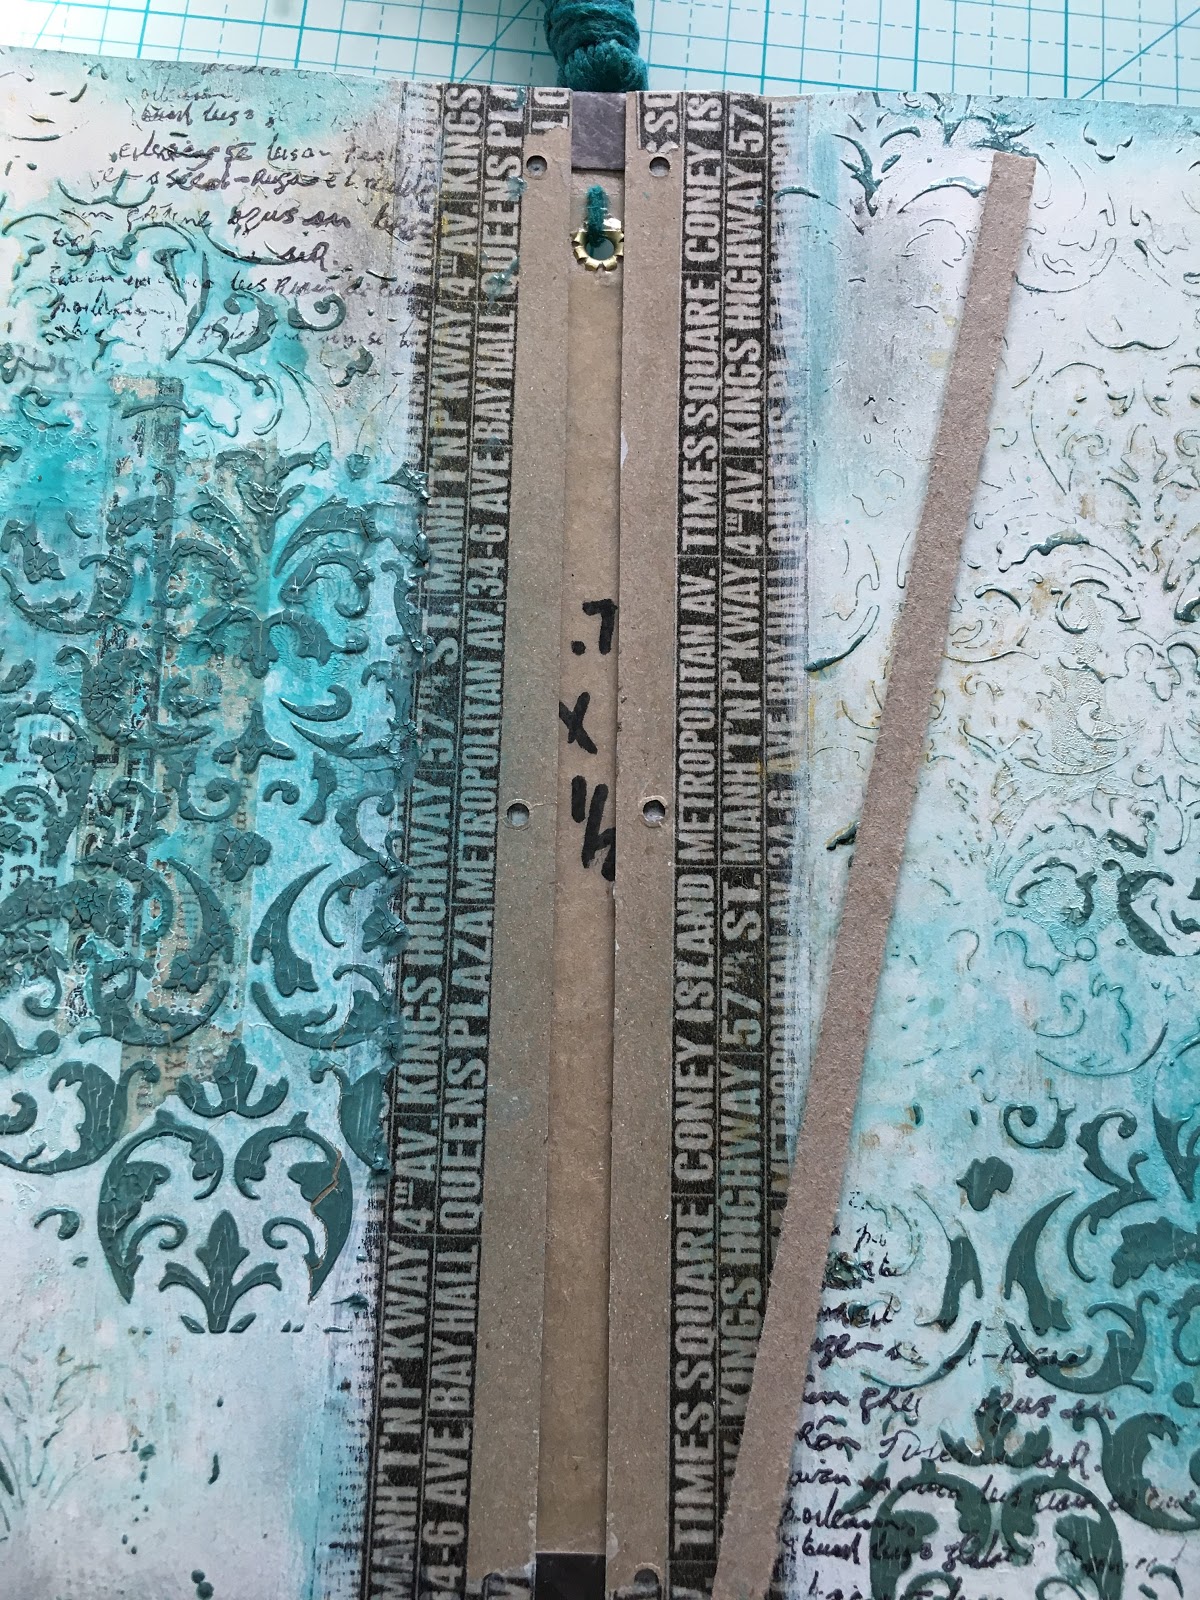
Sadly, there was a little more than a 1/4" gap. I contemplated adding a strip of chipboard, but changed my mind.

Anyway, you can see how it all lined up here.

Next I made a button and hair elastic closure. I got this idea from THIS pin. The wire worked great! I secured it with two layers of Red Line tape and then concealed with a few pieces from the Zella Teal ephemera pack. On the back cover, I simply punched a hole and strung the small sized hair elastic.

I used a beautiful button by Tim Holtz.

I gave my patchwork covers a coat of watery gesso to bring the patterns together, then stenciled the same Prima stencil on top. This time in white. I stamped a Prima texture stamp repeatedly and embossed in chunky platinum EP.


Once more, let me urge you to check out Seth Apter's new line of chunky embossing powders and preorder HERE. I cannot wait!

I had such fun creating the bundle for the cover of this book. I included a Prima leaf die and flowers, an embossed Tim Holtz scroll die, a beautiful leaf charm and snippet of Venise lace from Linda's shop. The bird is from the embellishment pack. I made the spotted tag and the glittery hole reinforcer is from the My Prima Planner line. The little plus signs are the cast off of a Tim Holtz Alterations die, which I stained grey.

The letters are from an old sign at the church where I work. My friend Bonnie saved them for me during a clean-up project. <3 <3 <3 There are similar letters by Tim Holtz found HERE. The sentiment stickers are also TH.

One of my 12 little Christmas pressies from my crafty BFF and F&F sidekick Sara Emily was a few alcohol inks. I mixed these two to form the teal color to stain the letters.

To for my signatures I followed the same process I described HERE, but with these measurements.
Signature One: 8 1/2 x 1 1/4
Signature Two: 8 1/2 x 1 3/4
Signature Three: 8 1/2 x 2 1/4
Score each Signature ½” from each end.
I cut my watercolor paper pages 8 1/2" tall, then scored at 4 1/8", folded and matched up the other side (total width of 8 1/4, just folded in half for ease). I glued the edge of one side of page to the signature, then added more glue to cover the full page and folded it in half, surrounding each little flap on the signatures one page at a time. I use Beacon 3 in 1 glue for this. It has a little more give than the Red Line tape. Wet glue is definitely your friend here!

I continued on page by page...

You can see if I had gone with a smaller spine, my pages would have had less of a gap at the front and back cover, but I'm still pleased with the result. No one would know if I didn't point this out - I just don't want you to make the same mistakes I have!
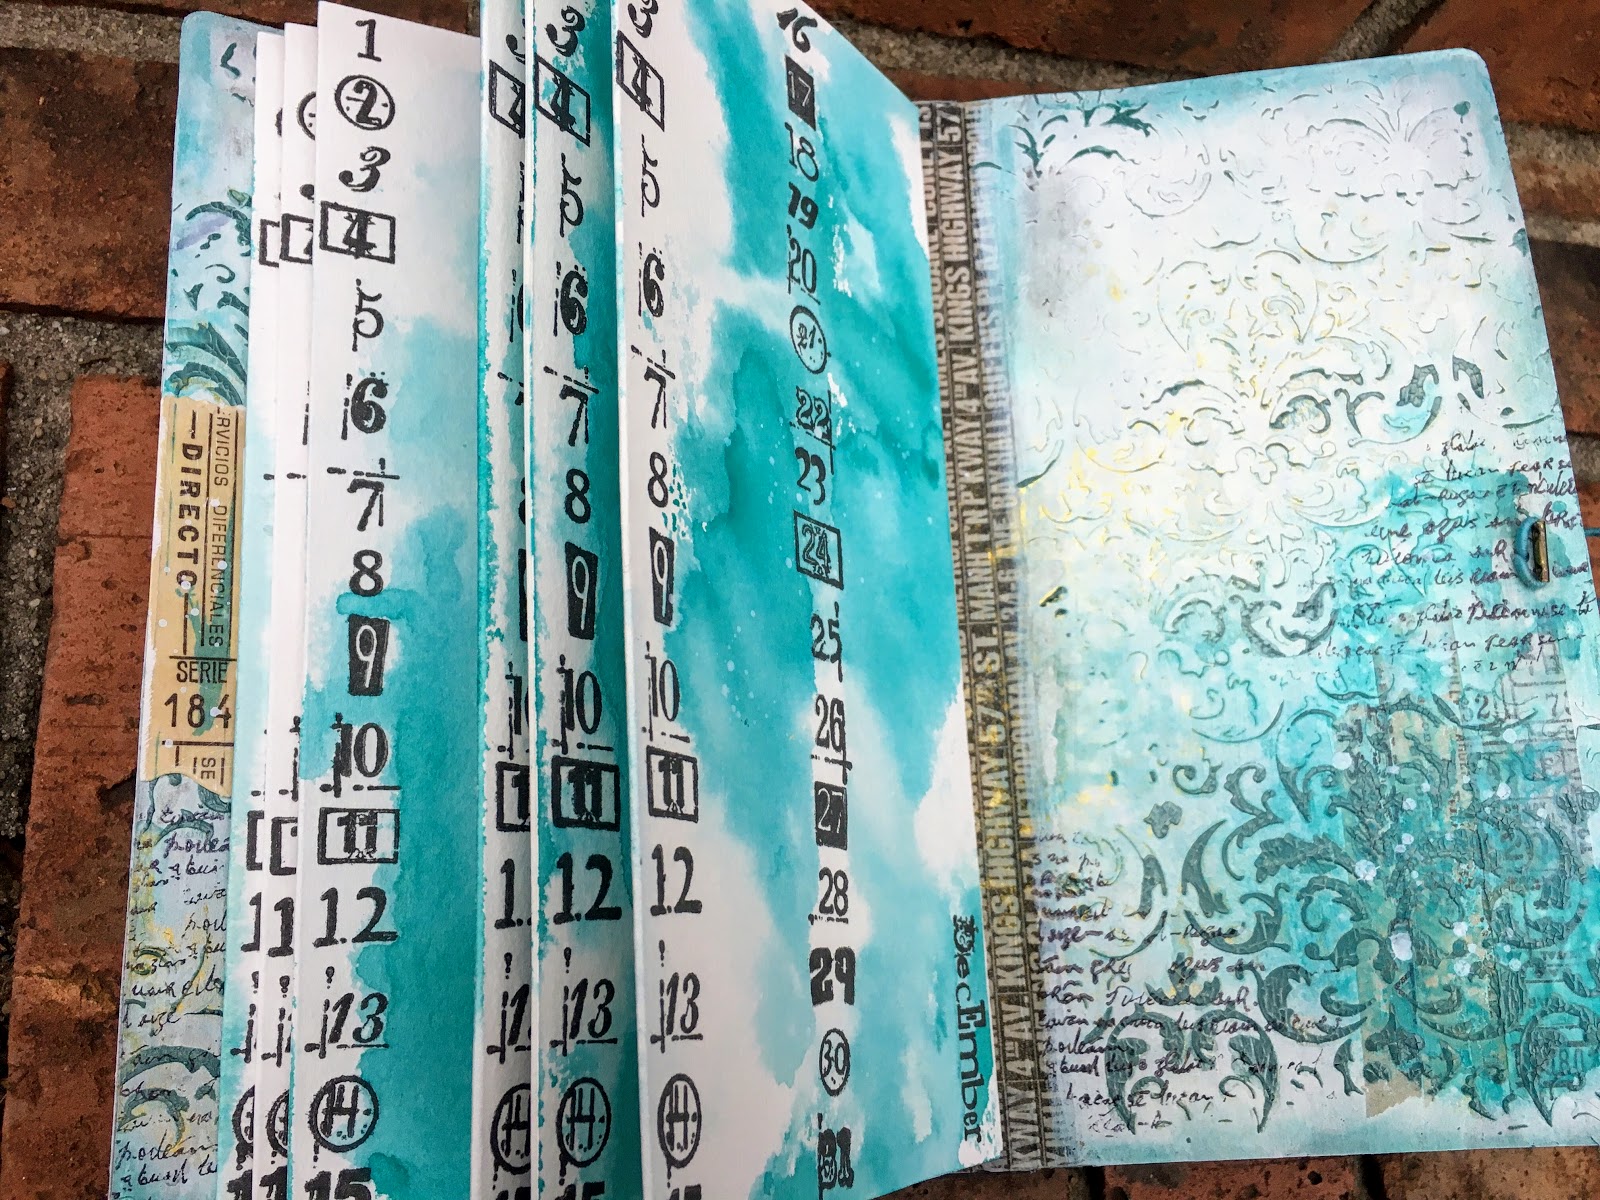
I colored each page by dipping it into watery Peacock Feathers DI before assembly. I can't wait to get more organized and fill up this book with the names of my loved ones. So what's your one little word this year? I hope you will consider turning it into a design for our current challenge. I hope you've been inspired and will pin this page for future reference. <3 Hugs, Autumn

 |  |  |  |
 |  |  |  |
 |  |  |  |
 |  |  |  |
 |  |  |  |
 |

I'm also sharing with:


45 comments:
Amazing creation Autumn, a delightful build up of complimentary elements alongside that fabulous colour combo. With the addition of that lush embossing powder (i'm very tempted to purchase Seth's chunky EP myself!!) you've created an adorable way to take note of those special days. I can see you clipping little extras into this handmade book really personalising the inside..
A delight to see. Big Hugs Tracey xx
Stunning! Absolutely Gorgeous! I didn't know you had already shared your word. :O But am so glad it inspired this beautiful planner! I will take one too! I am always falling behind on sending out the cards on the right dates. Thank you for sharing your word for 2018!
Wow, that embossing powder is such a lovely touch! Wonderful cover and hopefully your planner will help you keep your intentions alive! :)
HUGE applause from me, Autumn! First off, I adore those colors! And EEK, you patched the cover! (I was going to do that! Hard to believe, isn't it?) Your layered collage is just perfect in every way, and I could sit and stare at this charming journal all day! No one layers like you! Not only is your journal stunning, it's useful, too! I never, ever tire of your journals! Sending big hugs! PS I'm happy you found use for the AI's. :):)
Absolutely GORGEOUS Autumn and such a great idea!! The inside pages look lovely but it is the front cover that really stole my heart, love, love, love how you layered up te various embellisment, it just looks super!!
What a wonderful surprise to read your blog. I thought you had 'just' covered the front and that is amazing in itself and then you did all the pages and made the book....Stunning, creative and so very inspirational. A real treat and absolutely amazing x I guess I am loving this one x
Oh my goodness, stunning!! Wow!! It's so amazing!! I love all of the texture and the colors and details!! It's so spectacular, Autumn!! Your journals are works of art!! Have a great day!! Big hugs :)
Lisa
A Mermaid's Crafts
Wow Autumn your book is amazing! I though I was looking at the cover, but your post just kept on giving. This is a real work of art, and a beautiful one at that. Have a fun week, Sue xx
Gorgeous book Autumn! The whole design and all those yummy coordinating layers on the cover-ooh la la! Great word and intention for the year. Here's wishing you succession achieving your goals.
Wow, Autumn, beyond amazing! the colors, layering and texture truly spot on! I, too, am really bad at sending cards, so inspiring I added to my 'to do' list~ also pinned so I remember it's on the list. TY!!! xo xo
Fabulous book, Autumn!!!
Just saw this on FB and it is gorgeous!! I love the colors and textures on your cover. I just made my first journal with this die today but I am not loving the binding. Your technique would make it so much easier. Thanks for sharing. I am so going to have to give this a try.
Kate
This is really beautiful. I love all the layers and details on the cover. And thanks a million Autumn for the shout out for Baked Texture.
Utterly gorgeous Autumn and I love your word.....it makes me think to slow down and sip the flavors out of every moment instead of rushing toward the next project that is due. I so admire your books, but don't seem to have the skill or patience to make my own. Too many other things taking my attention. The favourite part for me is that splendid cover, jammed full of yummy pieces, yet still with great design principles employed. Superb.
Oh Autumn this is exquisite - I do hope you achieve your goal of posting the cards as well as making them. ;-)
Blessings
Maxine
Really so stunning! Fabulous project and love the styling and design! ;-)
Love your little word too and certainly a great sentiment to have! ;-)
Autumn, your journal is just stunning! I absolutely love the colors, the paper, embellishments, your textures...that Prima stencil has been on my wish list for awhile and I'm reminded of how gorgeous it is. You constantly amaze me with your beautiful projects! Your tassel is the best and I love how you colored it with DI! So glad you listened to your daughter. I love everything about this!! Hugs :-)
A stunning creation, so love what you did, all the texture, embossing, the beautiful tones , and little special details. So very gorgeous, Autumn .
Hugs, Dorthe, DT - Thank you for joining in the That's Crafty Blog Challenge.
OMG what a labor of love. You are so good. I have "birthday list" on my TO DO list and am hoping just to get one done on the PC to help me be ahead of time instead of late! You rock!
I love this Autumn, the colors, the binding, the special signatures! Really special way to savor those treasured dates and friends! I am going to try this!
This is simply amazing Autumn! So many great details and textures, gorgeous colors too! This must have taken a really long time to complete, wish I had the patients to do these types of projects. Stunning!
Oh. Em. Gee. This blows my mind, Autumn. It’s just so amazing - th colours, textures and how you built the journal. I have to go back an take a closer look at every yummy detail.
I LOVE this idea, Autumn! I'm so bad at remembering to send out handmade cards for birthdays and this would be the perfect way to organize all of them. Love the embossing powder, I've got to put that on my wish list and Eileen's Journal die too. I've seen so many use it with beautiful results and such fun ways to use it.
Wow, great creation! So much details, this is absolutely stunning and your colour choice is perfect!
This is wonderful. Love all the texture you created and the embellishments are gorgeous together.
Hugs!
Cec
Wow, what can I say that a I haven't said before? Orgasmic! The teal and the gold - breathtaking! The whole project is beyond awesome, but I must say I got captivated by the cover and I can't stop staring at it!
This is so rich in texture, color and detail! I love the spine adaptation and your gorgeous tassel!
Wow! This is absolutely fabulous Autumnn! The Birthday Organiser inside is totally brilliant and the outside cover is simply stunning!! I love the colours, the textures and especially the gold accents .. so elegant and so beautiful!! Your handmade tassel adds the perfect finishing touch! An amazing work of art!! Have a wonderful day!! hugs x
OMG this is so stunning I don't know what to stare at first. Amazing colors, texture (espesially the golden embossing) and fantastic stamping. So cool! Hugs!
Autumn this is stunning! I love all the textures and details and the fact that you will be using it all the year! Thank you so much for sharing how you put it all together - a great tutorial. Jennie x
Popped over again to say a BIG Thank you for sharing with us over at That's Crafty Autumn.. Wishing you all the very best in the Feeling Blue Blog Challenge.. **Stunning**!!
Big Hugs Tracey xx
I love everything about this journal! It's gorgeous!
this is such a great project. Love all the mixed media goodness. I decided a couple years ago to make sure I sent birthday cards to each of my family members and I have done it - makes me feel good that I have been able to do it and I think you will be able to do it also. They will love getting a card from you. I know I would. Thanks for joining us at HLS
Barb Housner (DT)
This is such a gorgeous creation! All the details and embellishments are stunning. Love the beautiful step photos, too. Thank you so much for sharing with us at Simon Says Stamp Monday Challenge. :)
What a wonderful cover you created on this beautiful birthday journal Autumn! A great idea to remember the birthdays each month! Love the colors and all the layering of items!! Julia xx
Gorgeous planner Autumn! I love your planner and the word you've chosen for the year. I skipped over to your year in review and you made such incredible thing last year and look forward to seeing more this year. x
This is fantastic Autumn!!! I guess it could work with the new Prima pads too. Thank you for the really informative tutorial too. Great choice of word as well. Jenny xx
This is just lovely, Autumn! Would be so fun to make! Love, love, love the touches of chunky EP!
Amazing creation, love the colours, and layers. Thank you for joining in the challenge at The Artistic Stamper.
Absolutely stunning! Love the color palette and composition. Great design elements tie everything together beautifully! Thank you for playing along with us at the STAMPlorations Mixed Media Challenge this month. We hope you join us again soon.
Amy- DT
{Lil Cutie Creations}
Ok, so saw this on FB the other day and was like....WHAT?! I am pinning this cover for later inspiration. I just ADORE all of your mixed media journals. Maybe I can get brave and try one in this style! This one is just....jaw dropping!!
Lovely work. Thank you for joining the challenge at More Mixed Media. Hope to see you again next time.
Amazing book! ;-)
Reading this post was like opening a present! What a fantastic exceptional project! I clearly remember seeing it on Instagram, but with life busy, I don't get around Blogland often enough... so glad I caught this today! :) LOVE the colors, and your friend Bonnie is the BOMB for snagging those letters for you!
Congratulations on your wonderful win over at Stamploraitons Autumn with this stunning and amazing mixed media project. I loved it the first time I saw it and I love it even more now....Thank you for finding time to stop by my blog Autumn, I always appreciate your kind and thoughtful comments x
Post a Comment