Feb 20, 2023

Distress Ink Blends with Studio Light Silhouette Stamps


Hi friends!  Today I have several new cards to share with you using a variety of Distress Ink blends, all featuring the gorgeous new Essentials Silhouette stamp collection by Studio Light.  For this first card I used the Dried Twigs stamps (SL-ES-STAMP382) in black permanent ink over a blend of Wild Honey, Rusty Hinge and Walnut Stain.  


I used the new Studio Light Dots Background stamp (SL-ES-STAMP370) to add interest around the perimeter and finished with a sticker from the new Essential Stickers pack (SL-ES-STIC06).


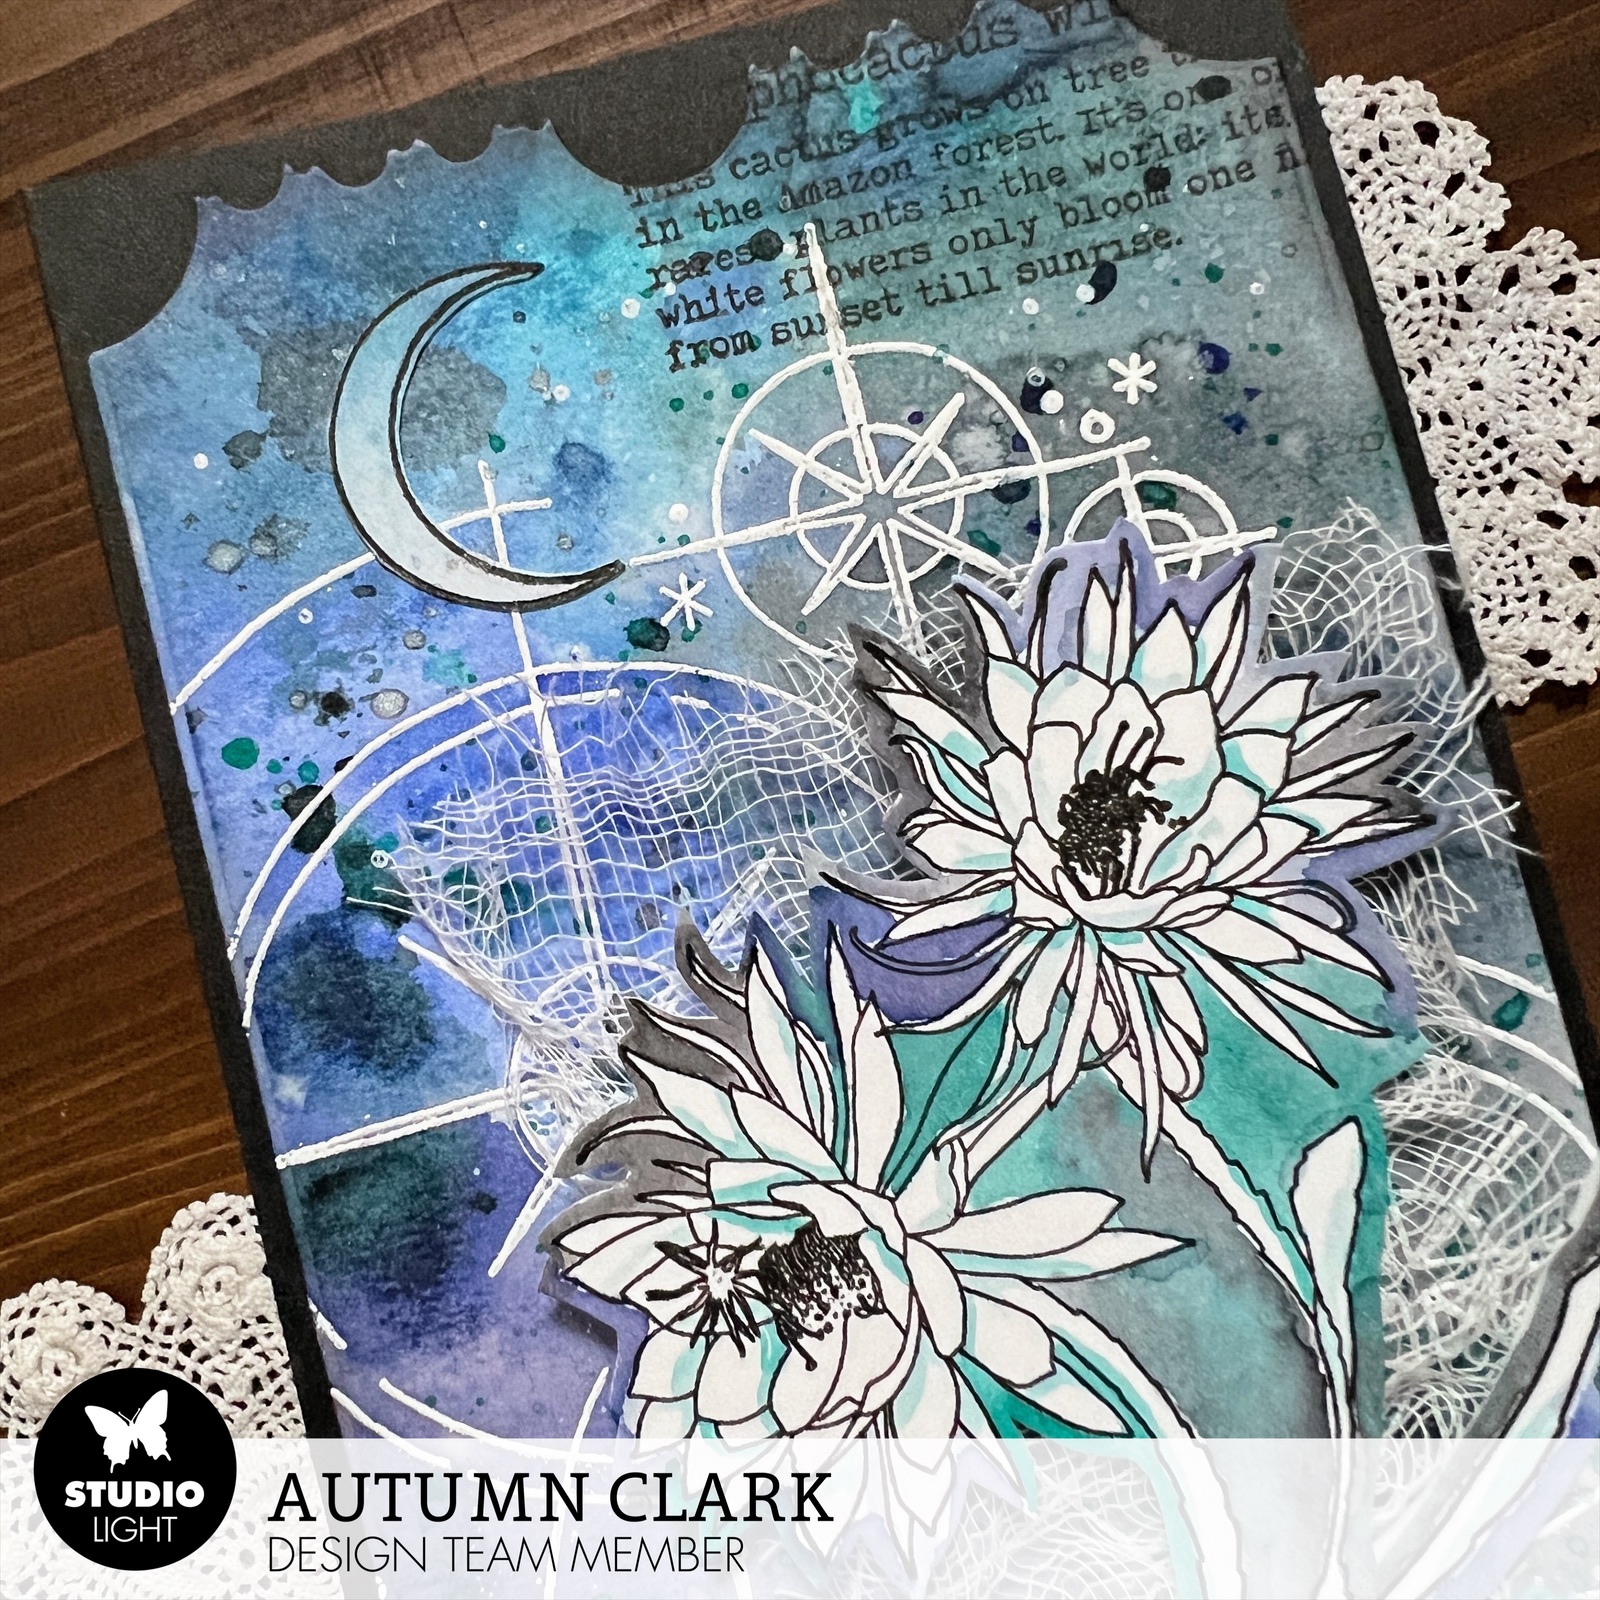
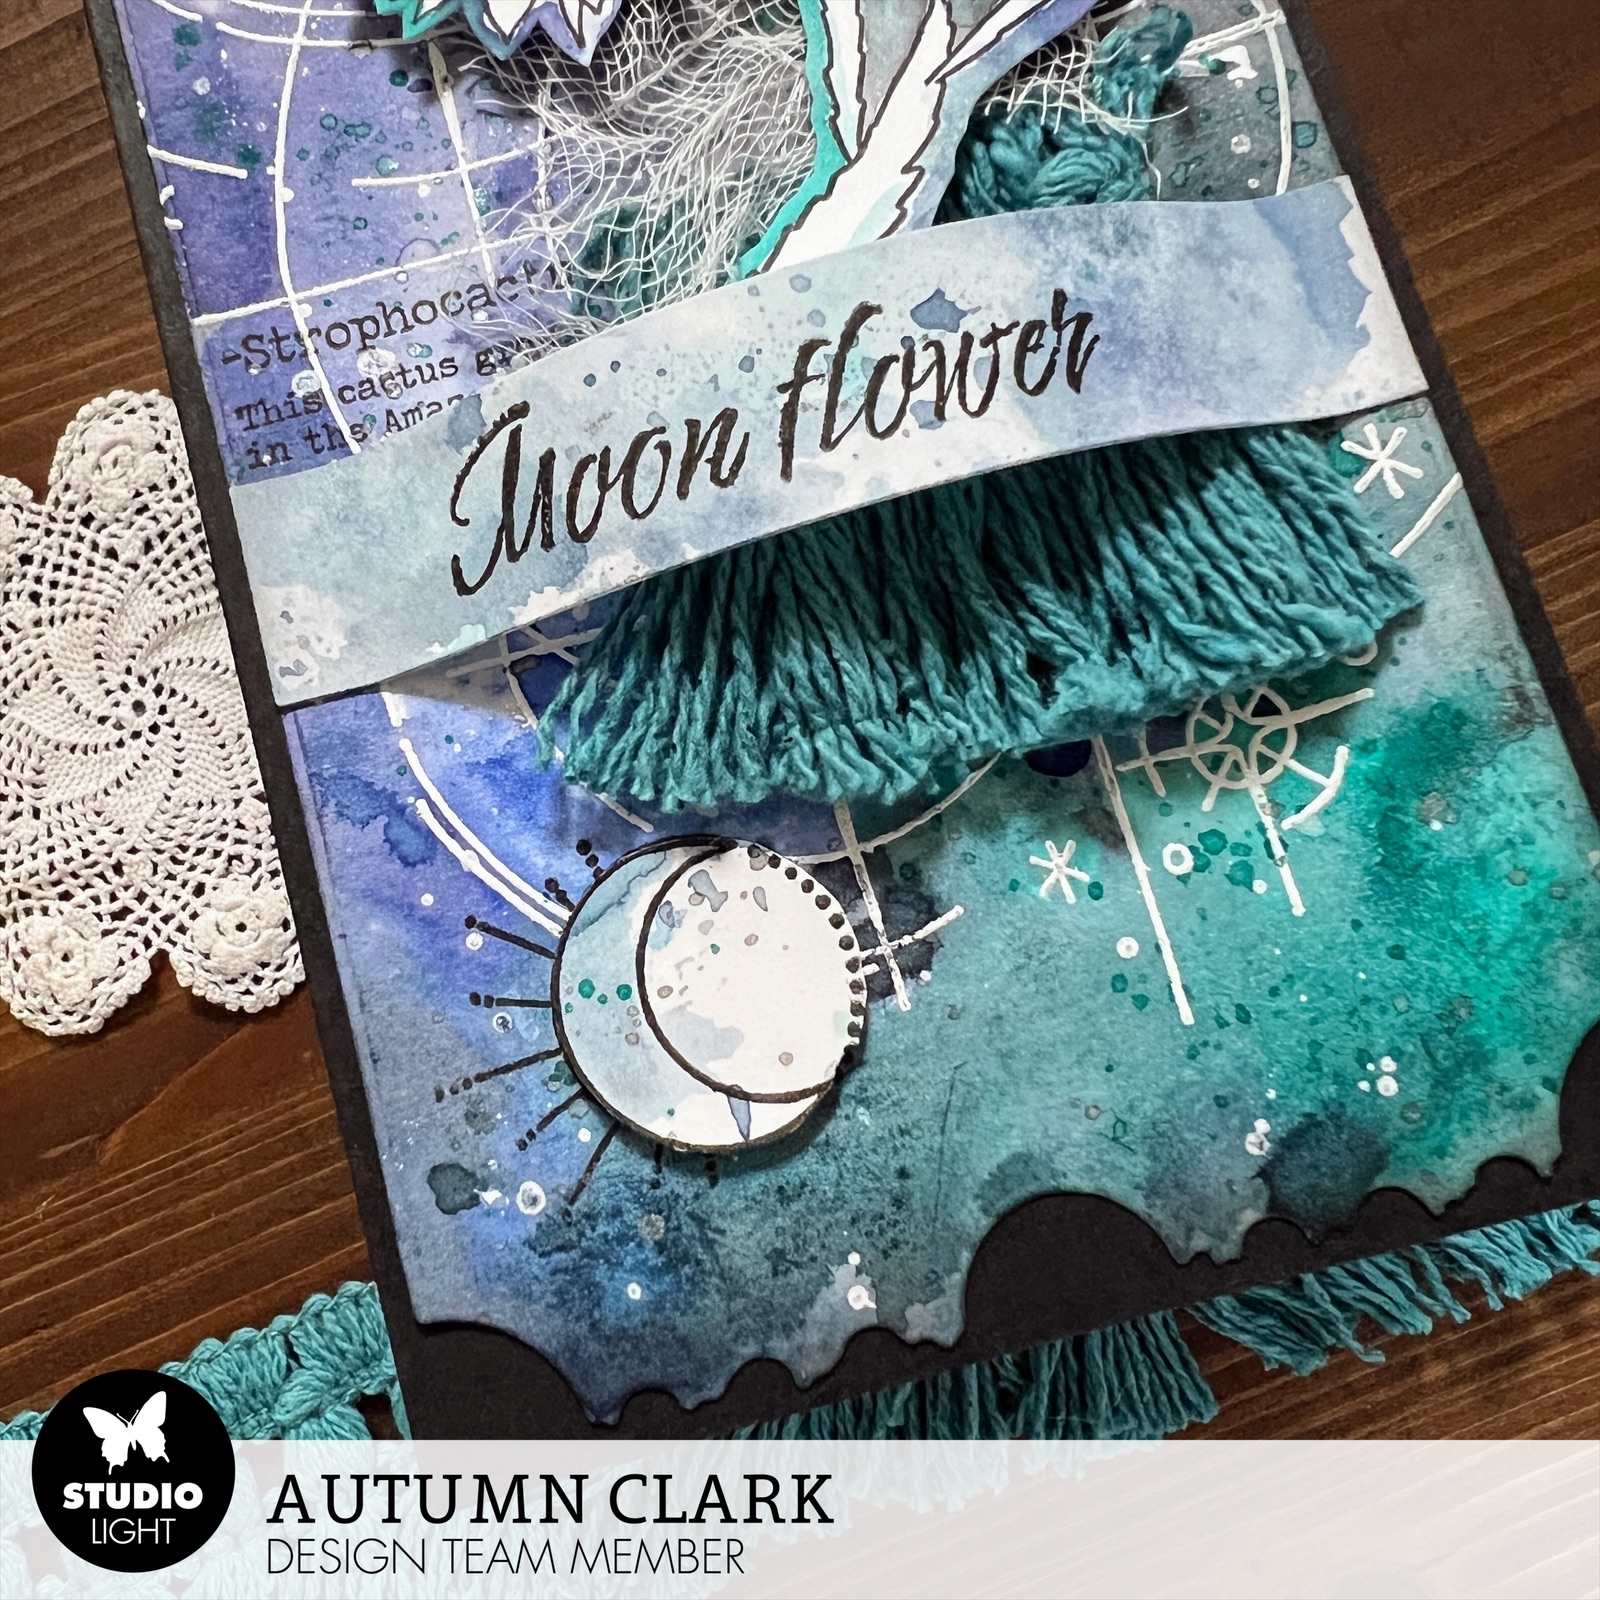
For my next card I achieved a really unusual effect, which I hope to experiment with further!  First I embossed the flower in the Butterfly Silhouette stamp (SL-ES-STAMP384) in blue.  Then I worked on my ink blend using Peacock Feathers, Chipped Sapphire and Seedless Preserves.  I stamped the twig from  the Dried Twigs stamps (SL-ES-STAMP382) in Seedless Preserves.  Then I gave a heavy splash of water, but it made my panel look polka dotted!  Not a good look on this particular card.  After all of that work, I wanted to salvage the card.  So I sprayed the entire panel heavily with water and blotted with a piece of paper.  


The result was this beautiful, ethereal look, similar to watercolor.  I was really happy to save the piece!  I added a dreamy Sticker sentiment and adhered some of the new Studio Light Shaker Sequins (SL-ES-SHAKE07) for texture along the top.  


I was hoping to give you guys plenty of color combos and stamping options for these gorgeous Silhouettes, so for my next card I embossed the Little Flowers stamp (SL-ES-STAMP381) in white and blended my inks in a more circular motion to resemble a sunset.  I used Scattered Straw, Spun Sugar and Tumbled Glass, with a tiny hint of Peacock Feathers along the top edges.  I used the heart from the Floral Heart Frame cutting dies (SL-ES-CD465) to pop up a portion of the background and finished with more of those gorgeous Stickers.  


For my final card I created a blend with Shaded Lilac, Stormy Skies and Hickory Smoke.  I added lots of small splashes of the same inks, watered down.  I stamped the butterfly from the Spring Silhouette stamps (SL-ES-STAMP383) at the top and watercolored it to match the background.  I stamped the Little Flowers stamp (SL-ES-STAMP381) along the bottom, highlighting with a Posca paint pen.  I finished by embossing a sentiment from the Bubbly stamp set (BL-ES-STAMP356) in white on black card and adding some of Jenine's Mindful Art adhesive pearls.  I really hope these cards have inspired you today and you'll check out this fabulous new collection of Silhouette stamps!  xx, Autumn


Feb 14, 2023

Art by Marlene Crazy Bird Valentine Spinner Cards


Happy Valentine's Day my lovely friends and followers!  I have a few fun Valentines to share with you today featuring super fun Art by Marlene Stamps.  I made these cards during a play date with my mom and we picked the adorable owl stamp from Marlene's Back to Nature Collection Crazy Birds stamp set (ABM-BTN-STAMP147) as our focal image.  We made inky backgrounds using Marlene's Mixed Up Collection Deco Envy stamp (ABM-MUC-STAMP289) and cut windows in each panel.  Two of the cards feature heart spinner cutouts.  Two hearts were attached to a string to form a sandwich, then the string was glued and taped taut between the card panel and background (both with a heart shaped cutout opening).  The heart is spun tight and when the card opens it spins around!  You can see that in action on my Instagram page @sewpaperpaint.  


I did a blue version with a circle cutout, which I turned into a shaker.  The little bunting comes from Marlene's Zig Zag Journal cutting dies (ABM-MUC-CD417).  The friendship and be mine stamps were old in my stash.  I used Distress Ink in Peacock Feathers, Chipped Sapphire and Blueprint Sketch for this card.


And I used Distress Ink in Picked Raspberry, Seedless Preserves and Shaded Lilac (Oxide) for this one and the first and my brush markers for detail work on coloring the owls.  I hope these cards inspire you today!  Happy Valentine's my friends!  xx, Autumn


Feb 9, 2023

Studio Light Blooming Butterflies and Text Background Stamps


Hello friends!  I'm back today with a couple of cards using the gorgeous new Blooming Butterfly stamp sets by Studio Light.  I had so much fun getting inky with these stamps!  For my first card, I went in a grungy direction and used the Anemone Butterfly set (SL-BB-STAMP359).  I stamped the flowers twice to make a larger section on which to layer the gorgeous butterfly over a bundle of thread.  


I used Distress Inks in Scattered Straw, Tea Stain and Victorian Velvet for the background.  I stamped the gorgeous new Spring silhouette stamp (SL-ES-STAMP383) around the edges of the card in coordinating Distress Inks, then added the new Text Background stamp (SL-ES-STAMP369) in black.  For this stamp, I didn't add it to an acrylic block so I could bend it to get good partial stamping where I wanted.  I added additional color to the flowers with markers and a white paint pen and finished the card with a sticker sentiment from the new Studio Light Essentials Stickers (SL-ES-STIC06).  These stickers are such fun!  To make my flowers and card border pop and add some grunge, I outlined everything in watery Black Soot Distress Ink.  I was really pleased with this color combo and hope it inspires you too!


For my next project, I created a tag using the Art By Marlene Marlene's World Collection Layered Tag Journal (JOURNALBM14) paper tag as mu substrate.  Marlene's tags are super sturdy and make great surfaces to get inky with.  I used Studio Light Texture Paste through the Blooming Butterflies Stencil/Mask (SL-BB-MASK169), then dipped the panel in Saltwater Taffy, Abandoned Coral and Seedless Preserves Distress Ink.  


I embossed the stems from the Birthday Butterfly stamp set (SL-BB-STAMP360) in white, which adhered to the texture paste and enhanced the contrast.  I then stamped and colored the flowers and butterfly, fussy cutting and layering them with die cuts from the Blooming Flowers die cut set (SL-BB-CD485).  


I finished by tying string around some sari ribbon at the top and stamping the coordinating sentiment along the tab of the tag.  I hope these projects show just how versatile these beautiful, delicate stamp sets can be: from grunge to romantic, they will stamp beautifully however you may choose to use them! xx, Autumn


Feb 7, 2023

Studio Light Moon Flower Grunge Galaxy Ticket Slimline Card


Hi friends!  I have slowly been collecting some older Studio Light products, especially the Grunge Cutting Dies.  I just love the elongated shape.  I picked up the Slimline Envelope Cutting Dies (SL-GR-CD27) so I could make coordinating envelopes for all of these uniquely sized cards - win win!  For today's card, I used the Grunge Slimline Ticket Cutting Dies (SL-GR-CD26) to cut my focal panel from Bristol.  

I used the OUT OF THIS WORLD! Moon Flower NR. 137 If Kisses Were Stars (SL-MFL-137) stamp to emboss the panel in white.  This stamp is HUGE and is such an amazing background.  I literally wish I could make a dozen different cards with it because it's just so cool and compelling to me.  I dipped the embossed panel into watery Distress Inks in Chipped Sapphire, Blueprint Sketch, Peacock Feathers and Black Soot for a dark and moody galaxy background.  I gave the panel lots of flecks of leftover inks once it was dry.  

I then stamped the Moon Flower NR. 134 Strophocactus Wittii stamp (SL-MFL-134) on another piece of Bristol and loosely watercolored around the flower, adding just a tiny bit of color to the actual image.  This let me fussy cut more widely the delicate image.  I added some fringe and cheesecloth and splashes of silver mica spray, then some fussy cut moons from the background stamp set.  I'll share a video on Instagram @sewpaperpaint if you'd like to see the details.  xx, Autumn


Feb 2, 2023

Studio Light Steampunk Dreams Grunge Slimline Cards


Hi everyone!  I'm happy to share a couple of cards with you today that I had a wonderful time creating.  After making my Zig Zag Tag Book with the Steampunk Dreams DIY Block (SL-ES-DCB37) by Studio Light, I could not stop myself from creating more!  If you missed the post, find my first grungy creation HERE.

There are hundreds of cutouts just waiting to be collaged in this one paper pad and I was happy to oblige!  I have recently purchased some of the older slimline Grunge dies by Studio Light and was anxious to give them a try.  I used the Card Shapes Film Grunge Cutting Dies (SL-GR-CD198) to cut the awesome background edge and focal paper from the pad for both cards.


I am really crazy over the birds and cages included in the pad, but wanted to use the hat and "steam airship" as the focus for this slimline card.  


I tried to create two completely different colorways so you could see how versatile the elements are.  


For my second card, I added a bundle of sisal fibers.  I gave both finished cards splashes of watery gesso and a sentiment sticker.  


I really hope these cards have inspired you today!  Make sure to check out all three of the new DIY Blocks, and visit my post HERE with the Romantic Forest DIY Block.  I just know you'll love these pads as much as I do!  xx, Autumn


NEW from Studio Light!


Popular Posts